X
This article was co-authored by wikiHow Staff. Our trained team of editors and researchers validate articles for accuracy and comprehensiveness. wikiHow's Content Management Team carefully monitors the work from our editorial staff to ensure that each article is backed by trusted research and meets our high quality standards.
This article has been viewed 77,362 times.
Learn more...
Have you ever wanted to build a LEGO dog, but didn’t know where to start? LEGOs are a fantastic toy; they’re fun to play with as well as being a great outlet for creative expression. Once you learn what the different blocks are and all the different ways you can use them, there’s no limit to what you can build.
Steps
Part 1
Part 1 of 4:
Building Your Dog’s Body
-
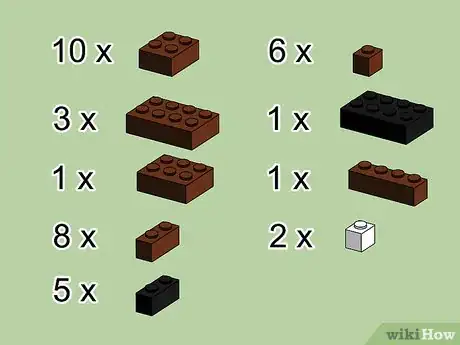
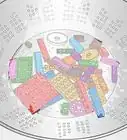
1Gather your LEGO blocks. To complete the following project, you will need the following bricks. If you don’t have the correct colors, don’t worry. Your dog can be whatever color you want it to be, depending on the options you have in front of you.
- 10 brown 2x2 bricks
- 3 brown 2x4 bricks
- 1 brown 2x3 brick
- 8 brown 1x2 bricks
- 5 black 1x2 brick
- 6 brown 1x1 bricks
- 1 black 2x4 brick
- 1 brown 1x4 brick
- 2 white 1x1 bricks
-
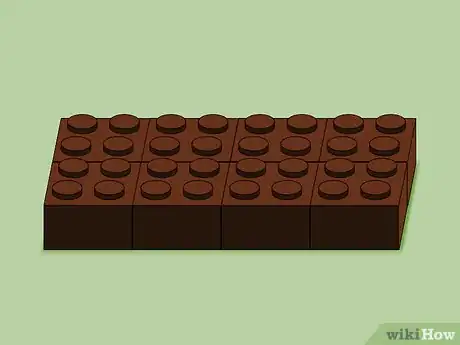
2Build your dog’s base. Line four brown 2x2 LEGO bricks in a row from left to right.[1] Then place another four brown 2x2 LEGO bricks next to that (also going from left to right.) The rows should be positioned directly next to one another. When you are finished, you should have eight brown 2x2 LEGO bricks lying side by side in two rows of four each.[2]Advertisement
-
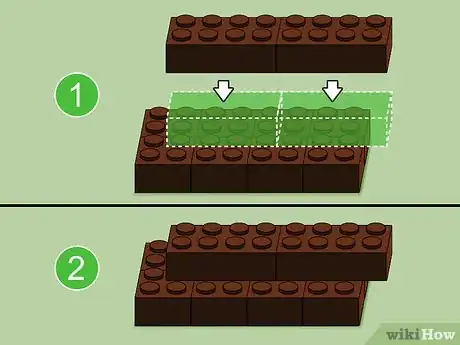
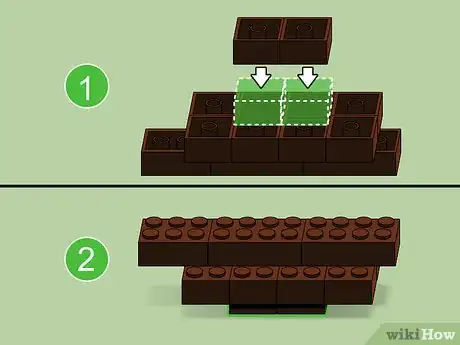
3Connect the base. To do this, gather two brown 2x4 bricks. Place one brown 2x4 brick on top of the right side of the base, positioned over the middle two studs and covering the last three studs (the brick should extend past the base by a distance of one stud.) Place another brown 2x4 brick right behind it, still covering the middle studs.
- When you finish, all of the middle studs of the base should be covered, except for the last row of studs on your left.
-
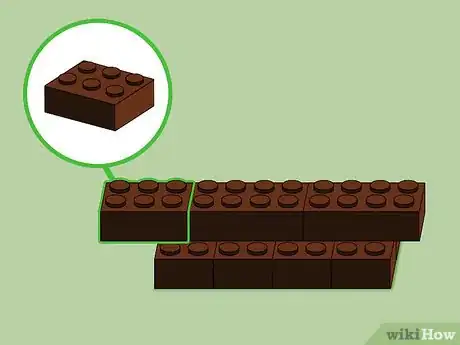
4Complete the dog’s body. Attach one brown 2x3 brick to the two remaining open middle studs on the left. There should now be an overhang of one stud on the right side of the base and an overhang of two studs on the left side of the base.
- From now on, the right side of the base will be referred to as the tail-end of your dog, while the left side of the base will be referred to as the front-end of your dog.
-
5Flip your base over. On the underside of your base, attach two brown 2x2 bricks to the bottom of the base. These should be positioned so they’re attached directly in the center of your base, elevating it.[3]
Advertisement
Part 2
Part 2 of 4:
Building Your Dog’s Legs and Tail
-
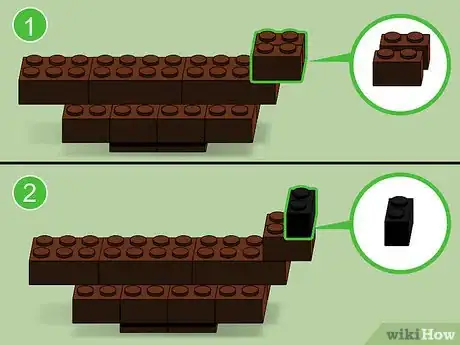
1Build your dog’s tail. Flip your base right side up. Attach two brown 1x2 bricks, laid horizontally, to the last two studs on the tail end of your dog. Connect those bricks by laying one black 1x2 brick vertically over the last two studs on the right.
-
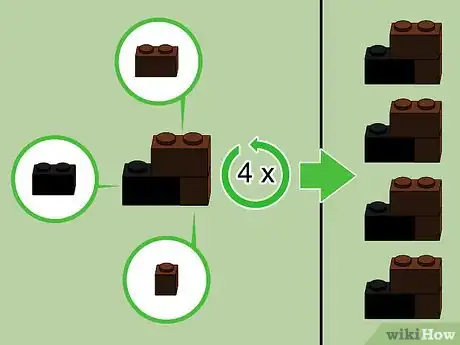
2Build the dog’s legs. Take a brown 1x2 brick, a black 1x2 brick and a brown 1x1 brick. Position the brown 1x1 brick to the right of the black 1x2 brick, creating a straight line. Position the brown 1x2 brick across both bricks to connect them.[4]
- Repeat this step four times, so you have constructed four identical legs.
-
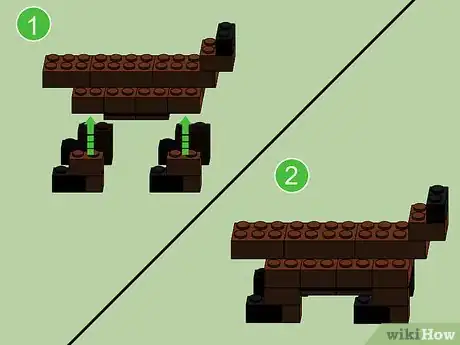
3Attach the dog’s legs. Position all four legs so they are attached to the bottom of the base in all four corners. Each of the black “feet” should be facing the front end of your dog.[5]
Advertisement
Part 3
Part 3 of 4:
Building Your Dog’s Head
-
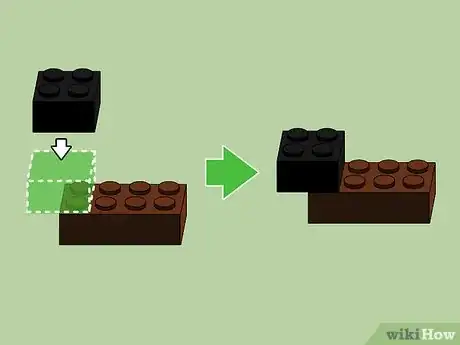
1Build your dog's nose. Get a brown 2x4 brick and a black 2x2 brick. Place the black brick on top of the brown brick and attach it to the first row of studs on the left hand side.[6]
- This black brick will serve as your dog’s nose.
-
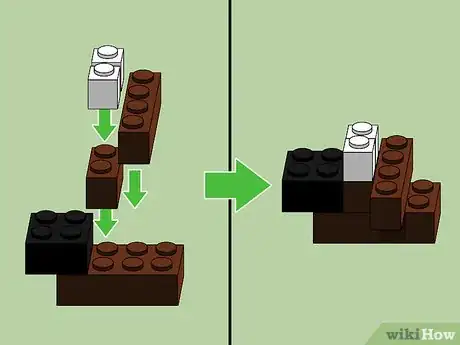
2Build your dog’s eyes. Add one brown 1x2 brick, laid vertically, directly behind the dog’s nose. Then add a brown 1x4 brick, laid vertically, behind that. Attach two white 1x1 bricks to the top of the brown 1x2 brick.
- These white bricks will serve as your dog’s eyes.
- If you’re looking for more realistic eyes for your dog, you can buy these separately. Dog eyes can be found in the LEGO classic small box, available online and in stores.[7]
-
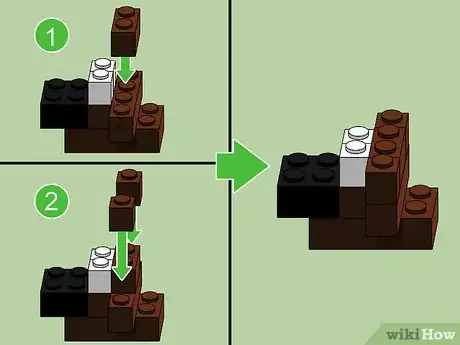
3Build your dog’s ears. In back of the eyes, add one brown 1x2 brick. Position two brown 1x1 bricks on either side of your brown 1x2 brick. These will serve as your dog’s ears.
-
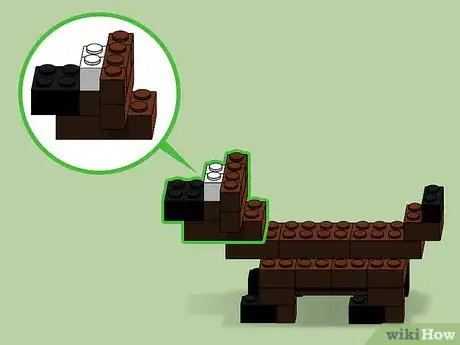
4Attach the head. Take the head so the dog’s nose is facing towards the front of the room and attach it to the front-end of your dog. The head should be positioned squarely on top of the 2x4 brick on the left side of your dog.[8]
Advertisement
Part 4
Part 4 of 4:
Enjoying Your Dog
-
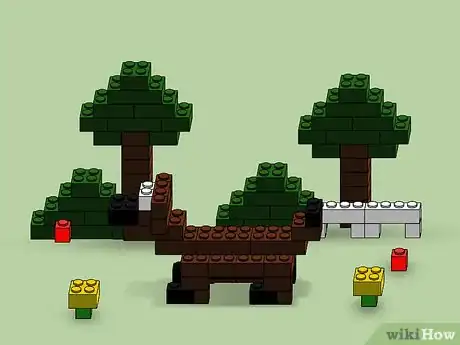
1Play with your dog. Now that the work is completed, it’s time to have fun with your dog. Give them a name and build them a park to play in. If you have extra pieces, build another dog, so they have a companion to play with.
-
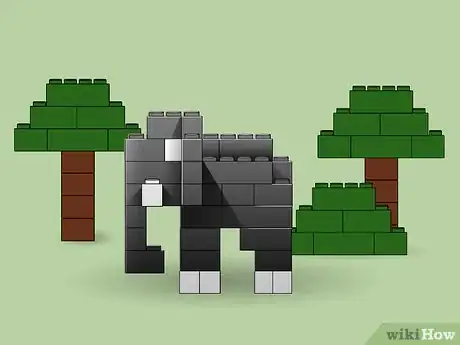
2Build other LEGO animals. A LEGO dog is just the beginning. Challenge yourself by building other LEGO creatures. Try building a cat or an elephant or any other animal you can think of.
-
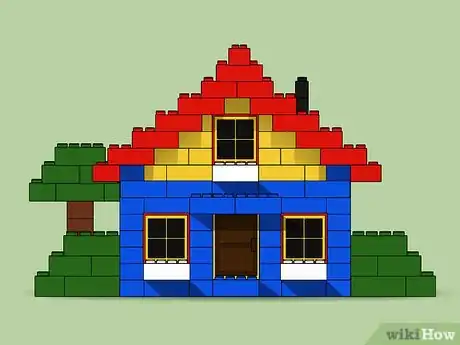
3Build a LEGO house. Once you feel confident with your LEGO dog making skills, try building a LEGO house. For instructions on how to build a LEGO house, try going here.
Advertisement
Warnings
- LEGOs can be a choking hazard for young children. Do not let infants or babies play with LEGOs unsupervised (unless they’re playing with LEGOs designed for that particular age group.)[9]⧼thumbs_response⧽
Advertisement
Things You'll Need
- LEGO Blocks
References
- ↑ https://www.quia.com/jg/1294878list.html
- ↑ https://www.youtube.com/watch?v=7zpaHBHFqdE
- ↑ https://www.youtube.com/watch?v=7zpaHBHFqdE
- ↑ https://www.youtube.com/watch?v=7zpaHBHFqdE
- ↑ https://www.youtube.com/watch?v=7zpaHBHFqdE
- ↑ https://www.youtube.com/watch?v=7zpaHBHFqdE
- ↑ https://www.amazon.com/LEGO-Classic-Creative-Bricks-10692/dp/B00NHQFA5E
- ↑ https://www.youtube.com/watch?v=7zpaHBHFqdE
- ↑ https://www.lego.com/en-us/themes?_requestid=1519698
About This Article
Advertisement
