This article was co-authored by wikiHow staff writer, Rain Kengly. Rain Kengly is a wikiHow Technology Writer. As a storytelling enthusiast with a penchant for technology, they hope to create long-lasting connections with readers from all around the globe. Rain graduated from San Francisco State University with a BA in Cinema.
Learn more...
Do you want to share a post with your community on YouTube? If you have at least 500 subscribers, you can make a community post to increase reach and engagement with your audience. You won't be able to make a community post if your audience is set as "Made for Kids" or if you have a supervised account. As long as you meet the criteria, you can easily create posts in a few simple steps. This wikiHow will show you how to make community posts and share polls, images, videos, and more with your YouTube audience using your computer, iPhone, or Android device.
Things You Should Know
- You must have at least 500 subscribers to make a community post on YouTube.
- Click the "Create" icon and select "Create post". Enter your text, then click "Post".
- On mobile, tap the "Create" icon, then "Create post". Schedule a post by clicking the clock icon.
Steps
Using a Desktop Browser
-
1Navigate to the YouTube website in your web browser. If you aren't already logged in, click the profile icon in the top-right corner, then Sign in to do so now.[1]
- You must have at least 500 subscribers to create a community post on YouTube. If you have less than 500, you'll need to get more subscribers.
-
2Click the "Create" icon at the top-right corner. This looks like a camera with a + inside.
- A drop-down menu will open.
Advertisement -
3Click Create post. You can also reach this page by going to your channel page and clicking the Community tab.
-
4
-
5Click Post. This is the button at the bottom-right corner of the post field.
- If you want to schedule your post for later, click the down arrow next to Post and click Schedule Post.
- Select a date, time, and time zone to publish the post.
- Click Schedule.
- Your community post will be posted.
- If you want to schedule your post for later, click the down arrow next to Post and click Schedule Post.
Using the Mobile App
-
1Open the YouTube app on your mobile device. This is the icon of a red rectangle with a white triangle inside. If you aren't already logged in, tap Sign in to do so now, or create a Google account.[2]
- YouTube is available for iOS in the App Store and for Android in the Google Play Store. Be sure your app is updated.
- You must have an active YouTube channel with at least 500 subscribers to create a community post.
-
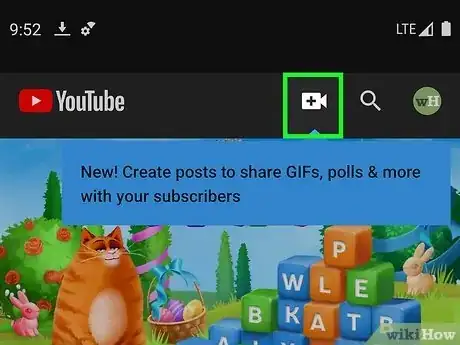
2Tap the "Create" icon at the top-right corner. On Android, this looks like a camera with a + inside. On iOS, this looks like a circle with a + inside.
- A drop-down menu will open.
-
3Tap Create post. You can also reach this page by going to your channel page and tapping the Community tab.
-
4Enter your text. This could be status updates on future videos or links to other social media such as Instagram and Twitter.
- You can also add an Image, Image Poll, or Text Poll to your post. Tap the option you want, then attach the files and/or insert the data for a poll.
- If you want to share a video on mobile, you must go to the video itself and tap Share to post it in the community section.
-
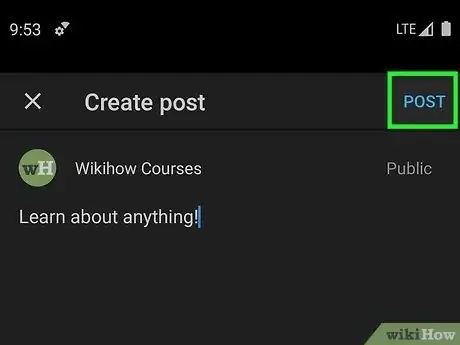
5Tap Post. This is the button at the bottom-right corner of the post field.
- If you want to schedule your post for later, tap the clock icon in the top-right corner.
- Select a date, time, and time zone to publish the post.
- Tap Done.
- Your community post will be posted.
- If you want to schedule your post for later, tap the clock icon in the top-right corner.
Deleting a Community Post
-
1Navigate to the YouTube website in your web browser. If you aren't already logged in, click the profile icon in the top-right corner, then Sign in to do so now.
- You can only manage your community posts on a computer. This can't be done on mobile devices.
-
2Click ☰ in the top-left corner. This will expand the menu.
- Skip this step if the menu is already visible.
-
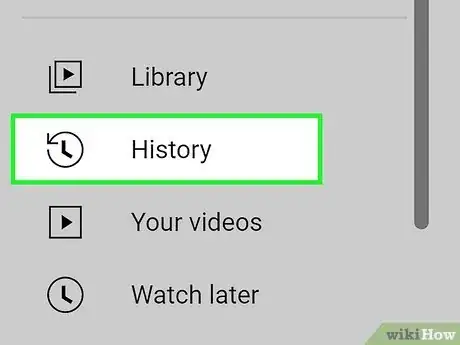
3Click History. You'll be taken to a new page.
-
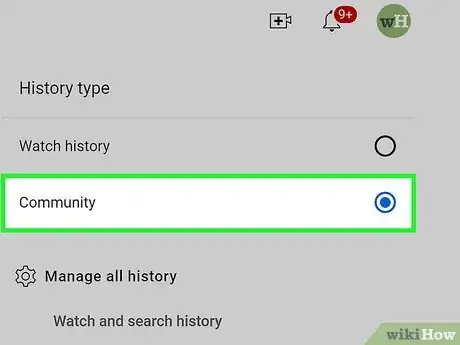
4Click Community. This is underneath the History type header.
-
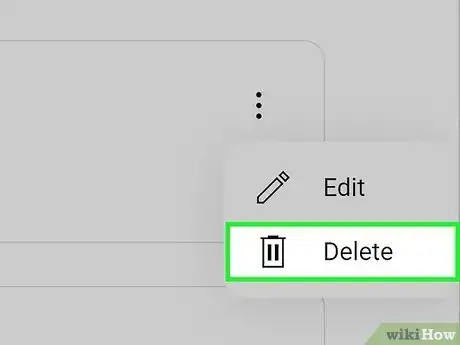
5Click ⋮ next to the post you want to delete. You may need to hover over the post first.
-
6Click Delete. This will delete your community post.
- You can also select Edit if you want to fix a minor mistake.


