wikiHow is a “wiki,” similar to Wikipedia, which means that many of our articles are co-written by multiple authors. To create this article, 24 people, some anonymous, worked to edit and improve it over time.
wikiHow marks an article as reader-approved once it receives enough positive feedback. In this case, 85% of readers who voted found the article helpful, earning it our reader-approved status.
This article has been viewed 234,183 times.
Learn more...
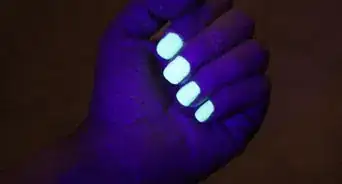
Glow-in-the-dark nail polishes can be purchased from various beauty supply stores, but if you want to explore this look without investing money in it, you can try making your own first. The use of glow stick liquid has mixed results, but pigment powders are usually much more effective. Here's what you need to know about making your own glow-in-the-dark nail polish.
Steps
Using Glow Sticks
-
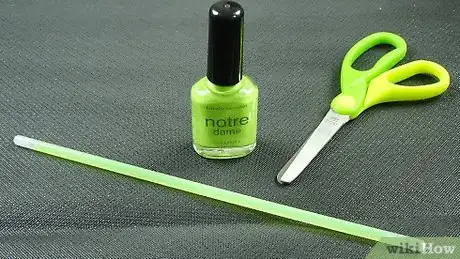
1Gather your supplies. Because you will be using glow sticks, which only glow for a certain amount of time, it is best to have everything on hand and ready. Plan the make this polish just before you need to use it, but be sure to include enough drying time. Here is a list of what you will need:
- 1 glow stick
- 1 bottle of nail polish (partly full)
- Sharp scissors
- Strainer (recommended)
-
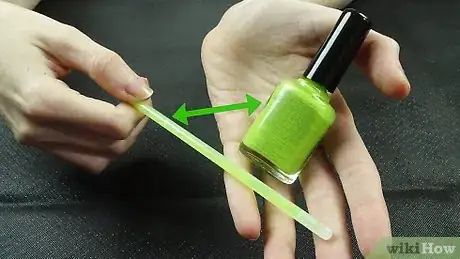
2Choose your nail polish and glow stick colors. You can use a clear polish or a colored one. If you choose to use a colored one, however, be sure to match it to the color of the glow stick. For example, if you are using a pink glow stick, then use a pink nail polish.
- A clear nail polish base will give you the best glow. It can also be applied over a solid-colored nail polish, just like a top coat.
- You can use any color of glow stick with white nail polish.
- Consider using a clear nail polish with glitter inside it for a sparkly effect.
Advertisement -
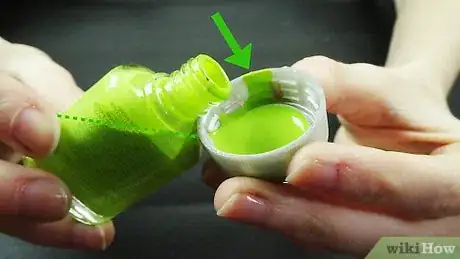
3Make sure that the nail polish is not all the way full. You will be pouring the glow stick fluid into the bottle, which will take up space. Choose a bottle that is one half to two-thirds of the way full. If you are starting out with a full bottle, you may want to pour some of the polish out; not doing so may result in an overflow.
-
4Activate the glow stick by snapping it in half and shaking it. Hold the glow stick between your fingers and snap it briskly. If you are using a long, slender glow stick, such as a bracelet or necklace, you may need to snap it in several places. Be sure to give the glow stick a good shake.
-
5Snip one of the ends off the glow stick using a pair of sharp scissors. You may want to do this over a sink so that you do not get glow stick liquid everywhere.
-
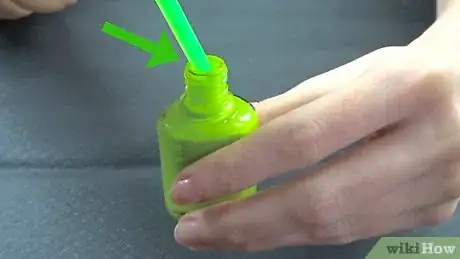
6Open the nail polish bottle and carefully pour the glow stick liquid inside. Hold the cut end of the glow stick glow to the mouth of the nail polish and carefully tip it over. Be careful not to get any of the glow stick liquid onto your work surface or onto your skin; the liquid can stain certain surfaces and irritate skin. Keep pouring the liquid until you either run out of liquid or the bottle becomes full.
- Glow sticks contain glass tubes, which shatter when you snap them. If you are concerned about getting glass into your polish, consider placing a tightly-woven strainer over the mouth of the nail polish bottle before pouring in the glow stick liquid.
-
7Close the nail polish bottle and shake it vigorously. Once you have gotten as much glow stick liquid into the bottle without causing it to overflow, set the glow stick aside and close the nail polish bottle tightly. Shake it to mix the two liquids together.
-
8Paint your nails as you would with any other nail polish. The glowing polish may take longer to dry than regular polish, however, so you might want to apply it using thinner coats.[1]
- For a dark-colored base, you may need three to four coats of polish. For a light-colored base, you may need two to three coats.[2]
-
9Protect your nail polish with a clear coat. Adding a coat of clear nail polish after the glow polish dries will protect the color longer.
- Note that the effect produced by this technique will not last for the duration of your polish. In fact, it may only last for a few hours, at most.
Using Pigment Powders
-
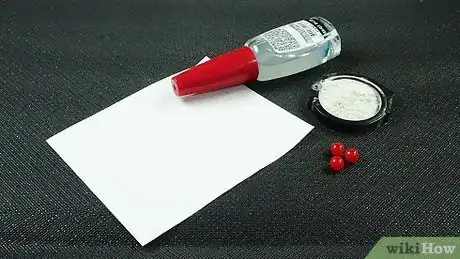
1Gather your materials. Unlike nail polish made from glow sticks, this polish will never lose its glow. You will, however, have to recharge it by letting it sit in the sunlight or under a bright light for a few minutes. The glow will eventually fade, but it can always be recharged. Here is a list of what you will need:
- Glow-in-the-dark pigment powder
- Clear nail polish (partly full)
- Scrap of paper
- 2 – 3 small ball bearings
-
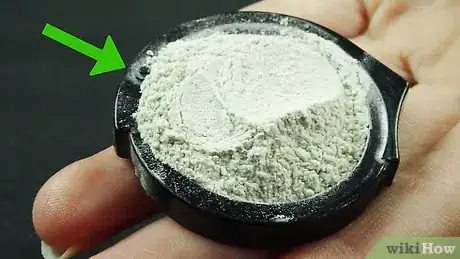
2Purchase some glow-in-the-dark pigment powder. You may be able to find it in a well-supplied arts and crafts store, otherwise, you will have to purchase it online. Try to get a pigment powder that is non-toxic, skin-safe, or meant for cosmetic use. Many artists' pigment powders, meant for mixing into paints, can be toxic.[3]
-
3Drop two to three ball bearings into the nail polish bottle. They will help the pigment mix better into the polish.
-
4Pour in the glow-in-the-dark pigment powder. It is very fine, so be careful not to inhale it. You will need abut 1 teaspoon of the powder.[4] The more powder you use, the more opaque the polish will be; the less powder you use, the more sheer the polish will be. There are several ways in which you can pour it into the bottle:
- Make a small funnel by rolling a scrap of paper into a cone. Stick the pointy end down the neck of the nail polish bottle, and pour the powder into the bottle.
- If the powder comes in a bag, and you already know how much the bag contains, you can snip one of the corners off the bag. Stick the cut corner into the mouth of the bottle and jiggle the bag until the powder is inside the bottle.
-
5Close the nail polish bottle tightly and shake it. Keep shaking it for a few minutes until the powder is mixed throughout the polish and there are no streaks. You may hear the ball bearings rattle inside; they are helping the polish and pigment mix together.
-
6Paint your nails as you normally would. You can paint them using just the glow-in-the-dark nail polish, or you can paint them with a regular polish first, and use the glowing one as a top coat.
-
7Apply a clear top coat. This will protect your nail polish against chips.
Using Eye Shadow
-
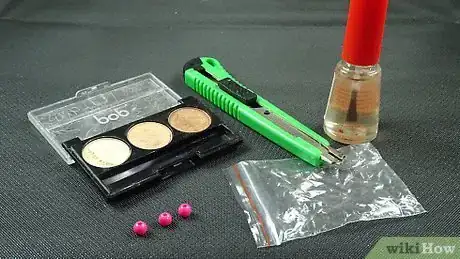
1Gather your supplies. You can make some nail polish that glows beneath a black light by mixing it with some powdered UV-reactive/black light eye shadow. Keep in mind that without a black light, this nail polish will not glow. Here is a complete list of what you will need:
- UV-reactive/black light eye shadow
- Clear nail polish (partly full)
- Plastic Ziploc bag
- 2 – 3 small ball bearings
- Box cutter or Xacto knife (optional)
-
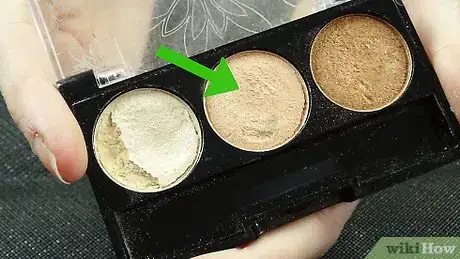
2Purchase some UV-reactive or black light eye shadow. You may be able to find it in a well-stocked beauty shop or at a costume store. You can also purchase it online. Make sure that it is the powdered kind, as a cream-based eye shadow will not work.
- You can also use some UV-reactive or black light makeup pigment, if you can find it.
-
3Open the eye shadow case and remove the eye shadow, if necessary. If the eye shadow is the only color in the case, leave it. If there are multiple colors in the case, you will have to take it out. Take a box cutter or an Xacto knife and stick the blade between the metal dish and the plastic wall. Gently wiggle the blade to loosen the metal dish from the eye shadow case. It will eventually pop out. Don't worry about being too neat; you will be crushing the eye shadow later.
- If you cannot remove the eye shadow, and there are multiple colors, try scooping the eye shadow out using a spoon or an Xacto blade. Don't worry if the eye shadow crumbles; you will crush it in a later step.
-
4Stick the eye shadow into a plastic Ziploc bag, and seal the bag tightly. Any kind of Ziploc bag will do, but a heavy-duty kind might survive the following steps longer.
-
5Start crushing the eye shadow. You can use the blunt end of a pencil or paintbrush. Keep smashing the eye shadow until it is a fine powder. Make sure that there are no chunks left; a grainy pigment may result in a grainy nail polish.
-
6Take the eye shadow case out of the bag and reseal the bag. You can the eye shadow case, or you can save it for a DIY project, such has homemade blush or lipstick.
-
7Open the nail polish bottle and drop 2 to 3 small ball bearings inside. They will help the crushed eye shadow mix better into the polish.
-
8Snip one corner of the bag off. This will make it easier to pour the powdered eye shadow into the bottle. Be careful not to spill any of the powder.
-
9Pour the eye shadow into the nail polish. Carefully wedge the cut corner into the mouth of the nail polish bottle and jiggle the bag until all of the eye shadow falls into the polish.
-
10Close the nail polish bottle tightly and shake it. Keep shaking it until the eye shadow is completely mixed into it and there are no more streaks.
-
11Apply the nail polish as you normally would. Use thin coats to help it dry faster.
-
12Finish off with a top coat. Acrylic paint chips even more easily than nail polish, so a top coat will help prevent premature damage.
Community Q&A
-
QuestionWhere do I buy glow in the dark pigment powder?
 Community AnswerAs it said in the instructions, you can get it at a well-supplied arts and crafts store such as Michael's or you can buy it online at a site like Amazon.
 -
QuestionIs the glow stick liquid toxic for your skin?
 Community AnswerYes.
 -
QuestionHow do I make glow in the dark lipstick?
 Community AnswerTake some neon non-toxic dye and mix it well. Then apply any shade of lipstick you want, then gently apply the neon dye to your lips. For extra shine and to make sure the dye does not leak, use some lip concealer or lip gloss to seal it.
Warnings
- Be careful when working with glow stick liquid. The substance inside, dibutyl phthalate, is not immensely toxic, but it can cause irritation to the eyes, skin, and mucous membranes if someone has sensitive skin or an allergy to the substance.[5] If the glow stick liquid does irritate your skin, wash the area immediately with soap and water. You can also check to label on your glow stick to see if it is toxic or non toxic.⧼thumbs_response⧽
Things You'll Need
Things You'll Need if Using Glow Sticks
- 1 glow stick
- 1 bottle of nail polish (partly full)
- Sharp scissors
- Strainer (recommended)
Things You'll Need if Using Pigment Powder
- Glow-in-the-dark pigment powder
- Clear nail polish (partly full)
- 2 to 3 small ball bearings
Things You'll Need if Using Eye Shadow
- UV-reactive/black light eye shadow
- Clear nail polish (partly full)
- Plastic Ziploc bag
- 2 to 3 small ball bearings
- Box cutter or Xacto knife (optional)
References
- ↑ She Knows, Make Your Own Glow in the Dark Nail Polish
- ↑ She Knows, Make Your Own Glow in the Dark Nail Polish
- ↑ Never Too Much Glitter, Pigment Tutorial Part 1
- ↑ Snap Guide, Make Glow in the Dark Nail Polish
- ↑ North Carolina Poison Center, Glow Sticks
About This Article
If you want to make glow in the dark nail polish, start by activating a glow stick and snipping off one of its ends with scissors. Then, carefully pour the glow stick liquid into your chosen bottle of nail polish, which should be the same color as the glow stick to ensure the best effect. Once you've gotten enough liquid in the bottle, close it and shake it vigorously. Finally, paint your nails with the polish as you normally would, and add a layer of clear nail polish to make the glow in the dark effect last longer. For tips on how to make glow in the dark nail polish using eye shadow or pigment powders, read on!
