This article was co-authored by Ed Kuoha. Ed Kuoha is a Chef and the Owner of Kuoha Culinary based in Aiea, Hawaii. He has more than 20 years of experience in various culinary kitchens and settings such as Morimoto Waikiki, where he received hands-on training from Iron Chef Morimoto. Chef Ed specializes in small catering events and private chef requests. He holds an Associate’s degree from The Culinary Institute of the Pacific at Kapiolani Community College.
This article has been viewed 96,646 times.
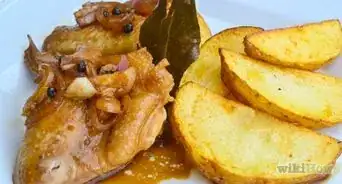
Stuffed with fragrant herbed butter, chicken Kiev is a Ukrainian comfort food beloved all around the world. To make it at home, first create the filling by blending butter with herbs like parsley and tarragon. Then wrap the chicken around the butter and fry it to the perfect golden brown crispiness before baking. So delicious and so decadent!
Ingredients
- 8 tablespoons (113.6 g) of butter
- 1 teaspoon (.5 g) of dried parsley
- 1 teaspoon (.6 g) of dried tarragon
- 1/4 teaspoon (.6 g) of black pepper
- 1 teaspoon (6 g) of kosher salt
- 2 large eggs
- 1 teaspoon (4.9 ml) of water
- 2.25 cups (337.5 g) of panko bread crumbs
- 2 tablespoons (30 ml) of vegetable oil
- Extra salt and pepper to taste
Steps
Stuffing and Rolling Traditional Chicken Kiev
-
1Mix butter, parsley, tarragon, salt, and pepper in a small bowl. Using a hand mixer or a stand mixer, beat 8 tablespoons (113.6 g) of butter, 1 teaspoon (.5 g) of dried parsley, 1 teaspoon (.6 g) of dried tarragon, 1/4 teaspoon (.6 g) of black pepper, and 1 teaspoon (6 g) of kosher salt. Blend the ingredients until they’re thoroughly combined.[1]
- To make mixing easier, soften your butter first. Let it sit in a room temperature spot for 30 minutes before you use it.
-
2Place the mixture onto a piece of plastic wrap and roll it up into a log shape. Lay a sheet of plastic wrap on a flat surface and spoon the butter mixture in a long line down the center. Pull the plastic wrap up tightly around the butter, then use your palms to roll the wrapped butter back and forth gently, creating a small log.[2]
- You can also substitute wax paper for plastic wrap.
- Work quickly so that the butter doesn’t melt from the warmth of your hands and start to lose its shape.
Advertisement -
3Freeze the butter log for 1 to 2 hours. Set the wrapped butter in the freezer until it’s very firm. After 1 to 2 hours, check that the butter is no longer soft, then remove it from the freezer.[3]
- Use a kitchen timer or the clock app on your phone to keep track of the time.
- If you are making the butter ahead of time, you can keep it in the freezer for up to 3 days.
-
4Flatten the 4 chicken breast halves so they’re about 1⁄4 in (0.64 cm) thick. Place the chicken between 2 pieces of plastic wrap, then use the flat side of a meat mallet to pound the breast. Make sure to pound the entire piece evenly so the chicken is the same thickness from center to edge.[4]
- Always wash your hands with soap and warm water before and after handling raw chicken so you don’t spread harmful bacteria.
Did you know?
Instead of plastic wrap, you can put the chicken inside a plastic resealable bag to pound it. Also, if you don’t have a mallet, use any heavy object, like the bottom of a skillet or a rolling pin.
-
5Place butter and breadcrumbs in the center of each chicken breast. Spread out 4 individual sheets of plastic wrap and place 1 breast on each piece. Then, spoon 1/4 (30 g) of the butter mixture onto the middle of each breast, along with 1 tablespoon (7.8 g) of panko breadcrumbs.[5]
- To make it easier to roll the chicken, pile the butter and breadcrumbs as close to the center of the chicken as possible.
-
6Roll the chicken up over the butter, then cover the breast in plastic wrap. Start on one of the longer sides of the chicken breast and roll it just like you would a burrito, tucking in the shorter sides of the breast as you go so that the butter is inside the roll. Tightly wrap the entire roll in plastic wrap when you’re finished to hold it together, then repeat with the other 3 breasts.[6]
- If you’re having trouble getting the chicken to stay rolled up, you can stick 1 to 2 toothpicks through the center to secure it.
-
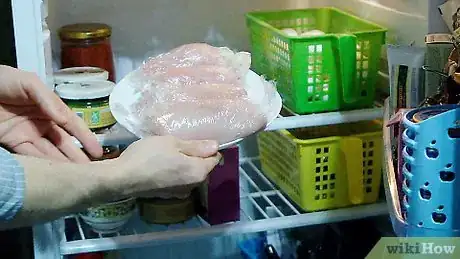
7Refrigerate the chicken rolls for at least 2 hours. Once you’ve tightly wrapped your chicken breasts, place them in the refrigerator. Let them chill for 2 to 24 hours.[7]
- One option is to prepare the chicken rolls the night before you want to serve them. Then, you can leave them in the refrigerator overnight.
Breading and Frying the Chicken
-
1Beat the eggs and water in one dish, and put the breadcrumbs in another dish. These dishes will be what you dip the chicken into, so use something like a pie pan or a shallow bowl. Whisk together 2 large eggs and 1 teaspoon (4.9 ml) of water in one dish. Pour 2.25 cups (337.5 g) of panko breadcrumbs into another separate dish.[8]
- If you don’t have a whisk for the eggs, you can use a fork instead. The tines help break up the yolk just like a whisk does.
-
2Dip each chicken roll in the egg mixture, then the breadcrumbs. Remove the plastic wrap from each piece of chicken. Carefully submerge each roll in the egg mixture and then dredge it in the breadcrumbs. Gently shake off any excess crumbs over the bowl, then set the pieces on a clean plate.[9]
- Make sure to completely cover the rolls in both the egg mixture and the breadcrumbs if you want that all-over crispy coating.
- If you'd like more seasoning, you can also sprinkle salt and pepper on the chicken before coating them.
-
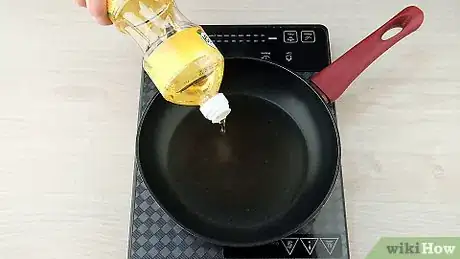
3Heat 2 tablespoons (30 ml) of vegetable oil in a saucepan. Place a 12 in (30 cm) pan on the stove over medium heat and pour in the oil. Use a spatula to spread the oil over the bottom of the pan so it’s evenly coated.[10]
- If your stove has 9 settings, for example, medium heat is from 4 to 6.
- You can use any type of oil, like olive or avocado oil, instead of vegetable oil. You can also substitute another fat, like butter or lard.
Did you know?
If you want a quick meal, you can cook your chicken kiev in the microwave instead of frying and baking it. After you coat the chicken in the egg mixture and breadcrumbs, place the pieces in a microwave-safe dish. Microwave the chicken on high for 5 to 6 minutes.[11]
-
4Place the chicken in the pan to fry for 5 minutes, turning it constantly. Set your breaded chicken rolls in the hot oil with the open seam facing down to start. Then, slowly turn them so that each side gets browned. Continue cooking the chicken until it’s a golden color.[12]
- Another way to know if the chicken is done is to check it with a meat thermometer. Stick the thermometer in the meat and look for a reading of at least 165 °F (74 °C).
- Don’t cook the chicken past the point of golden brown, or it will be dry.
Baking the Chicken Kiev
-
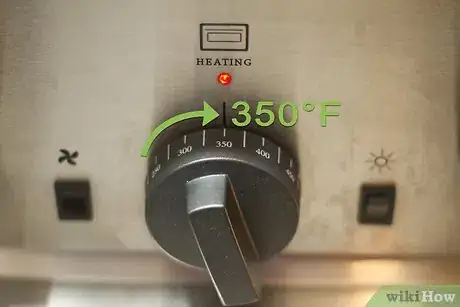
1Preheat the oven to 350 °F (177 °C). Turn the oven on before you start breading the chicken. Ovens usually take about 20 to 30 minutes to warm up, so this ensures it will be ready when you need it.
Tip: To preheat your oven faster, turn it on the broil setting first, which uses super concentrated heat to warm the oven. Then, when you’re ready to cook, switch the oven to the standard bake setting.
-
2Transfer the rolls to a 9 in × 13 in (23 cm × 33 cm) baking dish. Once the chicken is finished frying, remove the breasts from the pan with your spatula and set them in the baking dish. Keep the seam side down so they don’t come unraveled.[13]
- You can grease the baking dish before placing the chicken in it if you want. However, it’s not necessary because the butter in the chicken will coat the bottom and prevent it from sticking.
-
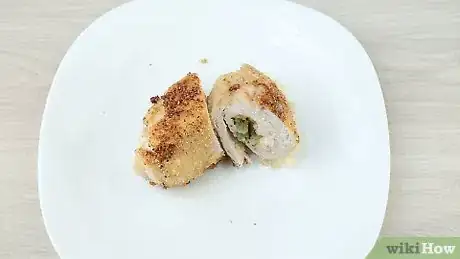
3Place the chicken in the oven for 10 to 15 minutes until it’s cooked through. For evenly-cooked chicken, set the dish on the middle rack, where the hot air is able to better circulate around the meat. When the chicken is no longer pink, remove it from the oven and enjoy.
- To check if the chicken is done, insert a meat thermometer into the center and check that the temperature is at least 170 °F (77 °C).
- For an even tastier meal, spoon any drippings from the bottom of the pan over the chicken when you serve it.
- Store any leftover chicken kiev in an airtight container. Keep it in the refrigerator for up to 1 week or in the freezer for up to 6 months.
Things You'll Need
- Mixing bowls
- Spoons
- Plastic wrap
- Meat mallet
- 2 shallow dishes
- Plate
- 12 in (30 cm) saucepan
- Spatula
- 9 in × 13 in (23 cm × 33 cm) baking dish
- Meat thermometer (optional)
References
- ↑ https://www.foodnetwork.com/recipes/alton-brown/chicken-kiev-recipe-1952333
- ↑ https://www.tasteofhome.com/recipes/quick-chicken-kiev/
- ↑ https://www.foodnetwork.com/recipes/alton-brown/chicken-kiev-recipe-1952333
- ↑ https://www.foodnetwork.com/recipes/alton-brown/chicken-kiev-recipe-1952333
- ↑ https://www.foodnetwork.com/recipes/food-network-kitchen/chicken-kiev-recipe2-2107051
- ↑ https://www.foodnetwork.com/recipes/alton-brown/chicken-kiev-recipe-1952333
- ↑ https://www.foodnetwork.com/recipes/alton-brown/chicken-kiev-recipe-1952333
- ↑ https://www.foodnetwork.com/recipes/alton-brown/chicken-kiev-recipe-1952333
- ↑ https://www.foodnetwork.com/recipes/alton-brown/chicken-kiev-recipe-1952333
About This Article
To make chicken Kiev, start by mixing together butter, parsley, tarragon, salt, and pepper and rolling the mixture up into a log shape on a piece of plastic wrap. Then, freeze the mixture for 2 hours. While that's in the freezer, flatten some chicken breast halves so they're 1/4 inch thick. When you're finished, spoon the frozen mixture and some breadcrumbs onto each chicken breast and then roll them up, refrigerating them for 2 hours. Finally, bread and fry the chicken rolls before baking them in the oven for 10-15 minutes at 350 degrees Fahrenheit. To learn how to make the breading for chicken Kiev, scroll down!
