This article was co-authored by Jillian Fae Downing. Jillian Fae Downing is a Private Event Chef, Chef Educator, and the Owner of Jillian Fae Chef Services based out of Temecula, California. With 12 years of experience, she specializes in menu planning and menu research and development. Jillian Fae holds an Associate of Science in Culinary Arts from Orange Coast College and a BA in Mass Communication and Media Studies from Arizona State University. She is also a member of the American Culinary Federation and the American Personal and Private Chef Association.
wikiHow marks an article as reader-approved once it receives enough positive feedback. This article received 15 testimonials and 100% of readers who voted found it helpful, earning it our reader-approved status.
This article has been viewed 794,795 times.
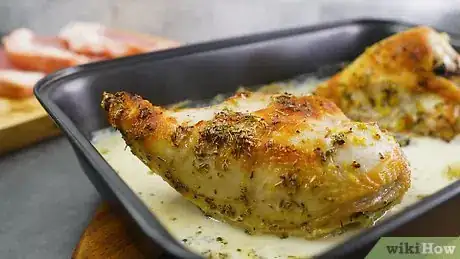
Tenderizing chicken is one of those recipe steps that a lot of us are guilty of skipping. After all, we’re eager to finish cooking so we can get some food on the table and eat, and it feels like one of those things that might not be super necessary. Well, we’re here to tell you that not only does tenderizing chicken make it so much more delicious and tender, it’s also super easy to do, and you have a couple of different options! Below we’ll walk you through how to tenderize chicken with a mallet or with a yummy marinade if you don’t have a mallet on hand.
Steps
Using a Meat Tenderizer Tool
-
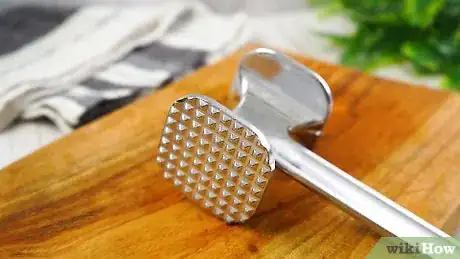
1Obtain a meat tenderizing tool. These are generally wooden or metal mallets with a bumpy head that are used to pound meat to make it more tender. You can buy a meat tenderizing tool from any kitchen supply store. If you don't have a tenderizer, you can use a clean hammer in its place, though this will be less effective than a tenderizing tool since it has a smooth head.
-
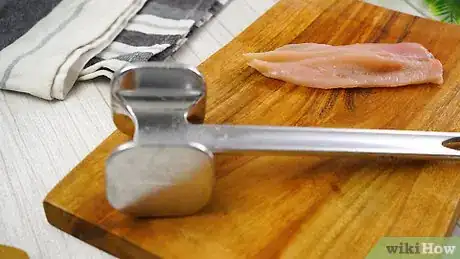
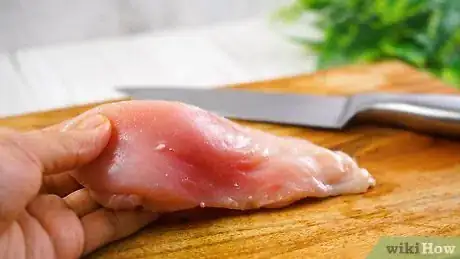
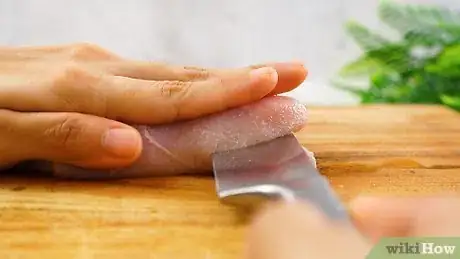
2Use it on boneless cuts of chicken. Boneless chicken breasts or thighs can be processed with a meat tenderizing tool. Don't attempt to tenderize bone-in cuts of meat, since you'll shatter the bones. If you have a bone-in cut of meat you want to tenderize in this manner, remove the meat from the bone first.[1]Advertisement
-
3Cover the meat with a piece of plastic wrap. This will prevent small pieces of meat from scattering over your countertop when you pound it.
-
4Pound the meat. Use the meat tenderizing tool to pound the meat evenly over the entire surface. Keep going back and forth over the meat until it's as thin as you want it to be for the recipe you're using. This is a great method to use before cooking meat using a fast method, such as grilling or frying. Pounding both breaks down fibers in the meat and allows for very fast cooking.
Using a Marinade
-
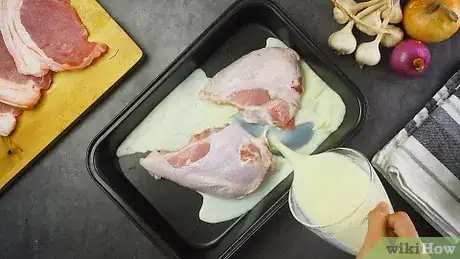
1Use a plain yogurt or buttermilk marinade. Yogurt and buttermilk contain enzymes and acids that work together to break down the proteins in chicken meat, causing it to become more tender. That's why so many cooks know that soaking chicken in yogurt or buttermilk overnight before frying chicken results in the very best fried chicken imaginable. The same trick can be used to prepare any type of chicken for any cooking process.[2]
- If you want to use yogurt, generally use a plain yogurt. Flavors such as vanilla yogurt may come out unpalatable.
- Some flavored yogurt, such as lemon, lime, coconut, or other fruit flavors that work well with chicken can yield wonderful results.
- Full fat or low-fat yogurt both work fine. The chicken will have a slight yogurt flavor, which pairs well with peppers and other spices.
- Buttermilk is a little milder and will not affect the flavor of the chicken. If you do not have buttermilk on hand, you can make it. Simply add 1 tablespoon (30 mL) of white vinegar to a cup-sized measuring cup. Fill up the rest of the cup with whole or low-fat milk. Let the mixture sit for 5 to 10 minutes, until it curdles. You can use this in place of buttermilk.
-
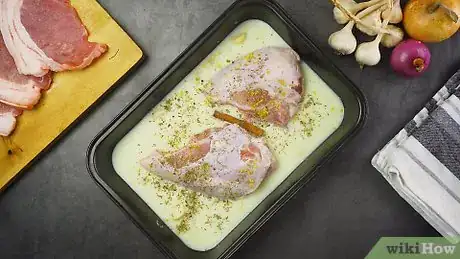
2Marinate the meat for an hour or more. Overnight is best, but marinating the chicken in buttermilk or yogurt for just an hour or so will make a big difference in the texture of the meat. To marinate it, simply place the meat in a container and pour enough plain yogurt or buttermilk to cover it. Close the container and let it sit in the refrigerator until you're ready to use it.
- You can season the marinade with spices and salt to brine the chicken while it's marinating.
- After the chicken is done marinating, shake or rinse off the excess buttermilk or yogurt before using it in your recipe.
-
3Experiment with other types of marinades. They will tenderize differently. There are hundreds, maybe thousands, of marinades and brines to choose from, both homemade and commercial. But realize that not all marinades will tenderize equally. Some will yield a firmer chicken, and not actually tenderize.
- Using a very acidic marinade, like one with vinegar or lemon juice, may slightly toughen the meat. Acid-based marinades infuse the meat with great flavor, but you may have to get very aggressive with mechanical tenderizing.This works best when you're making a curry. You cannot really detect the fruit in the finished curries, but you may be able to in dishes without a strong-tasting sauce.[3]
- For a mushy chicken, use an enzyme-based marinade that contains pineapple or meat tenderizer. These may do the job a little too well, causing chicken meat to become "mushy". Of course, this may be the desired outcome, and this may be fine for dishes that call for very soft chicken.
- Alternatively, use a fruit marinade. If you want the chicken to be as tender as possible, and don't mind if it gets a little mushy, you can take advantage of the enzymes naturally found in certain fruits. Peel and puree a Kiwi fruit, pineapple, or mango and mix with your raw chicken pieces. Keep it covered in the refrigerator for about an hour.
- Try soda as a marinade. An easily available and surprisingly good marinade is a soft drink. The highly acidic properties of pop chemically break down the chicken, and the flavor is delicious. Simply cover your chicken with your choice of soda, and add about a teaspoon of salt. If you do not have quite enough soft drink, add some water to the mixture
- Cola flavors tend to work well: Coca Cola, Pepsi, RC, etc.
- Lemon-Lime flavors also work well: Sprite, Mountain Dew, 7 Up, Sierra Mist, etc.
- Moxie (an uncommon American soda brand) also works very well.
- While some brines use sugar and that requires hot water to dissolve, be sure to let the mixture cool down before adding it to the chicken, or you might end up cooking it with the brine.
Cooking The Chicken
-
1Pick your cooking method. There are many ways to cook chicken, but here are a few examples:
- Blackening the chicken: Take a pan, put 1 tbsp (30 mL) oil (olive oil adds extra flavor!!) and heat up the oil. Meanwhile, season the chicken using whatever spices you like. Cover the chicken with the spices, and then place in the pan. Cook until no longer pink on the inside.
- Oven-baking the chicken: Season chicken and place in a greased baking pan. Bake 30-40 minutes, or until no longer pink.
- Grilling the chicken: Transfer the tenderized,seasoned chicken to the grill and cook until done. This way, you can have your chicken without the need to add other ingredients , as the grill will give the dish its own kind of flavor.
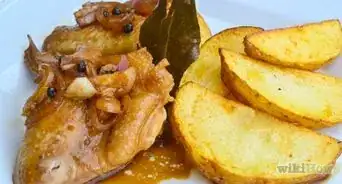
- Stewing the chicken: In a proper stew, it is virtually impossible to produce tough chicken. This is one of the many reasons chicken stews of various types are found throughout the world. This can use both plain or marinated cuts of chicken.
-
2Do not overcook the bird. Overcooking can lead to loss of moisture and proteins tightening up into bubblegum consistency. Experience will help you judge when chicken is done, but even professional cooks will still test with a thermometer to be certain. Test the temperature of the bird using a meat thermometer to determine whether it has reached the correct internal temperature. For most cuts of chicken, this will be 165 °F (74 °C).
- Use a probe thermometer when cooking a whole bird, plunged into the deepest part of the breast. Use an instant read for smaller cuts like breasts and thighs.
-
3Try a "low and slow" cooking method. Though seemingly contradictory to the "do not overcook" warning, low, slow cooking breaks down proteins, allowing for a more tender experience. This type of cooking also allows time for flavors and juices to penetrate into the meat, giving even more juiciness. It works best with bone-in thighs and other dark meat, or you could roast an entire chicken this way.
-
4Allow the meat to rest after cooking. Cover it with heavy-duty aluminum foil and let sit for 5 to 10 minutes. This allows the juices to redistribute in the meat. If you cut it right away, the juices are more likely to drain out immediately instead of reabsorbing into the meat. This is especially important for whole roasted chicken or roasted chicken parts.
- While this advice is absolutely true, be assured that carving right away will also not take your succulent chicken into a dry mess of a meal.
- It also makes sense to wait until the chicken is cool enough to handle, anyway. A chicken just out of the oven is too hot to cut into without risking burns. Chicken that hot will also burn when bitten into.
Selecting and Cooking the Tenderest Chicken
-
1Know your source. It is difficult to judge the quality of chicken just by looking at the meat, so the best thing to do is buy your chicken from a reliable source. The store brand may or may not be as reliable as a nationwide brand name. The organic poultry farmer may or may not provide a more tender chicken, although if bought at a farmer's market he or she may be able to guide you to a good choice.
-
2Keep in mind that old chicken is tough chicken. In the United States, meat chickens are processed at only a few weeks old to ensure tender flesh. However, it is possible to cook older "stew hens" such as those found on hobby farms or backyard coops. As the term suggests, stewing the meat is the suggested cooking technique, as the older flesh tends to be tougher.
-
3Consider the cut of poultry used. Dark meat chicken contains more fat, and therefore can be rendered more moist and tender in dishes that work well with dark meat. Breast meat and other white meat tends to be a little tougher. However, if you use a good buttermilk marinade or a meat tenderizer, it can still turn out quite tender.
Community Q&A
-
QuestionWhat is the maximum time I can keep the chicken in buttermilk?
 GrowingNanaCommunity AnswerYou can keep the chicken in the buttermilk as long as the chicken doesn't go bad. Keep it in a sealed container in the fridge.
 -
QuestionWill greek yogurt work instead of plain yogurt?
 Community AnswerIf you are preparing tzatziki, greek yoghurt is good. Plain yoghurt has to be drained for liquid before making tzatziki.
Warnings
- Defrost chicken in your refrigerator, not on the counter. If rapid defrost is desired, seal the chicken in a zip-top bag with all of the air squeezed out, and run under cold water in the sink.⧼thumbs_response⧽
- Never eat raw or undercooked chicken.⧼thumbs_response⧽
References
About This Article
To tenderize chicken, first lay a sheet of plastic wrap over a clean cutting board. Place your thawed boneless chicken on top of the plastic wrap, then lay another piece of plastic wrap over it. Press the plastic wrap down around the edges of the chicken to compress it. Next, gently pound each section of the meat with a tenderizing mallet for 30 seconds. This will break down the fibers in the meat, which will make the chicken much more tender when you cook it. Finally, peel the plastic wrap off and season or cut your chicken before cooking it. Keep in mind that the older or tougher the meat, the longer you should tenderize it before cooking. If you have a fresh-cut of quality chicken, you don't need to tenderize it all. For tips on tenderizing dark meat vs breast meat, read the article!
