This article was co-authored by Ryan Glynn, CPA. Ryan Glynn is a Plant Specialist, Interiorscaper, and the Founder of Chicago Plants, LLC. He specializes in houseplant care, interior plant-scaping, and gardening. Ryan and Chicago Plants have been featured in several media outlets such as TimeOut Magazine and the Chicago Tribune. Ryan holds a BBA and Master’s degree in Accounting from The University of Wisconsin-Madison.
There are 11 references cited in this article, which can be found at the bottom of the page.
This article has been viewed 17,534 times.
African violets are prized as houseplants due to their small size and beautiful blooms. However, these tropical flowers are known to be delicate. Even if you have never grown one before, you can find success by making a simple African violet soil mix with ingredients like peat moss, vermiculite, and perlite. The best potting mixture for African violets will have the perfect acidity level for the violets to thrive. Mix in some water and fertilizer as well. Check out the tips below to learn how to make the perfect soil mix for your African violets that will help them grow and thrive.
Steps
Making African Violet Soil Mix
-
1Select peat moss to serve as the soil’s base. Start off with at least 1 cup of peat moss. Peat moss is one of the best mediums available for most plants, and it’s no different for African violets. It’s lightweight, absorbent, and relatively inexpensive. It also has a low pH that can easily be adjusted to the slightly acidic conditions African violets thrive in.[1]
- Peat moss is sold online and at gardening centers. Keep in mind that the amount of peat moss you need may vary a little depending on the size of pot used.
-
2Choose vermiculite or perlite to lighten up the soil base. Plain peat moss is too dense for African violets, so mix in some additives to help them grow. Plan on mixing a cup of at least 1 ingredient into the peat moss. Vermiculite and perlite both create air pockets in the soil so that a violet’s roots can grow through it. Both choices help, and you can even use both of them to make the soil.[2]
- Vermiculite is a soft, spongy material that retains water well. Perlite is a hard type of volcanic glass that aerates better and has a slightly higher pH.
- Sand can also be used to lighten soil. It’s heavier than vermiculite and perlite and drains faster, so it helps if your soil mix tends to get waterlogged.
Advertisement -
3Use a commercial violet potting mix if you’re looking for a simpler base. Some gardening centers sell a soil mix designed specifically for African violets. The mix drains better than regular potting soil and is slightly acidic as well. However, it still uses potting soil, so it’s heavier than homemade peat moss mixes. It’s useful if you’re unable to make the perfect soil on your own.[3]
- Some growers find commercial mixes to be too dense. To fix this, combine 1 cup of the potting mix with 1 cup of peat moss and 1 cup of vermiculite or perlite.
-
4Combine the base with an equal amount of the additives. Make the soil in a 1 to 1 ratio. There are a few strategies you can take to get the perfect soil mix. The simplest option is to mix a cup of peat moss with a cup of vermiculite or perlite. Start off with 1 cup of each ingredient, using more as needed to fill the pot. You can mix the soil inside the pot you plan on using or in a separate plastic container.[4]
- Another option is to mix 2 cups of peat moss with 1 cup each of vermiculite and perlite. This mix will give you the benefits of both vermiculite and perlite.
-
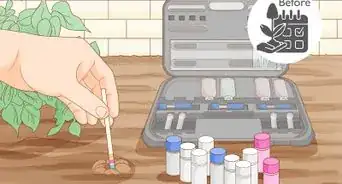
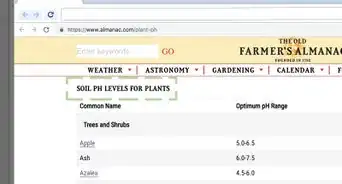
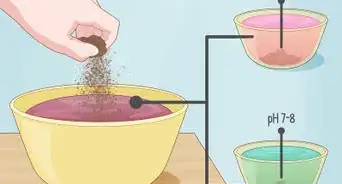
5Adjust the soil pH as needed to make it slightly acidic. If you made your own soil out of peat moss, vermiculite, and perlite, it most likely won’t require any initial adjustment. However, you can still use a soil testing kit to ensure it’s at the perfect acidity. Violets grow well in soil rated between 6.4 and 6.9 pH. If the pH is different, mix in lime or another treatment to fix it.[5]
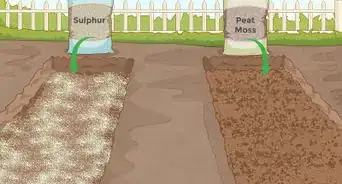
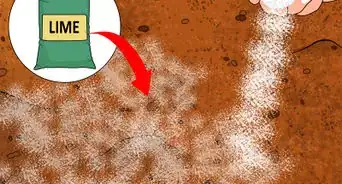
- To raise the pH, dilute some dolomite lime in warm water and use it to moisten the soil before planting.
- Lower the pH with diluted vinegar or ground sulfur mixed into warm water.
- Everything you need to monitor pH is available at gardening centers. Most homemade pH tests work by taking a sample of soil and mixing it with an included chemical, but there are also handheld monitors that detect pH when you stick them into soil.


Filling a Pot with African Violet Soil Mix
-
1Measure the diameter of the plant to determine what pot size to use. Measure the distance between the violet’s outermost leaves. Violets come in a few different sizes, and the ideal pot size can vary depending on how fast a plant grows. Regular violets generally require a 4 in (10 cm), while miniatures fit well in a 2 in (5.1 cm) or 2 1⁄2 in (6.4 cm) pot. Prepare a matching amount of soil to fill the pot you choose.[6]
- Getting the correct pot size matters a lot. It means the perfect amount of soil so the violet has enough space and nutrients available for growth.
- If your violet is too small for one pot, always choose the next size up.
-
2Select a clean clay or plastic pot that drains well. Clay and plastic pots are both safe for African violets, but they have different effects on the soil. Plastic pots retain water better, so you don’t have to water the soil as often. However, you are less likely to end up with waterlogged soil when using a clay pot. No matter which one you choose, make sure it has drainage holes on the bottom.[7]
- Avoid other types of pots, such as decorative glazed pots. The soil won’t drain fast enough to keep an African violet healthy.
- Pots can be reused as long as you clean them out first. Wash away old dirt with soap and water, then soak the pot in a bath of 9 parts water and 1 part household bleach.
-
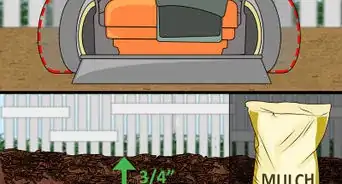
3Make a hole in the center of the soil for the plant. Shift the soil aside with a trowel or your fingers. Create a hole big enough for the plant’s roots. Use the plant’s size as a reference for how big the hole needs to be. Plan on making it so the plant’s lowest leaves are right above the rim of the pot.[8]
- If you’re repotting a violet, you could use the old pot to prepare the new one. Set the old pot in the new one, then spread the soil around it. The old pot will leave a perfectly-sized hole for the violet.
-
4Add lukewarm water to the soil until it is moist. African violets grow well in soil that is damp but not soaked. Pour a small amount, such as 1 c (240 mL), around the soil with a watering can. The surface of the new soil will become wet and stick to your fingers if you touch it. Once it is moist, plant the soil in it right away.[9]
- Watch for water to pour out of the drainage holes on the bottom. It shows that the water has passed all the way through the soil and you may even be using too much.
- If you wait, the soil may dry up. Wet it again. Make sure it stays moist so the violet adapts to the fresh mix.
-
5Apply a balanced 14-12-14 fertilizer to the soil, if needed. Select either a liquid or powdered fertilizer. Homemade soil mixes don’t have fertilizer, so it’s up to you to add nutrients for the violet to absorb. Once the soil has been moistened, sprinkle a small amount of fertilizer, usually about 1 tablespoon (15 mL), across the soil.[10]
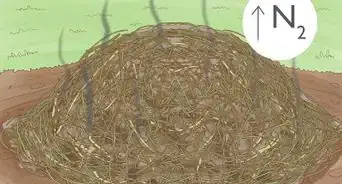
- The number on fertilizer symbolizes how much nitrogen, phosphorus, and potassium is in it. A 14-12-14 fertilizer is 14% nitrogen, 12% phosphorus, and 14% potassium.
- Check the manufacturer’s recommendations about how much fertilizer to use. Concentrated liquid fertilizers have to be diluted in water first.
- Commercial violet soil mixes often contain fertilizer, so be cautious about adding extra. Overfertilizing a violet causes it to overgrow and brown without sprouting flowers.


Planting an African Violet in Fresh Soil
-
1Remove the African violet from its old pot to plant it. Grasp the plant at the base of the stem below the lowest set of leaves. Hold on gently to avoid causing any damage to the soft stem. Then, attempt to pull the plant out of its pot. If it feels stuck, stop and try to loosen the soil.[11]
- Keep the soil at the right consistency so that removing the African violet is easier. If it is still stuck, try tapping the sides of the pot or sliding a knife around the edges of the soil.
- Be as gentle as you can when taking out an African violet. Never force it out, since that could cause permanent damage.
-
2Brush old dirt from the roots by hand. Look for the roots in the big clump of soil left at the bottom of the stem. You probably won’t be able to see them at first, so start rubbing away the dirt a little bit at a time. Brush away as much dirt as you can until the roots are exposed. Then, reach in with your finger and gently brush away anything left on the roots.[12]
- Take off as much of the old soil as you can. The plant will be fine if you’re unable to tease out every last clump of dirt. As long as you remove most of it, the violet will be fine.
- Always clear away the old dirt before replanting. It may have leftover fertilizer and other things that could have a negative effect on your violet.
-
3Place the African violet and cover the stem up to its lowest leaves. Set the plant down inside the new pot. Then, fill in the hole you made. Cover the roots and most of the stem. Spread the soil out so the lower leaves barely touch it.[13]
- Any buried leaves will end up rotting, so take care to keep them elevated above the soil. Leaving too much of the stem exposed could limit the violet’s growth as well.
-
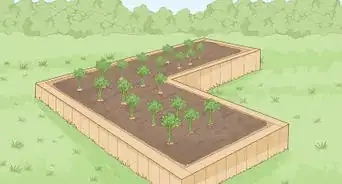
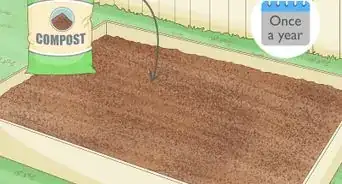
4Repot the African violet in new soil every 6 months to keep it healthy. The old soil runs out of nutrients over time, so mix a fresh batch. Remove the plant, then clean the old soil out of the pot. Water it lightly to moisten it, then add fertilizer if you wish. Replant the violet to let it begin spreading through its new soil.[14]
- At a minimum, repot African violets once a year. With regular soil changes, violets last for decades.
- Unless the violet has outgrown its container, reuse the old pot. You can tell by how the violet fits inside the pot. If the plant looks crowded with leaves and roots spilling out from the pot, then switch to the next largest size pot available.


Expert Q&A
-
QuestionHow often do I water my African Violet?
 Ryan Glynn, CPARyan Glynn is a Plant Specialist, Interiorscaper, and the Founder of Chicago Plants, LLC. He specializes in houseplant care, interior plant-scaping, and gardening. Ryan and Chicago Plants have been featured in several media outlets such as TimeOut Magazine and the Chicago Tribune. Ryan holds a BBA and Master’s degree in Accounting from The University of Wisconsin-Madison.
Plant Specialist & InteriorscaperWater your African violet whenever the soil gets dry! Stick your finger about 1 in (2.54 cm) into the soil (or up to your first knuckle)—if it feels dry, it's ready to be watered again. Be especially mindful of watering when your flower is about to bloom, or you might risk not having any bloom or losing flowers that are starting to develop.
Things You’ll Need
- Peat moss
- Vermiculite
- Perlite
- 14-12-14 liquid or powdered fertilizer
- Sized pot
- Watering can
- African violet potting soil (optional)


References
- ↑ https://digitalcommons.unl.edu/cgi/viewcontent.cgi?referer=&httpsredir=1&article=1968&context=extensionhist
- ↑ https://www.davs.org/grow.html
- ↑ https://hgic.clemson.edu/factsheet/african-violet/
- ↑ https://edis.ifas.ufl.edu/pdffiles/MG/MG02800.pdf
- ↑ https://www.avsa.org/sites/default/files/files/pH%2C%20RX.pdf
- ↑ https://www.youtube.com/watch?v=v94f2e9dexw&feature=youtu.be&t=18
- ↑ https://hgic.clemson.edu/factsheet/african-violet/
- ↑ https://secure.caes.uga.edu/extension/publications/files/pdf/C%20660_2.PDF
- ↑ https://secure.caes.uga.edu/extension/publications/files/pdf/C%20660_2.PDF
- ↑ https://mrec.ifas.ufl.edu/Foliage/Resrpts/rh_90_5.htm
- ↑ https://www.youtube.com/watch?v=iRKLlPJfy3Y&feature=youtu.be&t=356
- ↑ https://www.youtube.com/watch?v=49v0EHiDlqU&feature=youtu.be&t=359
- ↑ https://digitalcommons.unl.edu/cgi/viewcontent.cgi?article=1968&context=extensionhist
- ↑ https://digitalcommons.unl.edu/cgi/viewcontent.cgi?article=1968&context=extensionhist
About This Article