This article was co-authored by wikiHow Staff. Our trained team of editors and researchers validate articles for accuracy and comprehensiveness. wikiHow's Content Management Team carefully monitors the work from our editorial staff to ensure that each article is backed by trusted research and meets our high quality standards.
This article has been viewed 33,605 times.
Learn more...
Making your own custom T-shirts is a fun way to express both your creativity and your personality. If you have a die cutting machine, using heat transfer vinyl is one of the easiest and most popular ways to iron a design onto a shirt. But if you don't have a machine, you can still create a personalized T-shirt with fabric transfer paper and an iron. Choose your favorite picture or a cool quote and break out the ironing board!
Steps
Using Heat Transfer Vinyl
-
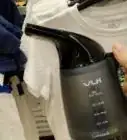
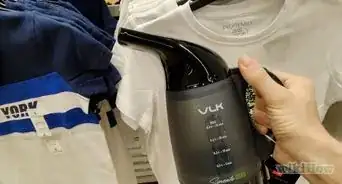
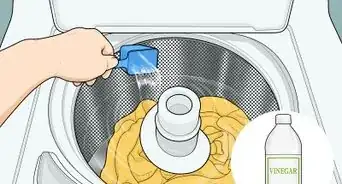
1Wash and dry your shirt first if it’s brand new. This allows the shirt to shrink however much it might during the first wash before you apply your transfer. If you skip this step, your picture could get distorted when you wash the shirt later on.
- If you’ve worn and washed your shirt before, you don’t need to do this step.
- Check the care label on the inside of the shirt to find directions for washing and drying it properly.
What Shirt Fabric to Choose for Transfers
Pick 100% cotton or cotton/polyester blend. These fabrics are the best because they can withstand high heat.
Avoid shirts with a loose weave, like pique knit fabric, which won't hold the picture as well.
-
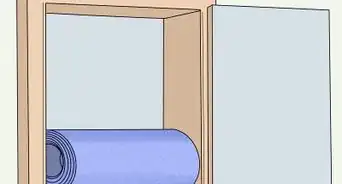
2Cut the mirror image of your picture with the die cutting machine. Since you’ll be turning the vinyl over to transfer it, make sure you flip the picture before you print it so it looks backwards. Place the vinyl on a cutting mat and load it into the die cutting machine so that the shiny plastic side is facing down while it cuts. Make sure the arrows on the cutting mat are pointing towards the machine when you load the mat.
- To create the mirror image, look for a button in your design software that says something like “flip horizontally.”
- There are all different types and colors of heat transfer vinyl you can choose from.
- You may need to adjust your cut settings based on the type of vinyl you use. For example, flocked vinyl may have a different setting than glossy vinyl.
Choosing a Type of Heat Transfer Vinyl
If you want a bold design, choose vinyl in neon colors or with a bright pattern.
For a glamorous shirt, go with metallic vinyl in gold or silver.
If you want a super unique shirt, use glow-in-the-dark vinyl.
For a little extra sparkle, opt for glitter or holographic vinyl.
If you want a design with texture, pick embossed vinyl, which has raised bumps, or pick flocked vinyl, which feels similar to velvet.
Advertisement -
3Trim and remove any vinyl that you don’t want to be transferred. This process is known as weeding. Use an X-Acto knife or a weeding tool to cut away any pieces of vinyl that are not part of your final design. Peel those sections carefully off of the cutting mat and discard them.
- For example, if you’re transferring the letter “A,” you’ll likely remove the small triangle inside the letter to create the negative space.
- If you have trouble seeing the cut lines on the back of the vinyl, try holding it up to a window or light source. The light will shine through the spots that were cut by the machine.
- Any vinyl left behind during this step will end up on your shirt.
-
4Place the image onto your shirt with the shiny plastic side facing up. Remove your cut vinyl from the mat and arrange your picture so it’s exactly where you want it to be on your shirt. Set it so that the glossy side is facing you, which means the picture should read correctly and not be a mirror image.
- If your picture is reflected, you probably have the wrong side facing up. Otherwise, you cut the vinyl on the wrong side, you’ll have to re-cut it.
-
5Lay a piece of parchment paper over the vinyl. This will protect your design from overheating or curling up when you’re ironing. Tear off a sheet of paper that’s large enough to cover the entire piece of vinyl and smooth it down flat.
- You can also use a thin piece of cotton fabric or a towel to act as a barrier between your iron and the vinyl.
-
6Iron each area of the picture for 10 to 20 seconds. Instead of dragging the iron over the design, place the iron over each section, holding it in place before lifting it and setting it down on the next section. Make sure you cover the entire picture, including the edges.
- Check the instructions for your specific heat transfer vinyl as the ironing times can vary between brand and type.
- Turn your iron to the cotton setting with the steam turned off. The cotton setting is usually the highest heat option on an iron.
- Avoid holding the iron in 1 spot longer than the recommended time or you could melt the vinyl.
- If you aren't able to press down hard enough on a folding ironing board, place your shirt on a cutting board instead to iron it.
-
7Remove the parchment paper and carefully peel off the plastic backing. After you’ve ironed the entire picture, gently begin pulling off the glossy plastic layer. The vinyl will stay on the shirt as you peel back the plastic.
- If you’re having difficulty removing the plastic, or if the vinyl starts coming up with it, lay the plastic back down and iron over it again.
- Some vinyl is “cold-peel,” meaning you have to wait until it cools to remove the plastic. Check the package to see if your vinyl is this type.
- To press the picture into your shirt even further, you can flip the shirt over after the peel off the plastic and run the iron over the backside of the design.
-
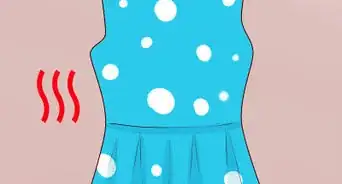
8Let the design set for 24 hours before you wash the shirt. Don't wash the shirt immediately following the transfer or the vinyl will peel or fade. Wait at least 24 hours, then wash the shirt inside out on a gentle cycle with cold water.
- Air dry the shirt or tumble dry it on a low heat cycle.


Working with Fabric Transfer Paper
-
1Print the picture's mirror image onto the clear side of the transfer paper. Place a sheet of fabric transfer paper in your printer just as you would a normal piece of paper. Make sure it's loaded so that the design will print on the clear side, not the white side. Your picture will be reversed when you transfer it, so flip the image 180 degrees horizontally on your computer before you print it. It should look backwards.[1]
- You can buy fabric transfer paper at a craft store or from an online retailer.
- Some printers have a “mirror” setting that you can select. This will automatically print the reverse image so you don’t have to manually reflect the picture.
- Printing on transfer paper only works with inkjet printers. You cannot use a laser printer.
-
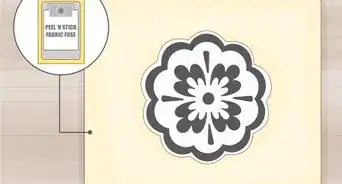
2Cut out your picture from the transfer paper. Use a sharp pair of scissors to cut as close to the edge of your picture as possible. This removes any extra paper that you don’t need to iron and makes it easier for you to line up the picture properly on the shirt.[2]
- You can leave a small border around the picture if you’d like. It won’t transfer onto your shirt.
-
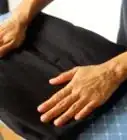
3Lay the picture on your shirt with the white side facing up. Decide where you want your picture to go, like in the center of the shirt or on the sleeve. Place the picture onto the fabric so that the clear side is facing down and smooth the paper out so it’s lying flush against the shirt.[3]
- If your shirt is very wrinkled, iron it before you place the picture on it. Otherwise, the picture may not transfer cleanly.
- You can place a sheet of cardboard underneath the area you'll be ironing to help keep the shirt perfectly flat.
-
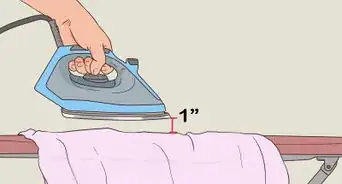
4Iron the paper for 2 minutes, moving from the center to the edges. After you line up your picture, firmly press the hot iron onto the middle of the paper. Run it over the entire paper, making sure to iron the edges, too. Pay special attention to any spots where your picture has a lot of color or details that need to be transferred.[4]
- Keep the iron moving constantly over the paper. If you hold it in 1 spot for longer than a few seconds, you could damage the fabric.
- Use the cotton setting on your iron and check that the steam setting is turned off before you begin.
- Read the directions on the back of the transfer paper package to find out the ironing times for your specific brand and type.
-
5Let the paper cool for 5 minutes before peeling off the white backing. Once the paper is cool to the touch, gently pull up 1 corner of the fabric transfer paper to check your image. If it looks like it's transferred properly, continue peeling off the rest of the paper.[5]
- If the image isn't clear or is very light, smooth the corner of the paper back down and iron it for another 2 minutes.
- Re-run the iron over any sections that don't lift off easily.
-
6Wait 24 hours before washing the shirt inside out. Give your transfer at least 1 full day to set before you wash it. When you put it in the washing machine, turn it inside out first to protect the picture. Run your shirt on a delicate cold cycle.[6]
- It's best to let the shirt air dry. If you do tumble dry it, use a low heat setting.
- Don’t iron over the picture again in the future once you remove the paper. It will cause the image to peel off quicker.


Things You’ll Need
Using Heat Transfer Vinyl with a Die Cutting Machine
- Heat transfer vinyl
- Die cutting machine
- Weeding tool or X-Acto knife
- Parchment paper
- Ironing board
- Iron
- Shirt
Working with Fabric Transfer Paper
- Printer
- Scissors
- Fabric transfer paper
- Iron
- Ironing board
- Shirt

References
- ↑ https://wolvesinlondon.com/2012/11/19/how-to-transfer-printed-images-onto-fabric/
- ↑ https://wolvesinlondon.com/2012/11/19/how-to-transfer-printed-images-onto-fabric/
- ↑ https://wolvesinlondon.com/2012/11/19/how-to-transfer-printed-images-onto-fabric/
- ↑ https://wolvesinlondon.com/2012/11/19/how-to-transfer-printed-images-onto-fabric/
- ↑ https://wolvesinlondon.com/2012/11/19/how-to-transfer-printed-images-onto-fabric/
- ↑ https://wolvesinlondon.com/2012/11/19/how-to-transfer-printed-images-onto-fabric/
About This Article