This article was co-authored by wikiHow staff writer, Jack Lloyd. Jack Lloyd is a Technology Writer and Editor for wikiHow. He has over two years of experience writing and editing technology-related articles. He is technology enthusiast and an English teacher.
The wikiHow Tech Team also followed the article's instructions and verified that they work.
This article has been viewed 610,897 times.
Learn more...
This wikiHow teaches you how to install the MySQL Server program on a Windows 10 computer. In order to install MySQL on a Windows computer, you must first have Python 2.7 (not Python 3+) installed.
Steps
Installing Python
-
1Open the Python download page. Go to https://www.python.org/downloads in your computer's web browser.
-
2Click Download Python 2.7.14. It's a yellow button at the top of the page. Python version 2.7.14 is the version that you'll need to use for MySQL.
- You cannot run MySQL using Python 3.
Advertisement -
3Double-click the Python setup file. You'll find it in your browser's default downloads location. Doing so opens the Python setup window.
-
4Navigate through the Python installation. The Python setup process is fairly straightforward:
- Click Next on the first page.
- Click Next on the "Select Destination Directory" page.
- Click Next on the "Customize" page.
-
5Click Yes when prompted. Doing so will cause Python to begin installing.
- The Python installation should only take a few seconds.
-
6Click Finish. This option appears when Python has been installed successfully. Now that Python 2.7 is installed, you can proceed with installing MySQL.


Installing MySQL
-
1Open the MySQL Server download page. Go to https://dev.mysql.com/downloads/windows/installer/8.0.html in your computer's web browser. This will take you to the download site for the community version of MySQL Server.
-
2Click the bottom Download option. This blue button is at the bottom of the page.
- Make sure to click the bottom Download button and not the top one here.
-
3Scroll down and click No thanks, just start my download. It's a link near the bottom of the page. The MySQL setup file will download onto your computer.
-
4Double-click the setup file. Doing so prompts the MySQL setup window to open.
-
5Click Yes when prompted. This will confirm that you want to proceed with installing MySQL, which will open the MySQL launcher window.
- You may have to do this twice before proceeding.
-
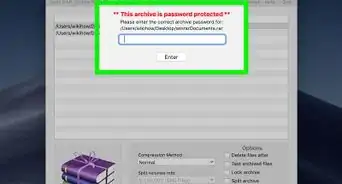
6Check the "I accept the license terms" box. It's in the bottom-left side of the launcher window.
-
7Click Next. This is at the bottom of the window.
-
8Check the "Full" box. It's in the middle of the page.
-
9Click Next. This option is at the bottom of the page. Doing so will save your installation preferences.
-
10Click Next on the "Requirements" page. It's at the bottom of the page.
-
11Click Execute. This button is at the bottom of the window. Doing so will prompt MySQL to begin installing onto your computer.
-
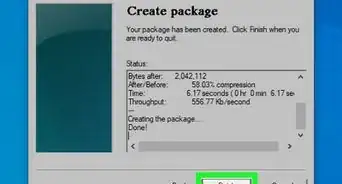
12Wait for MySQL to finish installing. Once each of the options in the "Installation" window have checkmarks next to them, you can proceed with setting up MySQL.


Setting up MySQL
-
1Navigate through the first few pages. The first five pages of the MySQL setup are optimized for most Windows computers, so you can just click through them:
- Click Next when the installation completes.
- Click Next on the configuration page.
- Click Next on the "Group Replication" page.
- Click Next on the "Type and Networking" page.
- Click Next on the "Authentication Method" page.
-
2Create a MySQL password. Type your preferred password into the "MySQL Root Password" text box, then re-enter the password in the "Repeat Password" text box.
-
3Add an administrator account. This will be the non-root account that you can use to do things like add users, change passwords, and so on:
- Click Add User in the lower-right side of the page.
- Type in your preferred username in the "Username" field.
- Make sure that the "Role" field has DB Admin selected; if it doesn't, click the "Role" drop-down box and then click DB Admin
- Enter a unique password for the user in the "Password" and "Confirm Password" boxes.
- Click OK
-
4Click Next. This is at the bottom of the page. Doing so confirms your password and user account.
-
5Click Next. It's at the bottom of the "Windows Service" page.
-
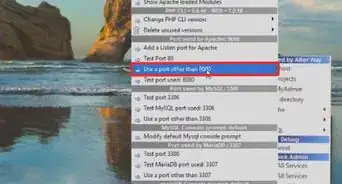
6Enable MySQL as a document store. You can skip this step by clicking Next if you like. Otherwise, do the following:
- Check the "Enable X Protocol / MySQL as a Document Store" box.
- Change the port number if necessary.
- Make sure that the "Open Windows Firewall port for network access" box is checked.
- Click Next
-
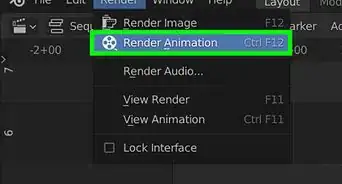
7Click Execute. It's at the bottom of the window. Your MySQL installation will begin configuring itself.
-
8Click Finish. This option will become available when the configuration is complete.
-
9Configure the next attribute. Click Next at the bottom of the window, then click Finish. This will bring you to the final part of MySQL's setup, which is connecting to the server itself.
-
10Enter your root password. In the "Password" box near the bottom of the window, type in the password that you created at the beginning of this part.
-
11Click Check. It's at the bottom of the page. This will check your password and, if the password is correct, allow you to proceed.
-
12Click Next. This option is at the bottom of the page.
-
13Click Execute. Doing so will configure this part of your installation.
-
14Finish the product configuration. Click Finish, click Next at the bottom of the "Product Configuration" page, and click Finish in the bottom-right corner of the window. This will complete your MySQL setup and open the MySQL Shell and dashboard. You're now ready to begin using MySQL.


Warnings
- If you have Python 3 installed, MySQL will not recognize it as a valid source. You need to have Python 2.7 installed in order for MySQL to be properly configured.⧼thumbs_response⧽


About This Article
1. Install Python.
2. Download the MySQL Server for your operating system.
3. Run the setup file.
4. Accept the terms.
5. Follow the on-screen instructions to install.
6. Create a root password and admin account.
7. Enable MySQL as a document store.
8. Configure your network settings.