X
wikiHow is a “wiki,” similar to Wikipedia, which means that many of our articles are co-written by multiple authors. To create this article, volunteer authors worked to edit and improve it over time.
This article has been viewed 2,588 times.
Learn more...
Windows Subsystem for Linux (WSL) is a feature of Windows 10 and 11 machines that allows for simultaneous running of both Windows and Linux at the same time. This works by adding a hypervisor layer between Windows and your machine that Linux then connects to. This wikiHow will show you how to install WSL on your machine.
Steps
Part 1
Part 1 of 3:
Enabling WSL from Windows Features
-
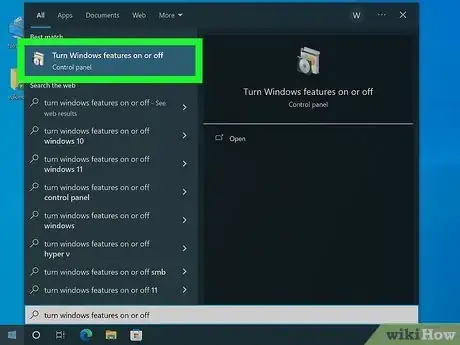
1Open the Windows Features dialog. To do so, search for "Turn Windows features on or off" from the taskbar then select it.
-
2Find "Windows Subsystem for Linux" from the features list. Make sure that box is checked.Advertisement
-
3Click OK. This will apply the feature changes to your machine.
-
4Restart your machine when prompted. To enable the new hypervisor, your computer will need to be restarted. Windows also has to change a few settings to make WSL work on your machine.
-
5Update WSL. Before use, you should update WSL to the latest version. To do so, run wsl --update in an elevated PowerShell or Command Prompt window.
- To start an elevated terminal, search for "Command Prompt" or "PowerShell" or "Windows Terminal", click "Run as administrator", and accept the elevation prompt. Windows Terminal will display a security shield after elevation is successful.
-
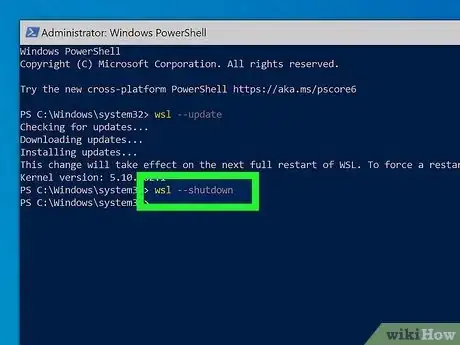
6Shut down WSL. Before the updated WSL can run, you have to terminate the process. This can be done with the command wsl --shutdown. Once WSL is shut down, you can start your Linux distribution and get all the latest features.
-
7Install a Linux distribution. You can install the default (Ubuntu) quickly by running the command wsl --install. To install a different Linux distribution, run the command wsl --install <distribution>.
- You can also visit the Microsoft Store to select a distribution of your pick.
-
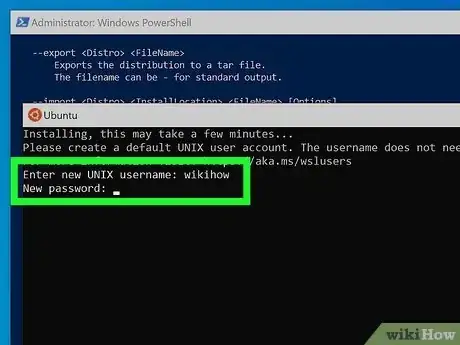
8Create an account on that distro. The account will be only for that one particular distro. If you install a different distro, it will require its own credentials. Type a username and set a password when prompted. After, you are all set to use that particular distribution.
Advertisement
Part 2
Part 2 of 3:
Enabling WSL from the Terminal
-
1Open a PowerShell window. This icon has a white arrow on a blue background.
-
2Attempt to install a Linux distribution. You can install the default (Ubuntu) quickly by running the command wsl --install. To install a different Linux distribution, run the command wsl --install <distribution>.
- You can also visit the Microsoft Store to select a distribution of your pick.
-
3Restart your machine when prompted. To enable the new hypervisor, your computer will need to be restarted. Windows also has to change a few settings to make WSL work on your machine.
-
4Update WSL. Before use, you should update WSL to the latest version. To do so, run wsl --update in an elevated PowerShell or Command Prompt window.
- To start an elevated terminal, search for "Command Prompt" or "PowerShell" or "Windows Terminal", click "Run as administrator", and accept the elevation prompt. Windows Terminal will display a security shield after elevation is successful.
-
5Shut down WSL. Before the updated WSL can run, you need to terminate the process. This can be done with the command wsl --shutdown. Once WSL is shut down, you can start your Linux distribution and get all the latest features.
-
6Launch your Linux distribution. To do so, type the command wsl without any parameters. You can also search for your Linux distribution from the search box by typing in the name of the distribution you installed and clicking it.
-
7Create an account on that distro. The account will be only for that one particular distro. If you install a different distro, it will require its own credentials. Type a username and set a password when prompted. After, you are all set to use that particular distribution.
Advertisement
Part 3
Part 3 of 3:
Verifying the Install Worked
-
1Open WSL. To do so, run the command wsl, either from the run box or from a terminal window.
-
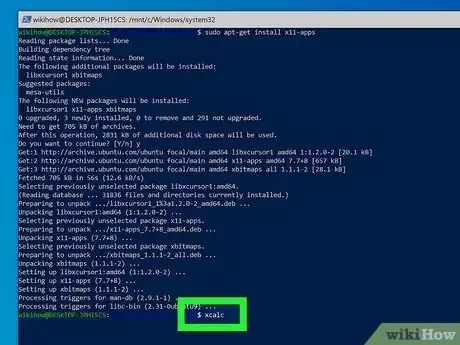
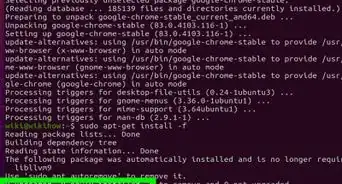
2Install x11-tools. To do so, first run the command sudo apt-get update to update the local package data, then run the command sudo apt-get install x11-tools to install.
-
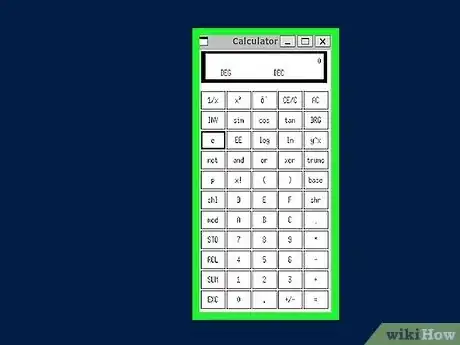
3Open Xcalc. Xcalc is a basic calculator app that you can use to see if your WSL installation is working. To run it, type xcalc into the WSL bash window. This will open the calculator.
- GUI apps only work on WSL2 with WSLg.
-
4Try dragging the calculator around and resizing it. You can also try inputting in a calculation, like 1 + 2. If you can do this, then it means that your WSL machine is working.
-
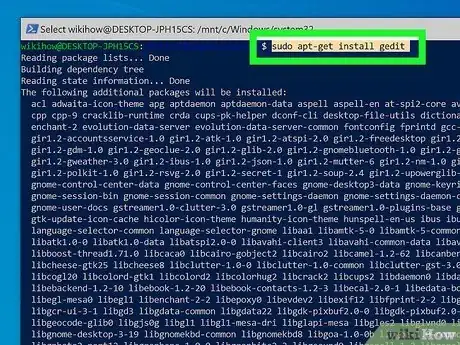
5Install some other packages. You can install most apps and packages by running the command sudo apt-get install <package_name>. Some common packages that are installed include gedit, nautilus, and firefox. Other packages include those used for development like Python or Apache Server.
Advertisement
About This Article
Advertisement
