This article was co-authored by Mia Danilowicz. Mia Danilowicz is a Master Tailor who works onset and on the red carpet in Los Angeles, California. With over a decade of experience, Mia specializes in bridal and gown couturier fittings, garment reconstruction, and custom design. Mia has worked at the Oscars, Grammys, SAG Awards, and Golden Globes. Her clients include a long list of entertainment and fashion industry headliners, major fashion magazines, luxury consumer brands, and popular media. Mia was trained at the Fashion Institute of Design and Merchandising and received her AA in Fashion Design and BS in Business Management.
This article has been viewed 43,767 times.
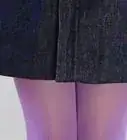
A rolled hem is a popular stitch for delicate fabrics and projects, such as scarves, napkins, and handkerchiefs. This stitch involves stitching in two locations on the folded edge of fabric and then pulling the stitches to roll them. It is a simple, yet elegant stitch. Learn the rolled hem stitch so you can use it for all of your delicate hemming needs.
Steps
Starting the Hem
-
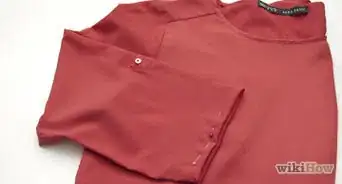
1Trim any uneven edges or hanging threads. It is important to make sure that the edge of your fabric is even and not frayed. Use a pair of sharp scissors to trim along the edge of your fabric as needed.[1]
- To ensure a straight edge, you may want to trim about 1/8 to 1/4 inch of fabric from the edge before you begin sewing the rolled hem.
-
2Thread a needle. It is important to use a needle and thread that are appropriate for the type of fabric you are sewing. Rolled edges are popular with delicate projects like scarves and handkerchiefs, so you may want to use a fine needle and fine thread.
- Try using a straw needle in size 11 with some delicate thread.[2]
- Thread the needle by inserting the end of the thread through the eye of the needle.
- Tie a couple of knots at the end of the thread to anchor it in place when you begin sewing.
Advertisement -
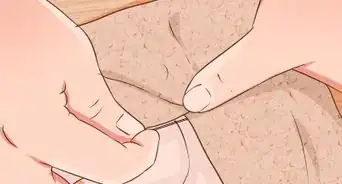
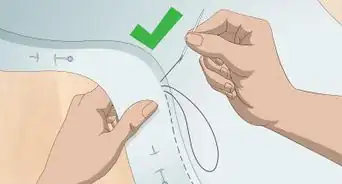
3Insert the needle into the corner of the fabric. To secure your thread and hide the knot, insert the needle into the wrong side of the fabric. Push the needle through near the corner of the fabric. After you fold down the fabric and complete your first few stitches, the knot will be hidden.[3]
- Some sewers do not recommend knotting the thread to secure it out of concern for the fabric. Instead, they recommend allowing the stitches to hold the thread in place.[4] If you are concerned about the knot damaging your fabric, then you can try starting the stitch without a knot. You will just need to take care not to let the end of the thread pull through. After several stitches, your thread should be secured.
-
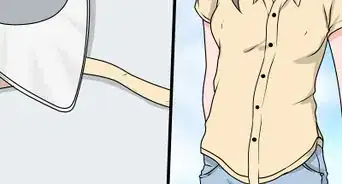
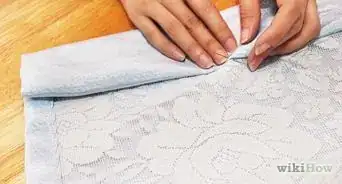
4Fold over the edge of your fabric. Next, fold over the edge of your fabric by about 1/8 of an inch. There is no need to secure it in place with pins, which may damage delicate fabric. However, it is a good idea to crease the fabric, such as by pressing the edge with an iron.[5]
- Keep in mind that pressing with an iron is optional. You can also crease the edge with your fingers or use a coin to crease the edge if ironing is not an option.
- Be careful when creasing or pressing delicate fabric. You may want to lay a piece of scrap fabric over the fabric and crease or iron through the extra fabric to protect it.


Creating the Rolled Hem
-
1Insert the needle into fabric just below the raw edge. Your thread should be coming out of the right side of the fabric from securing the knot. Bring the needle up and over the top of the folded edge and then insert the needle near the bottom of the raw edge.[6]
- The needle does not need to go all the way through the fabric. It is okay if you just catch a few threads.[7]
-
2Go through the fabric near the top edge of the fold. Next, insert the needle near the top edge of the fold.[8] This is the second stitch location for the rolled hem stitch.
- After you go through the top, go back through the bottom again. Repeat this pattern about every 1/4 inch (1cm).
- Continue to alternate between stitching at the bottom and top of the fold for three to five stitches. These two stitches work together to create the rolled hem.
-
3Pull the thread after about three to five stitches. After you have completed three to five stitches, you can tug the thread to roll the hem. Gently tug on the thread to tighten the stitches. By tugging on the thread, you will be pulling the two edges together and this is what creates the rolled hem.[9]
- Tug the thread to tighten the stitches about every three to five stitches.
- Continue to stitch and tug until your project is complete.


References
- ↑ https://www.youtube.com/watch?v=0Dt_5vnOJ_E
- ↑ http://www.threadsmagazine.com/item/43496/video-sew-a-hand-rolled-hem
- ↑ https://www.youtube.com/watch?v=0Dt_5vnOJ_E
- ↑ https://feltmagnet.com/textiles-sewing/How-to-sew-a-rolled-hem
- ↑ http://www.threadsmagazine.com/item/43496/video-sew-a-hand-rolled-hem
- ↑ https://feltmagnet.com/textiles-sewing/How-to-sew-a-rolled-hem
- ↑ http://www.threadsmagazine.com/item/43496/video-sew-a-hand-rolled-hem
- ↑ https://feltmagnet.com/textiles-sewing/How-to-sew-a-rolled-hem
- ↑ https://feltmagnet.com/textiles-sewing/How-to-sew-a-rolled-hem
About This Article