This article was co-authored by Meredith Juncker, PhD. Meredith Juncker is a PhD candidate in Biochemistry and Molecular Biology at Louisiana State University Health Sciences Center. Her studies are focused on proteins and neurodegenerative diseases.
wikiHow marks an article as reader-approved once it receives enough positive feedback. This article received 32 testimonials and 87% of readers who voted found it helpful, earning it our reader-approved status.
This article has been viewed 616,081 times.
Ever wanted to grow bacteria for a science project or just for fun? It's surprisingly simple! All you need is some nutrient agar (a special gelatinous growing material), a number of sterilized Petri dishes, and some disgustingly good sources of bacteria!
Steps
Preparing the Petri Dishes
-
1Prepare the agar. Agar is a jelly-like substance used to culture bacteria. It is made from a type of red algae, which provides an ideal growing surface for many different types of bacteria. Some types of agar contain added nutrients (such as sheep's blood and others) which help to promote more vigorous bacterial growth.[1]
- The easiest type of agar to use in this experiment is a nutrient agar which comes in powder form. You will need as much agar as you need, but don't use less than 1.2 grams (½ teaspoon) of agar powder for every 10 centimetres (3.9 in) Petri dish you wish to use.
- In a heatproof dish or bowl, stir 1.2 grams (½ teaspoon) of the nutrient agar powder into 60 millilitres (0.25 c) of hot water. Multiply these quantities by however many Petri dishes you plan on using.
- Place the bowl or dish in the microwave and let it begin to boil for 1 or more minutes, watching to make sure that the agar solution doesn't boil over.
- When the solution is ready, the agar powder should be completely dissolved and the liquid should be clear in color.
- Allow the agar solution to cool for several minutes before proceeding. You don't want to get burnt!
-
2Prepare the Petri dishes. Petri dishes are small flat-bottomed containers made of clear glass or plastic. They have two halves - a top and a bottom - which slot into one another. This protects the contents from any unwanted contaminated air, but also allows any gasses produced by the bacteria to escape.[2]
- Petri dishes must be completely sterilized before they are used for growing bacteria, otherwise, the results of the experiment could be affected. Newly purchased Petri dishes should come pre-sterilized and sealed in plastic packaging.
- Remove the Petri dish from its packaging and separate the two halves. Very carefully, pour the warm agar solution into the bottom half of the Petri dish - just enough to form a layer over the bottom of the dish. Work in the presence of a candle with a tall flame or a Bunsen burner to keep contamination low.
- Quickly replace the top half of the Petri dish to prevent any airborne bacteria from contaminating the experiment. Set the Petri dishes aside for 30 minutes to 2 hours, until the agar solution cools and hardens (when it’s ready it will resemble set Jell-O).
Advertisement -
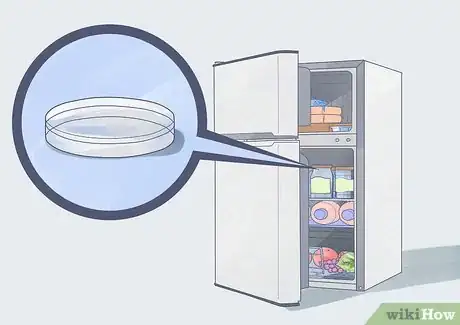
3Refrigerate the Petri dishes until ready to use. If you don't plan on using the agar-filled Petri dishes immediately, they should be stored in the refrigerator until you are ready to proceed with the experiment.[3]
- Storing the Petri dishes in the refrigerator prevents the water inside the dishes from evaporating (bacteria need a moist environment to grow). It also allows the surface of the agar to harden slightly, which prevents any tearing or gouging when you transfer your bacteria samples.
- When storing Petri dishes in the refrigerator, the dishes should be placed upside down. This helps to prevent any condensation on the lid from dropping down and disrupting the growing surface.
- Agar-filled Petri dishes will keep in the refrigerator for as long as a couple of months. When you are ready to use them, remove them from the refrigerator and allow them to reach room temperature before introducing your samples.
Growing Bacteria
-
1Introduce bacteria to the Petri dishes. Once the agar solution has hardened and the Petri dishes are at room temperature, you are ready for the fun part - introducing the bacteria. There are a couple of methods of doing this - through direct contact or through sample collection.[4]
- Direct contact: This is when bacteria are transferred to the Petri dish using direct contact, i.e. touching the agar. One of the most common ways of doing this is to simply press your fingertip (either before or after washing your hands) lightly onto the surface of the agar. However, you could also try pressing a fingernail or the surface of an old coin into the agar or even placing a small hair or drop of milk into the dish. Use a sterile cotton swab if you have one available. Use your imagination!
- Sample collection: With this method, you can collect bacteria from almost any surface and transfer it to the Petri dish, all you need are some clean cotton swabs. Simply grab a swab and swipe it over of any surface you can think of - the inside of your mouth, a door handle, the keys on your computer keyboard, or the buttons of your remote control - then use it to streak the surface of the agar (without tearing it). These places harbor a lot of bacteria and should provide some interesting (and disgusting) results in a couple of days time.
- If you like, you can place more than one sample of bacteria in each Petri dish - all you need to do is divide the dish into quadrants (quarters) and swipe a different sample of bacteria in each of them.
- It is recommended that you keep one quadrant of the Petri dish free of bacteria samples to use as a control group. This allows you to know if the agar had been contaminated prior to the introduction of bacterial samples.
-
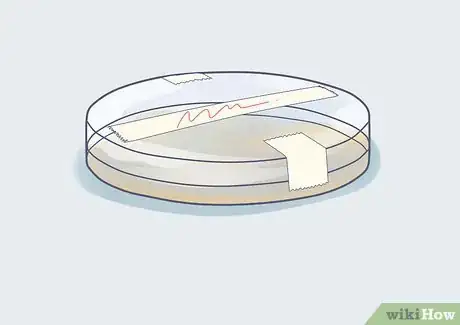
2Label and seal the Petri dishes. Once you have introduced the bacteria, you should replace the lid on the Petri dish and seal it with some parafilm or Saran wrap.[5]
- Make sure to label each Petri dish with the source of the bacteria it contains, otherwise you won't be able to tell which is which. You can do this using some tape and a marker.
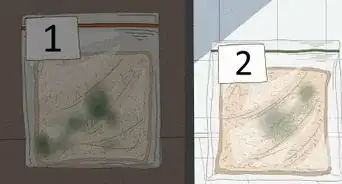
- As an extra precaution, you can place each Petri dish in a zipper-lock bag. This will provide an extra layer of protection against any hazardous bacteria colonies that may develop, but will still allow you to view the contents of the Petri dish.
-
3Place the Petri dishes in a warm, dark place. Leave the Petri dishes in a warm, dark place where the bacteria can develop, undisturbed, for several days. Remember to store the dishes upside down, so the bacterial growth remains undisturbed by any water droplets.[6]
- The ideal temperature for growing bacteria is between 70 and 98 degrees F (20-37 degrees C). If necessary, you can place the Petri dishes in a cooler location, but the bacteria will grow a lot more slowly.
- Leave the bacteria to develop for 4-6 days, as this will give the cultures enough time to grow. Once the bacteria begins to grow, you may notice a smell coming from the dishes.
-
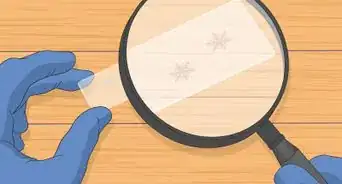
4Record your results. After a couple of days, you will notice an amazing variety of bacteria, molds and fungi growing inside each Petri dish.
- Use a notebook to record your observations on the contents of each dish and perhaps come to a conclusion about which locations had the most bacteria.
- If you like, you can measure the daily growth of the bacteria colonies by using a felt-tip marker to trace a circle around each colony on the bottom of the Petri dish. After several days, you should have a collection of concentric rings on the bottom of each dish. This will help you count and record the data.
-
5Test the effectiveness of antibacterial agents. An interesting variation of this experiment is to introduce an antibacterial agent (hand sanitizer, soap, etc.) to the Petri dish in order to test its effectiveness.[7]
- Once you have introduced bacteria to the Petri dish, use a cotton swab to place a small drop of hand sanitizing gel, disinfectant soap, or household bleach into the center of the bacteria sample, then continue the experiment as normal.
- As the bacteria in the dish grows, you should see a ring or "halo" around the spot where you placed the antibacterial agent where no bacteria is growing. This is known as the "kill zone" (or more accurately, the "zone of inhibition").
- You can measure the effectiveness of different antibacterial agents by comparing the size of the kill zones in each Petri dish. The wider the kill zone, the more effective the antibacterial agent.
Safely Disposing of the Bacteria
-
1Take the proper safety precautions. Before you attempt to dispose of your Petri dishes, you first need to take the proper safety precautions.[8]
- Although most of the bacteria you grow will not be hazardous, large bacteria colonies may pose more of a risk - so you will need to kill them before disposal using household bleach.
- Protect your hands from the bleach by wearing rubber gloves, protect your eyes with plastic goggles and protect your clothes by wearing an apron.
- Cover open cuts with rubber gloves and avoid ingesting or breathing in the bacteria as it grows.
-
2Pour bleach into the Petri dishes. Open the Petri dish and carefully pour a small amount of bleach on top of the bacteria colonies, holding the dish over a sink. This will destroy the bacteria.[9]
- Be very careful not to let any of the bleach touch your skin, as it will burn.
- Then place the disinfected Petri dish into a ziplock plastic bag and dispose of the bag in the trash.
Expert Q&A
Did you know you can get expert answers for this article?
Unlock expert answers by supporting wikiHow
-
QuestionCan you reuse petri dishes?
 Meredith Juncker, PhDMeredith Juncker is a PhD candidate in Biochemistry and Molecular Biology at Louisiana State University Health Sciences Center. Her studies are focused on proteins and neurodegenerative diseases.
Scientific Researcher While it is generally recommended to use fresh dishes for each experiment, it is possible to reuse dishes if needed. Sterilization methods will vary depending on the material of your dish (glass vs. plastic). If your plastic Petri dishes were used to harvest live pathogens, it is recommended to use a new dish as the risk of cross-contamination is high.
 -
QuestionWhere or how do you get nutrient agar? Or do you need to use agar for this project?
 Community AnswerTo grow bacteria in a lab-like setting, you need agar. You can find it online or through a science supply store.
 -
QuestionHow do I find the effect of hand washing on microbial growth?
 Community AnswerUsing two sets of petri dishes, create one group of bacteria samples taken before washing your hands and one group taken after washing your hands. Compare growth of the bacteria between groups over time.
Warnings
- Melted agar is very hot and sticks to your skin, meaning it could give you serious burns if touched.⧼thumbs_response⧽
- Never put anything in the dish which is likely to grow into dangerous bacteria (bodily fluids should never be placed on a Petri dish). If the dish is reopened it could cause serious illness.⧼thumbs_response⧽
References
- ↑ http://www.stevespanglerscience.com/lab/experiments/growing-bacteria
- ↑ https://learning-center.homesciencetools.com/article/bacteria-experiment-guide/
- ↑ https://www.sciencecompany.com/Bacteria-Growing-Experiments-in-Petri-Plates.aspx
- ↑ https://www.giftofcuriosity.com/growing-bacteria-in-a-petri-dish-stem-activity-for-kids/
- ↑ https://www.sciencecompany.com/Bacteria-Growing-Experiments-in-Petri-Plates.aspx
- ↑ https://www.sciencecompany.com/Bacteria-Growing-Experiments-in-Petri-Plates.aspx
- ↑ https://learning-center.homesciencetools.com/article/bacteria-experiment-guide/
- ↑ https://www.sciencecompany.com/Bacteria-Growing-Experiments-in-Petri-Plates.aspx
- ↑ https://sciencing.com/sterilize-petri-dishes-5892646.html
About This Article
If you want to grow bacteria in a petri dish, prepare an agar by mixing 1/2 teaspoon of agar powder with 1/4 cup of water. Place the mixture in the microwave for 1 minute until the water boils, and then let it cool to room temperature before pouring the mixture into the dish. Move the dish to the refrigerator until you need them, and then introduce the bacteria by rubbing a swab or dropping liquid onto the agar. Then, use a piece of tape to label and seal the dish, and place it in a dark, warm place for 4-6 days to grow the bacteria. For tips on recording your results and getting rid of the dishes, read on!


-Step-9.webp)


-Step-9.webp)


