This article was co-authored by Marta Nagorska. Marta Nagorska is a Nail Technician and Nail Art Blogger based in London, UK. She runs the blog, Furious Filer, where she gives tutorials on nail care and advanced nail art. She has been practicing nail art for over 5 years and graduated from Northampton College with distinction with a Nail Technician and Manicurist degree in 2017. She has been awarded the top spot in the OPI Nail Art Competition.
This article has been viewed 93,512 times.
Whether you're practicing for your new salon business or just having a sleepover, knowing how to give someone else a manicure can help them feel relaxed and beautiful and help you hone a skill. Put on some music, grab your nail kit, and let's get started.
Steps
Prepping the Nails
-
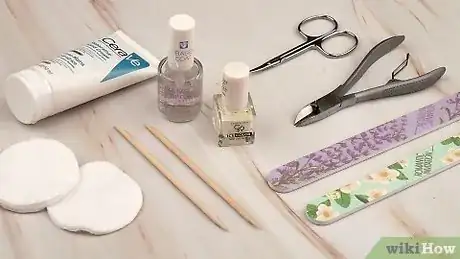
1Gather everything you'll need. You'll be much happier if you have everything right next to you as you go about giving your manicure over the next 15 minutes or so. No getting up and sloshing around, no running around trying to time everything just rights – it's all just right there. Be sure to grab:
- Your base coat, nail polish, and top coat
- Nail polish remover
- Cotton swabs
- A small tray with warm water and soap
- Moisturizer
- Nail scissors
- Nail file
- Cuticle pusher or cuticle remover
-
2Remove any existing nail polish. Take a couple cotton balls, or a washcloth and dip it into a nail polish remover. Gently wipe away the nail polish, being sure to get into the nooks and crannies. Then, wash your hands real quick, just to get rid of the smell.[1]
- It's best to use 100% acetone. It'll smell and leave your friend's hands a little gray, but that comes off easily with soap and water (which you'll do next). 100% acetone makes the job go much, much quicker.
- Alternatively, you could use a dip-it tub of acetone. It's full of pink, rubbery bristles that do the job for you. Hard-to-get-off nail polish can even be gone in a couple of minutes with this kind of tub.
Advertisement -
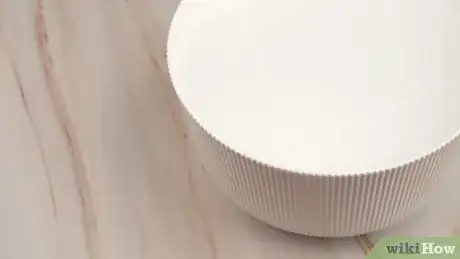
3Fill a tray with sudsy liquid. Take a small tray and fill it with warm water (make sure it's not too hot). Add in a gentle soap that smells good and moisturizes the skin. This will help with the acetone odor and graying effect and loosen up the dead skin on the nails and cuticles.
- If you'd like and have one available, consider using a scrubbing brush with the warm soap and water. This exfoliates the skin and leaves it bright and glowing.[2]
- A mild face cleanser can work as your soap, too. Even a mild dish detergent can do the job.
-
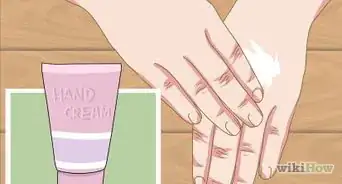
4Soak the person's fingers. Most manicure trays are only for one hand at a time. So while one hand is soaking, you can massage and moisturize the other. Use a scented lotion or massage oil and rub the hand for a few minutes to give the other adequate time to soak.
- After a few minutes, switch hands, placing the newly-moisturized hand into the tray of water. Spend a few minutes massaging the second hand, and then move onto the next step.
Shaping the Nails
-
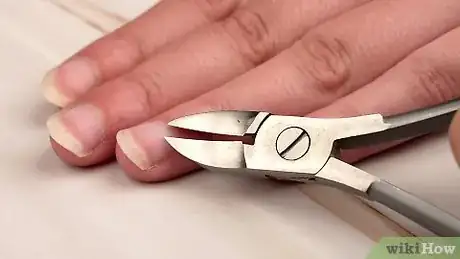
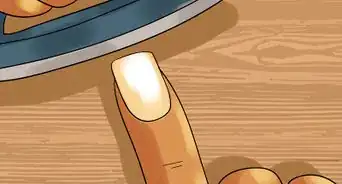
1Trim the person's cuticles. Use a special nail trimmer to trim the skin around the cuticle. But be careful – too rough and you'll cause the cuticle to bleed. You could also use a cuticle remover gel. This is a liquid that should just be left on the skin for a few seconds. It eats away at the dead skin, making it easier to come off. It's good for callouses, too.
- Be sure to time this right. You don't want to go so fast that you cut their skin and cause injury, but you don't want to go slow the other hand starts wrinkling. After a few minutes you may wish to take the other hand out of the water, pat it dry, and go back to finishing the first hand.
-
2Push the person's cuticles back. Use a rubber cuticle pusher and gently push the cuticles back.[3] This will make the nails appear longer and cleaner. Make sure all the loose skin is removed and give both hands a once-over.
- Some people like to moisturize the cuticles after this stage. If you do this, just be sure you wipe off any residue with nail polish remover before you begin painting the nails.
-
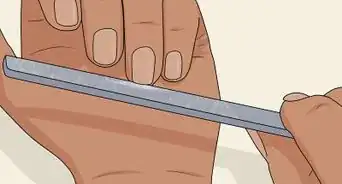
3File the person's nails. File the nails how your friend would like them. Curved? Square? Somewhere in between? Make sure they're uniform in length, too.[4] Ask your friend what they like and go from there.
- Be sure to file in one direction to keep the nail as strong as possible.[5] Be sure to take your time; get too hasty and you'll end up making it shorter than intended – and then you'll have to shorten the rest, too.
- An emery board (a nail file) with a grit of 240 is a good place to start if you're unsure.
Applying the Color
-
1Apply a base coat. It's important to start off with a clear base coat applied thinly, smoothly, and carefully. Some base coats act as adhesives that help to retain the nail color and make it last longer, preventing chipping. Others are nail thickeners, which brittle nails sorely need. Talk to your friend – which is more up their alley?
- Just one layer is plenty. Base coats also don't take that long to dry, so don't feel the need to take a break. By the time you hit the tenth nail, the first nail should be ready for color.
-
2Pick a polish. Ask your friend which color they would like and begin applying two coats evenly on each nail. Make the layers thin – thin layers look better than one gloopy one. Start on the same finger as you did with the base coat and work your way over. Take your time, applying evenly and thoroughly. One swipe down the center, and one on the left and right for each finger.[6]
- If you wind up getting color on the skin, take a small cotton swab dipped in nail polish remover and very carefully wipe it off, not touching the nail.
- Alternatively, take your own nail to lightly scrape off the not-yet-dried nail polish as soon as it hits the wrong place.
- Has your friend requested a French manicure? You can read about it here.
-
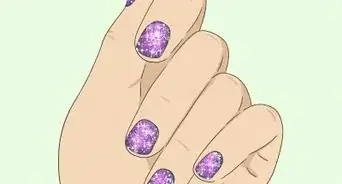
3Apply nail art if requested. The wide world of nail polish is getting wider and wider. If you have gems, tape, and other nail art equipment, why not try it out on your friend? You could also take a toothpick and make fancy designs. After all, the only way to improve is to practice.
- If your friend isn't sure if they want nail art, suggest just doing it on one finger. They can try it out, and the one-finger look is actually super trendy if they wish to keep it that way.
- Need ideas? Try reading wikiHow's article on how to do nail art.
-
4Apply a topcoat. To seal in the color and prevent chipping, add on a topcoat.[7] This also makes it super shiny and eye-catching. Keep this layer thin, however; another gloopy layer shiny though it may be won't make the nails look any better.
- Your friend should reapply a topcoat every day or so if they want the color to last longer.
Sealing the Manicure
-
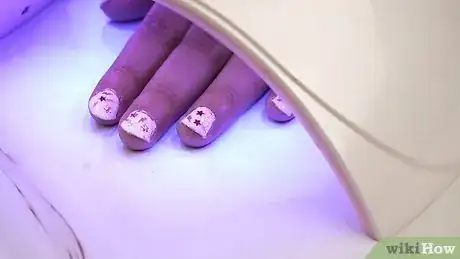
1Put the nails under a light source. If you're fancy, put your friend's nails under a small lamp, like a manicure lamp. Put on some music and come back to check their nails in about ten minutes. It's always better to spend a little longer in the heat than not enough time and have them smudge on the way out.
-
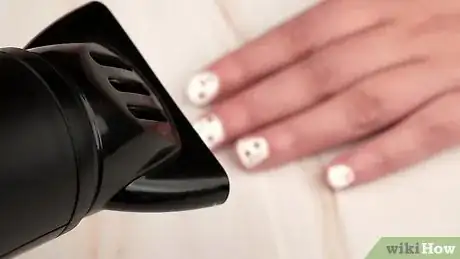
2Alternatively, use a fan or a blow dryer. Nothing is worse than going through all of the trouble to make beautiful nails, then having them destroyed a minute later. So if you can, put a fan in front of your nails and keep them there for about 20 minutes.
- Blow dryers go a little bit faster if you're pressed for time. Turn the heat on medium and move the blow dryer back and forth, making sure the hot bursts of air reach every nail. After about five minutes, check the nails, and keep going if necessary.
-
3Or just sit still. Are you killing time at a sleepover? As long as the person can sit still for 20 to 30 minutes, that'll be fine. Don't let her do much – pop in a movie, grab her a drink, and keep her away from the popcorn if need be. You've put way too much work in for them to be ruined on the spot!
- Once dry, you may wish to moisturize a bit more, especially if you didn't do so after the cuticle stage.Use a nice scented lotion lightly over the fingers and into the cuticles, keeping them hydrated and healthy.
Expert Q&A
Did you know you can get expert answers for this article?
Unlock expert answers by supporting wikiHow
-
QuestionHow do I do someone else's nails?
 Marta NagorskaMarta Nagorska is a Nail Technician and Nail Art Blogger based in London, UK. She runs the blog, Furious Filer, where she gives tutorials on nail care and advanced nail art. She has been practicing nail art for over 5 years and graduated from Northampton College with distinction with a Nail Technician and Manicurist degree in 2017. She has been awarded the top spot in the OPI Nail Art Competition.
Nail Artist
-
QuestionShould I trim my nails before a manicure?
 Marta NagorskaMarta Nagorska is a Nail Technician and Nail Art Blogger based in London, UK. She runs the blog, Furious Filer, where she gives tutorials on nail care and advanced nail art. She has been practicing nail art for over 5 years and graduated from Northampton College with distinction with a Nail Technician and Manicurist degree in 2017. She has been awarded the top spot in the OPI Nail Art Competition.
Nail Artist
-
QuestionWhat do I do if a nail tech files every nail a different length? She also did not buff or remove the old nail polish.
 Community AnswerShe's a bad nail tech. Try to get a better one. Look at review sites to find one near you.
Warnings
- Be extra careful when using nail clippers.⧼thumbs_response⧽
- If acetone comes in contact with your eye, immediately flush your eye out with cold water for 20 minutes. If it comes in contact with your mouth and you happen to drink it, don't force yourself to vomit! Call poison control and do exactly what they tell you.⧼thumbs_response⧽
Things You'll Need
- Nail polish, topcoat, and base coat
- Nail file
- Cuticle trimmer or cuticle remover gel
- Cuticle pusher
- Bowl or tray with warm, soapy water
- Gems (optional)
- Acetone (nail polish remover)
- Cotton swabs
- Lotion
References
- ↑ Marta Nagorska. Nail Artist. Expert Interview. 29 July 2019.
- ↑ http://health.learninginfo.org/how-to-give-a-manicure.htm
- ↑ Marta Nagorska. Nail Artist. Expert Interview. 29 July 2019.
- ↑ Marta Nagorska. Nail Artist. Expert Interview. 29 July 2019.
- ↑ http://www.collegefashion.net/beauty-and-hair/how-to-give-yourself-a-flawless-manicure/
- ↑ http://www.paulaschoice.com/expert-advice/beauty-buzz/_/ten-steps-to-a-salon-quality-manicure-at-home
- ↑ Marta Nagorska. Nail Artist. Expert Interview. 29 July 2019.
