This article was co-authored by Mia Rubie. Mia Rubie is a Nail Artist and the Owner of Sparkle San Francisco, a nail studio based in San Francisco, California. She has over eight years of nail artist and management experience and is known for her push-the-envelope designs and artistic eye for colors. Her clients include Sephora, Target, and Vogue. Her work has been featured in the San Francisco Chronicle and StyleCaster. She holds a BBA focusing on Entrepreneurial and Small Business Operations from San Francisco State University. You can find her work on her Instagram account @superflynails.
wikiHow marks an article as reader-approved once it receives enough positive feedback. In this case, 80% of readers who voted found the article helpful, earning it our reader-approved status.
This article has been viewed 1,680,895 times.
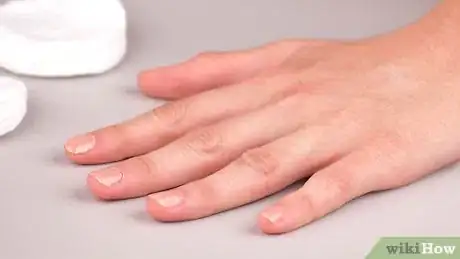
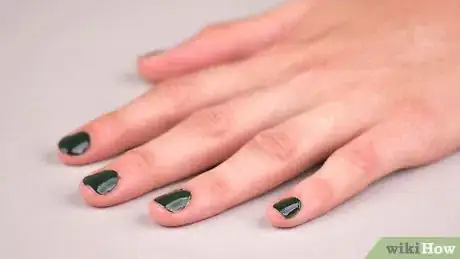
A fresh, beautifully done manicure helps you look clean and put together. But professional manicures can be expensive and time-consuming. Why go to the salon when you can give yourself a perfect manicure at home? Read on, to learn how.
Steps
Getting Your Nails Ready
-
1Get your supplies together. To give yourself a gorgeous manicure, make sure you have all the right supplies. You might have to spend a bit up front, but next time you want to paint your nails, you'll already be covered. Get the following products:[1]
- Nail polish remover
- Cotton balls or cotton swabs
- Nail buffer
- Nail trimmers
- Nail file
- Cuticle or hand cream
- Nail polish
- Base coat
- Top coat
-
2Set up your workspace. Nail polish and remover can damage many surfaces such as cloth, wood finish and plastic. Wear an expendable t-shirt and no valuable accessories, sit at a desk or table, and protect it with scrap paper (not newsprint, which smudges). Make sure the table itself and anything near it is not particularly valuable or important to keep perfect because there might be a spatter or spill soaking through. You might not want to work near a computer, for instance.Advertisement
-
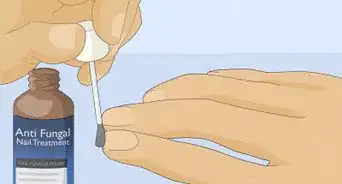
3Remove your old nail polish. Use nail polish remover and cotton balls or swabs. Some kinds of nail polish remover may dry the areas on your nails and around them. You may wish to find one that doesn't do this as much, but do not be concerned unless you have a severe allergic reaction.
- If you have and wish to keep fake nails, such as acrylic, choose a polish that will not remove them, and don't let it soak much.
- Unless you use it once a month or less, don't use a nail polish remover with acetone in it. Though acetone will make removing the nail polish easier, it can damage the nails themselves.
-
4Cut and file your nails. Use nail clippers and trim your nails. Don't cut them too short; you should be able to see at least a little of the white tip still, all the way across. Using a nail file, file the nail and create a smooth and clean shape. Gently drag the file across the nail, rather than pushing it. Excessive force or sawing back and forth will weaken the nails and cause them to break.[2] Pivot the hand with the file through each stroke to make a smooth curve rather than angles. Do not file them too short: just clean up any points or roughness left by the clippers.[3]
- If you want to remove fake nails, perhaps because they look odd from having grown out too far, here's how to do that.
- Do not round the corners down into the sides of the nail bed. This can cause the nail to become ingrown. Be particularly careful with the big toe, which, perhaps due to shoes, is more prone to ingrowing.
-
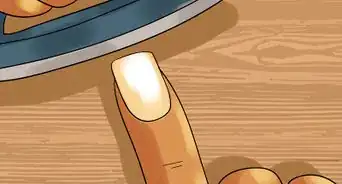
5Buff your nails. Using a white block of a stick-type nail buffer, or a pad-type nail buffer and buffing powder, buff the surface of the nail a little bit to even out the surface and to smooth out ridges. Remember not to buff too much; thinning it too much will weaken it.[4] Perfect edge-to-edge flatness is not practical or necessary. A soft, flexible buffer will more easily buff the sides of the nail along with the middle.[5]
- You may wish to buff your nails after pushing back the cuticles if there is some residue where the cuticles used to cover, in order to scrape or grind it off in the process. Being thin, soft, and not firmly attached, it should come off easily.
-
6Soak your nails. Get a bowl or stopper the sink and fill it with warm (not hot!) water and a few drops of soap. Soak your hands only for a few minutes. The water and soap will help to loosen dirt, dead skin, and any dust left over from filing and buffing, and soften cuticles. Use a nail brush to gently clean your nails and the skin around them. Gently scrape under your nails if necessary to remove dirt. If you want your nails and cuticles really manageable, you can soak them in Dawn dishwasher soap.[6]
- If you have dry skin or fragile nails you should not soak them; just rinse them.
- Don't go overboard with scraping, since you can damage your nails if you remove the white powdery substance that is actually part of your nails.
-
7Prepare your cuticles. Dry your nails and apply a cuticle cream. Using a cuticle pusher, also called an orange stick, gently push back the cuticle. Do not force them back, and never cut your cuticles. Even if the equipment is sterile, removing the cuticle can cause infection and leaves the then-less-protected margin of the skin vulnerable. Wipe off the excess cream with a tissue or towel in the direction that you pushed.[7]
- A small binder clip is great for pushing back cuticles. Make sure it's clean and well-formed, without sharp edges. Fold the wire grips to lay flat against each other. Hold the clip between the thumb and forefinger or middle finger by the flat metal sides, with the grips passing between in the direction of the little finger tip; the flat back piece extending past the thumb and forefinger. Now you're ready to push back the cuticles on the other hand (switch later to do the one currently holding the clip).
-
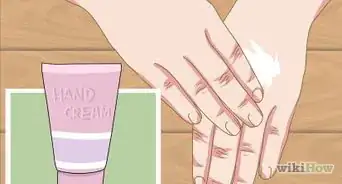
8Apply hand cream or lotion. Take a lotion or hand cream and massage it into your hands. If you have very dry skin use an intensive lotion, if not, any lotion will do. Be sure to rub it into and around your nails and let it soak in for 30 minutes or longer.
- This is as well done after painting the nails and allowing them to dry thoroughly as before painting. For very dry skin, apply some greasy lotion and sleep with cheap cotton gloves over your hands to allow it to remain on and work for a long time without keeping you from productive activities.
- Nail polish/lacquer will not stick to nails with moisturizer on them, so take a Q-tip dipped in nail polish remover and quickly wipe the nails to remove the lotion. Wipe excess remover off promptly to mitigate nail damage.
Painting Your Nails
-
1Apply the base coat. Cover the nail with a clear base coat or nail hardener. This will even out and ridges and unevenness that may still be on the nail, serve as a primer for the polish, help the polish to last longer, and keep the color from staining your nails.[8]
- This is the point at which you'd apply fake nails if you like.
- Let the coat completely dry before proceeding.
-
2Polish your nails. Pick a nail polish that you really like. Roll the nail polish bottle between your hands for about 10 seconds. Shaking the bottle causes air bubbles in the polish and makes harder for the polish to stick to your nails. Begin painting nails using a thin coat. Dip the brush into the bottle of polish and as you remove it, gently swirl the brush around the inside rim of the bottle to remove excess polish. Slowly paint a vertical stripe down the center of your nail, followed by another stripe on either side of the first. Try to paint all the way to the edge, but it's better to leave a small margin than paint the skin on the side.[9]
- Angle the brush a little forward, press gently so the bristles spread out a little into a neat curve, and drag it gently and smoothly across the nail to paint it. Do not apply a blob of paint to the nail and spread it around. Blobs or runs mean too much paint or painting too slowly; subtle ridges should smooth themselves out under gravity (self-level) but very-thin spots mean too little paint or too much pressure.
- Fancy designs can be difficult, so stick with simple if it's important to get a good result the first time.
- If there is a little bit of nail polish on your fingers or around you nail you can use a toothpick (flat, not round and pointy, is generally best) to get it off if it's still wet. If it's already dry, dip a Q-tip in nail polish remover and wipe it away, or use a nail touch up pen, sold at most drugstores. Be careful not to touch the actual nail with the Q-tip or touch up pen, or you will have to redo that nail.
-
3Let your nails dry. Try not to move your nails too much or the polish may smudge. Wait 10 to 15 minutes for the polish to dry. If you apply a second coat too soon, it will only smudge the first coat. You may be able to speed drying with a fan, but don't be overly optimistic. By blowing the fumes away, the fan will remove one reminder of continuing wetness.
- After the first coat has dried, apply a second coat if you'd like. This ensures the color looks rich and even.
- After the color coats have dried, you may add designs, by brush, airbrush, mask or stencil, decal, rhinestones, or otherwise.
- Skipping the base coat, or even applying only one color coat (depending on the kind of polish and application technique; some give or appear to give more even color with uneven thickness than others), will often give acceptable results. However, extra layers add a little extra to initial surface quality.
-
4Apply the top coat. Finish with a clear top coat for a hard, smooth, scratch-absorbing, chip and flake-resistant shield particularly important for designs that don't cover the entire nail, as well as adding shine. Let it dry completely. Have fun and enjoy your newly beautiful nails![10]
Trying Variations
-
1Do splatter paint nails. This fun variation has the appearance of multicolored paint splatters on top of a surface color.
-
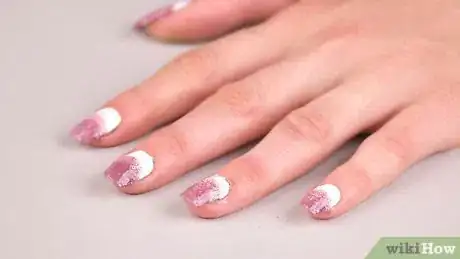
2Do ombre nails. Fade from a light color to a darker color to make your nails look intriguing and totally fashionable.
-
3Do a French manicure. This classic style emphasizes your nail's white tips while retaining the natural color of your nail bed.
-
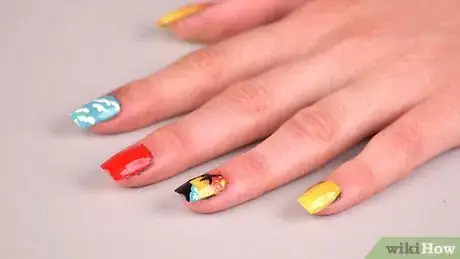
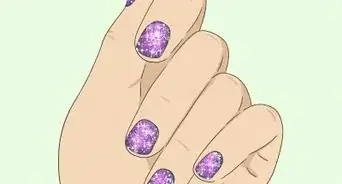
4Add some flair. Paint a layer of glitter, crack polish, shimmer, or another pretty polish to make your manicure stand out even more.
-
5Make tiny nail art flowers. You'll need several colors in addition to your base coat to make this pretty little design.
-
6Do the tuxedo. This striking design uses two colors, giving the effect of a tuxedo against a white shirt.
-
7Make beachy nails. This cute design is a great way to celebrate the summer months.
-
8Make miniature strawberries. You'll love the effect of these tiny red berries on your nails.
Expert Q&A
-
QuestionHow do I keep my nail polishes from drying out?
 Mia RubieMia Rubie is a Nail Artist and the Owner of Sparkle San Francisco, a nail studio based in San Francisco, California. She has over eight years of nail artist and management experience and is known for her push-the-envelope designs and artistic eye for colors. Her clients include Sephora, Target, and Vogue. Her work has been featured in the San Francisco Chronicle and StyleCaster. She holds a BBA focusing on Entrepreneurial and Small Business Operations from San Francisco State University. You can find her work on her Instagram account @superflynails.
Nail Artist Tighten the bottle really tightly, and then keep them out of direct sunlight. I keep all of my polishes in a plastic bag in my closet. That keeps the air out too, which can also cause a polish to dry out.
 -
QuestionWhat order should I go with the different nail files?
 Mia RubieMia Rubie is a Nail Artist and the Owner of Sparkle San Francisco, a nail studio based in San Francisco, California. She has over eight years of nail artist and management experience and is known for her push-the-envelope designs and artistic eye for colors. Her clients include Sephora, Target, and Vogue. Her work has been featured in the San Francisco Chronicle and StyleCaster. She holds a BBA focusing on Entrepreneurial and Small Business Operations from San Francisco State University. You can find her work on her Instagram account @superflynails.
Nail Artist You want to work from the harshest to the softest grit. I typically recommend working in this order: 80, 100, 120, 180, then 200. That should give you a nice, smooth texture.
 -
QuestionWhat do you soak your hands in for a manicure?
 Mia RubieMia Rubie is a Nail Artist and the Owner of Sparkle San Francisco, a nail studio based in San Francisco, California. She has over eight years of nail artist and management experience and is known for her push-the-envelope designs and artistic eye for colors. Her clients include Sephora, Target, and Vogue. Her work has been featured in the San Francisco Chronicle and StyleCaster. She holds a BBA focusing on Entrepreneurial and Small Business Operations from San Francisco State University. You can find her work on her Instagram account @superflynails.
Nail Artist Warm water. Don't use acetone or anything like that if that's what you're thinking. You don't want to use anything outside of moisturize.
Warnings
- Keep nail polish and polish remover away from heat or flame (including smoldering tobacco) as it is very flammable.⧼thumbs_response⧽
- Don't inhale the polish or polish remover.⧼thumbs_response⧽
- Your cuticles are there for a reason: they keep your nails from getting infected. Do not remove them! Do trim off torn dangling bits neatly so they don't take more with them.⧼thumbs_response⧽
- Don't buff too far down. You could weaken the nail or even wear through it in a spot, which would hurt and risk infection. You just need an overall smooth surface rather than a ridged one, not a completely flawless or glossy one - the paint will take care of that.⧼thumbs_response⧽
Things You'll Need
- Scrap paper (to protect work space)
- Nail polish remover
- Cotton balls
- Nail clippers
- Nail file
- Nail buffer
- Nail buffing powder, if nail buffer uses a separate powder.
- Bowl or sink stopper
- Warm water
- Soap
- Nail brush
- Towel
- Cuticle cream
- Cuticle pusher ("orange stick") or small binder clip
- Hand cream, lotion, or other skin moisturizer
- Cheap cotton gloves (for overnight moisturizing)
- Base coat
- Nail polish
- Top coat
- Fan (to speed drying)
- Toothpicks (preferably flat)
- Cotton swabs such as Q-tips
- Nail touch-up pen
- Guide strips or other masking material (for French manicure)
References
- ↑ Mia Rubie. Nail Artist. Expert Interview. 23 April 2020.
- ↑ Mia Rubie. Nail Artist. Expert Interview. 23 April 2020.
- ↑ https://www.thecut.com/2015/02/how-to-give-yourself-a-salon-worthy-manicure.html
- ↑ Mia Rubie. Nail Artist. Expert Interview. 23 April 2020.
- ↑ https://www.thecut.com/2015/02/how-to-give-yourself-a-salon-worthy-manicure.html
- ↑ http://www.oprah.com/style/home-manicure-how-to-do-your-own-nails/all
- ↑ https://www.thecut.com/2015/02/how-to-give-yourself-a-salon-worthy-manicure.html
- ↑ https://www.thecut.com/2015/02/how-to-give-yourself-a-salon-worthy-manicure.html
- ↑ https://www.self.com/story/ways-to-not-ruin-your-at-home-manicure
- ↑ Mia Rubie. Nail Artist. Expert Interview. 23 April 2020.
- Videos provided by Pippopunkie
About This Article
To give yourself a manicure, first cut and file your nails. Then, buff your nails with a nail buffer to smooth out any ridges. Fill a bowl with warm water and add a few drops of hand soap. Soak your hands for 5 minutes to clean them. Next, dry your hands off and use an orange stick or a cuticle pusher to gently push your cuticles back. Massage some lotion into your hands so they’re nice and soft, then let the lotion soak in for 15 minutes. Now, apply a base coat to each of your nails and wait for it to dry. Then, apply the first coat of nail polish in the color you've chosen for your manicure. Let the first coat dry, then apply a second coat and let it dry as well. Clean up the edges while you work by using a cotton swab dipped in nail polish remover. Finally, apply a clear top coat to your nails and let it dry. If you want to learn more, like how to buff your nails so they're shiny, keep reading the article!


