This article was co-authored by Lindsay Yoshitomi. Lindsay Yoshitomi is the nail artist behind the blog, Lacquered Lawyer. She was featured as one of Nail It! magazine’s “Bloggers You Should Know,” and has been on the cover of Nail Art Gallery Magazine. She has been practicing nail art for over 15 years.
There are 7 references cited in this article, which can be found at the bottom of the page.
wikiHow marks an article as reader-approved once it receives enough positive feedback. In this case, 89% of readers who voted found the article helpful, earning it our reader-approved status.
This article has been viewed 79,412 times.
Using manicure tools is an essential part of giving a manicure, whether it is to yourself or to someone else. Some manicure tools may look a little strange and not everyone knows how to use them the right way. However, you can learn the right way to use a cuticle pusher, cuticle nipper, nail clippers and nail file. After using your manicure tools, always make sure that you clean and disinfect them to prevent the spread of infection causing bacteria.
Steps
Using Cuticle Pushers and Nippers
-
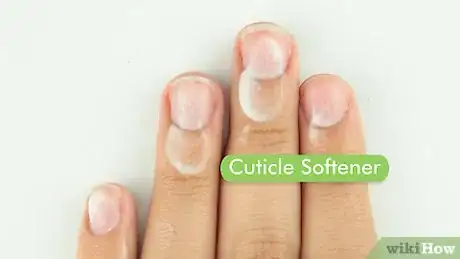
1Soften cuticles with cuticle remover or softener. Before you use a cuticle pusher or nippers, it is important to use a cuticle softener or remover. This will make it easier to push back the cuticles and also to remove any excess skin with the nippers.[1]
- Try soaking nails in a solution of warm water with a few drops of hand soap in it. Let the nails soak for about five minutes.
- Then, remove the nails from the water and dry them off with a towel. Apply a drop of cuticle softener to each cuticle and rub it around gently.
-
2Push back the cuticle. Use the rounded edge of your cuticle pusher to gently push back the cuticle. Do this for all of the nails.[2]
- Make sure that you do not force the cuticle back.[3] Just push it back gently.
- If the cuticles are difficult to push back, then you might want to soak the nails in warm water for a little longer.
Advertisement -
3Use pointed end of the cuticle pusher to scrape away dirt and debris. The cuticle pusher should have a pointed end on the opposite side. You can use this side of the cuticle pusher to scrape away any debris or dirt that is near the cuticle.[4]
- Be careful with this tool. Do not try to stick it under the cuticle.
-
4Squeeze excess skin with the cuticle nippers. After you finish pushing back and cleaning around the cuticle, check for any excess skin around the cuticle area that might interfere with painting the nail. If you spot any excess skin, then you can use the cuticle nippers to remove it.[5]
- To use the cuticle nippers, open the nippers and place them over the excess skin. Look for skin that is sticking out or that appears ragged.
- Then, squeeze the nippers to sever the skin from the cuticle and then release. Do not squeeze the skin and pull! This may result in bleeding.
- After you release the nippers, the skin you squeezed should come right off or you should be able to brush the skin away.
Clipping and Filing Nails
-
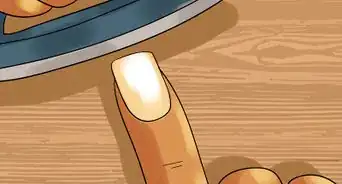
1Trim nails with a straight edge clipper. If the nails are much longer than you want them to be, then you will first need to use a straight edged nail clipper to bring down the length.[6] A straight-edged nail clipper will result in some square edges, but it will also allow you to be more accurate.
- Clip only a small amount of the nail at a time. Otherwise, you may end up trimming too much.
-
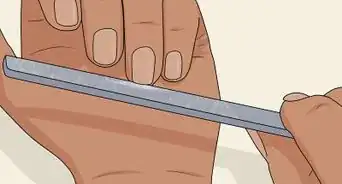
2File your nails. Next, you will need to file down any rough edges left on the nail. Use a nail file to smooth out ridges and to start to shape the nail.[7] There are some important things to keep in mind when you file nails. Make sure that you:
- Start with a fine nail file. Nail files have grits like sandpaper, so choosing a nail file with a high number grit will mean that it is finer. A lower number grit nail file will have a coarser edge. It is best to start with a high grit or fine nail file to avoid tearing or damaging your nails.
- File your nails in one motion. Do not use a sawing motion to file your nails. Instead, place the file against one edge of the nail, move it in a swift forward motion, and then remove it from the nail and start over.
- Hold the edge of the nail file flat against the edge of your nail. If you angle the file, then this can thin out the nail’s tip and weaken it.
-
3Buff nails for a smooth finish. After you are done filing, use a nail buffer to smooth out the tops of the nails. This will improve the texture of the nails and make it easier to apply and even coat of nail polish.
- Use a back and forth motion to buff your nails.
- Some nail buffers also include a shine edge that you can use to give nails a natural shine after you finish buffing them.
- Buffing your nails is a good nail care practice as long as you do not do it too often. Buff your nails no more than once per week.[8]
Keeping Manicure Tools Clean
-
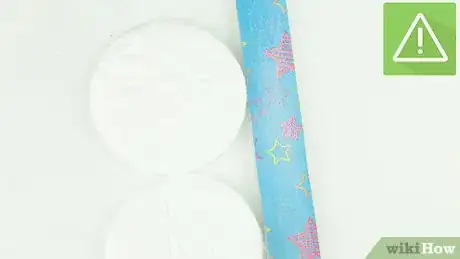
1Dispose of items that are not reusable. Some items cannot be cleaned, so you will have to dispose of these after you use them. For example, emery board cannot be properly disinfected because the material is too porous. Throw these items away along with:[9]
- Wooden cuticle pushers.
- Cotton balls and swabs.
- Paper towels.
- Toe separators.
-
2Clean your tools. To clean your manicure tools, you can wash them with warm water and some liquid detergent, such as dish soap. Use a brush to scrub away any debris from the last manicure. Then, rinse the tools well and dry them off with a clean, dry towel.[10]
- Make sure that you use a brush that is clean and has been disinfected.
- Wash your tools after every manicure.
-
3Disinfect your instruments. After you have washed your tools to remove the debris, you will also need to disinfect them. This often requires soaking the tools in a disinfectant solution. When disinfecting your tools, always keep in mind that:[11]
- Spraying your tools is not enough. It is important to immerse tools in disinfectant so that they are fully covered.
- Ultraviolet cabinets are not a suitable replacement for disinfectant. They may be used for storage, but only after items have been properly cleaned and disinfected.
- You need to mix disinfectant fresh every day. Disinfectant solution cannot be reused day after day.
Expert Q&A
Did you know you can get expert answers for this article?
Unlock expert answers by supporting wikiHow
-
QuestionHow do I choose a nail file?
 Lindsay YoshitomiLindsay Yoshitomi is the nail artist behind the blog, Lacquered Lawyer. She was featured as one of Nail It! magazine’s “Bloggers You Should Know,” and has been on the cover of Nail Art Gallery Magazine. She has been practicing nail art for over 15 years.
Nail Artist
References
- ↑ https://www.youtube.com/watch?v=kMm5A1l2zZg
- ↑ https://www.youtube.com/watch?v=kMm5A1l2zZg
- ↑ https://www.aad.org/public/skin-hair-nails/nail-care/manicure-safety
- ↑ https://www.youtube.com/watch?v=kMm5A1l2zZg
- ↑ https://www.youtube.com/watch?v=gLPjhOtl9SM
- ↑ https://www.youtube.com/watch?v=kMm5A1l2zZg
- ↑ https://www.youtube.com/watch?v=kMm5A1l2zZg
- ↑ http://www.harpersbazaar.com/beauty/nails/advice/a10155/is-nail-buffing-bad-for-nails/
- ↑ http://files.nailsmag.com/Handouts/GuidelinesClnngMncrngEqpmnt1.07.pdf
