This article was co-authored by Adam Shuty and by wikiHow staff writer, Janice Tieperman. Adam Shuty is a Certified Strength and Conditioning Specialist and owner of ATOMIC Total Fitness, a fitness training studio in New York, New York. With over 15 years of experience, Adam specializes in weightlifting, strength and conditioning, and martial arts. Adam holds a BS in Industrial Engineering from Virginia Polytechnic Institute and State University. In 2014, Adam appeared on the Live With Kelly and Michael Show as one of the top five fitness instructors in the country.
There are 13 references cited in this article, which can be found at the bottom of the page.
This article has been viewed 15,266 times.
While yoga balls are traditionally used for their namesake activity, they can also be used for engaging your core, strengthening your lower body, and performing cardio and upper body workouts. Also known as a stability ball, yoga balls can change up your usual exercise routine for a few minutes each day. Try experimenting with different workouts until you find an activity that you like!
Steps
Strengthening Your Core
-
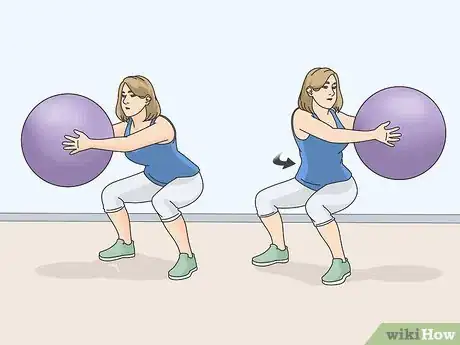
1Squat while holding the yoga ball to engage your core. Hold the ball with both hands, keeping your fingers splayed along the sides of the equipment.
Straighten your back, then bend your knees into a squatting position. While maintaining this position, rotate your torso to the left and hold the ball for at least 3 seconds.
Next, repeat the same process by twisting your torso to the right. Twisting to the left and right counts as a complete rep of this exercise.[1]- To create a different challenge, try lifting or lowering the ball in front of you, instead of extending it forward.
Tip: If you’re just starting out, only do about 5 total reps of core-strengthening exercises. As you build muscle and stamina, increase your regimen to at least 12 reps.
-
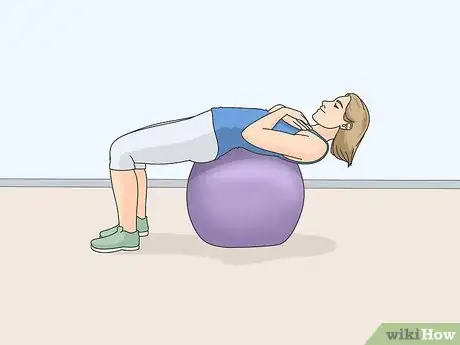
2Sit on your yoga ball and lean back to form an abdominal crunch. Position your bottom on the front half of the ball, mimicking a traditional sitting position.
Engage your core muscles and cross your arms in an “X” shape across your chest.
Lean back at a 45-degree angle until your abdominal muscles feel tight. Continue holding this position for at least 3 seconds, then lean forward again.[2]- Don’t overwork yourself with this exercise! If you feel strained after a few reps, give yourself a break.
- You may have to build your strength up before you can successfully perform a lot of crunches.
Advertisement -
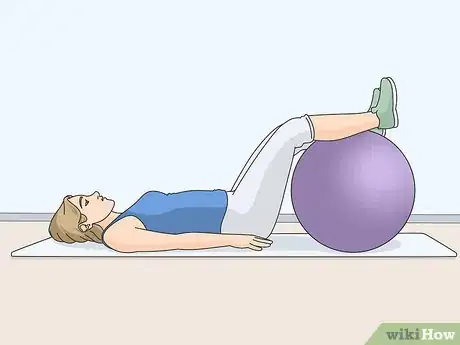
3Lie on your back and balance your legs on a yoga ball to form a bridge pose. Unroll a yoga mat on the floor to provide cushioning for your back, bottom, and shoulders.
Arrange the yoga ball at 1 end of the mat, then extend both legs onto the top of the ball.
To complete the stretch, raise your hip and bottom from the floor. Hold this position for 3 sections, then lower your butt back onto the mat.
Keep your calves anchored in the center of the yoga ball. While holding the bridge position, keep your body in a 45-degree angle pointed away from the yoga mat.[3]
As an extra challenge, lift 1 leg from the ball while completing a rep of the bridge pose. -
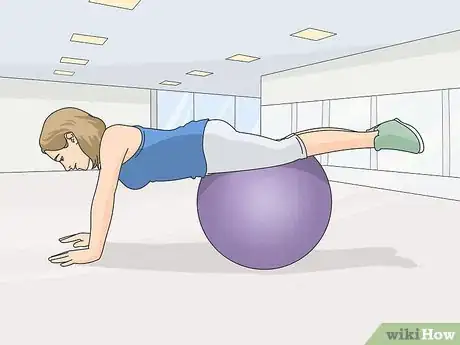
4Perform a plank with your thighs resting on the yoga ball. Place the ball under your stomach and get into the push-up position.
Slowly and carefully, guide your arms forward to arrange the ball beneath your thighs. At this time, let your feet dangle off the edge of the ball, then engage your core muscles to hold the plank position.
Maintain this position for at least 3 seconds, or as long as you can comfortably manage it. If you plan on doing multiple plank reps, hold the pose for a shorter amount of time.[4]- Although the yoga ball is under your legs, don’t rely on the equipment to keep you upright.
-
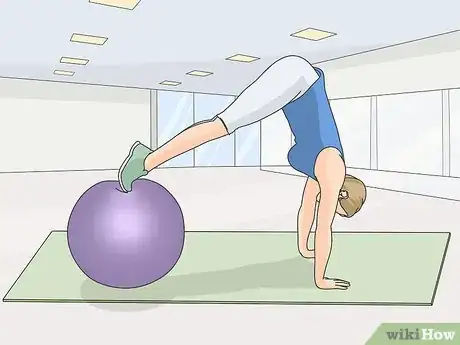
5Roll the ball forward with your legs to strengthen your abs. Arrange a yoga mat on the floor to help cushion and anchor your hands throughout the exercise.
Form a push-up position with your arms and legs; however, instead of placing your feet on the yoga mat, arrange them on top of the yoga ball instead.
Engage your core, then roll the yoga ball forward with your legs. At this point, bend your knees into your chest to form a makeshift crunch.
Repeat this exercise by rolling the ball forward and backwards with your legs and core.[5]- This exercise is also known as a pike. You can do this exercise in lieu of traditional crunches.
Targeting Your Legs and Lower Body
-
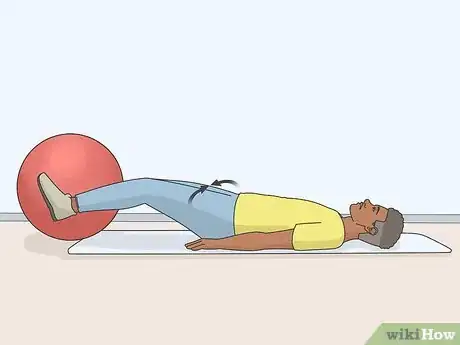
1Pick up the ball with your legs to perform a leg lift. Unroll a yoga mat across your exercise area so your back, bottom and shoulders remain cushioned.
Next, arrange the yoga ball between your lower calves, so you can comfortably and safely lift the equipment. Using slow, careful movements, squeeze your calves to raise the ball at a 90-degree angle.
Lift and lower the ball at least 5 times, or perform as many reps as you feel comfortable with.[6]
Always keep your knees bent when performing this type of exercise. Keep your back flat and your core engaged to maximize the effects of the exercise. -
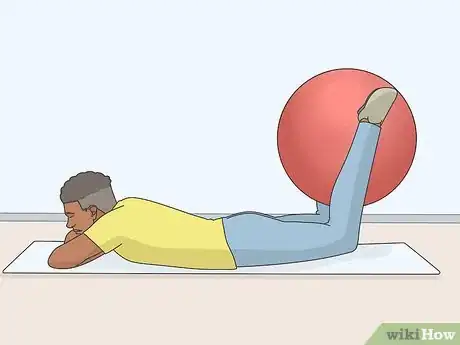
2Stretch your hamstrings by lifting the ball with your calves. Lay on your stomach, keeping your elbows bent and resting beneath your head. Position and squeeze the yoga ball between your lower calves, then lift your upper thighs from the mat to raise the ball. Continue raising and lowering the yoga ball at least 5 times, or until your hamstrings feel sufficiently stretched.[7]
- This exercise is best done on a yoga mat, so your body is supported and cushioned throughout the workout.
-
3Rest your feet on the ball to form a glute bridge. After unrolling a yoga mat, arrange the ball in the center of the mat.
Push up onto your shoulders and place both feet on top of the yoga ball.
Next, keep both knees bent at a 90-degree angle and both arms stretched along the sides of the yoga mat.
Complete 1 rep by lowering your butt until it’s 3 to 4 in (7.6 to 10.2 cm) away from the mat, then lift it back up to its original position.[8]- Try to do at least 5 reps of this exercise, or however many you feel comfortable with.
-
4Squeeze your legs while your lower calves hold the yoga ball. Unroll a yoga mat on the floor to provide support for your back, shoulders, and glutes.
At 1 end of the mat, arrange the yoga ball firmly between your lower calves and ankles.
While the ball is in place, squeeze your legs for 1-2 seconds, then relax the muscles.
Repeat this at least 5 times so you can strengthen your upper legs![9]- Focus on engaging your core and keeping your lower back as flat as possible on the yoga mat.
Trying Cardio and Upper Body Workouts
-
1Perform at least 5 push-ups while placing your arms on the ball. Arrange your yoga ball in the corner of a room, so it can rest against 2 walls.
Next, get in a push-up position by placing your palms flatly on the surface of the yoga ball. Do several push-ups from this position, working to bring your chest to the surface of the ball as you go.
As you move, try keeping your core engaged.[10] For an extra challenge, move the ball to a place where it’s only leaning against 1 wall, or arrange it in the center of a room.- Try to keep your glutes tight and in line with the rest of your back. If you move your bottom too much during the exercise, your arms won’t get a good workout.
-
2Balance on your yoga ball and do an out-of-water breaststroke with your arms. Place the yoga ball less than 1 m (1.1 yd) away from the wall, then lie stomach-down on the ball.
To keep yourself balanced, push your feet against the nearest wall, so you can stay anchored in place.
While lying and balancing on the ball, lift both arms at a 45-degree angle above your head, then swing them backwards over your shoulders.
Repeat this motion several times to mimic swimming the breaststroke. While performing this exercise, your body will be positioned at an upward angle.[11]- Perform at least 5 total reps of the breaststroke, or however many reps feel comfortable for you.
-
3Jog in place while lifting the ball to strengthen your arms. While standing on a sturdy surface, hold the yoga ball securely in both hands with your elbows bent.
Run or jog in place while holding the ball, which allows your heart rate to increase. As you move, lift the yoga ball up and down with your arms.
Continue this exercise for at least 1-2 minutes, or however long you want to continue the workout.[12]- This is a great exercise to perform in circuits, or small chunks of time. It’s also useful if you’d like to prioritize cardio exercise in your workouts.
-
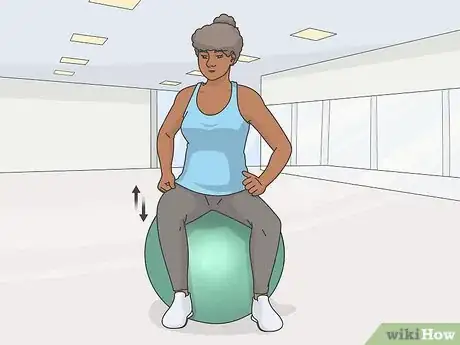
4Bounce on the ball consistently to engage your core and heart rate. Balance yourself in a sitting position on the ball, leaving your legs splayed in a “V” shape. Engage your core, then bounce your torso and bottom up and down on the ball to increase your heart rate. Continue this exercise for 1-2 minutes, or as long as you’d like.[13]
- As you move, try lifting your feet off the ground to give your bounces more power.
Expert Q&A
Did you know you can get expert answers for this article?
Unlock expert answers by supporting wikiHow
-
QuestionHow can I use a yoga ball for back extension?
 Adam ShutyAdam Shuty is a Certified Strength and Conditioning Specialist and owner of ATOMIC Total Fitness, a fitness training studio in New York, New York. With over 15 years of experience, Adam specializes in weightlifting, strength and conditioning, and martial arts. Adam holds a BS in Industrial Engineering from Virginia Polytechnic Institute and State University. In 2014, Adam appeared on the Live With Kelly and Michael Show as one of the top five fitness instructors in the country.
Certified Strength & Conditioning Specialist Lean back on the ball with the ball at your waist and your feet against a wall. You can either cross your arms over your chest or put them behind your head. Then, fold down over the ball and drive your hips into it while squeezing your glutes. You'll get this nice contraction of the back of your body.
Things You’ll Need
- Yoga ball
- Yoga mat
References
- ↑ https://www.mayoclinic.org/healthy-lifestyle/fitness/multimedia/core-strength/sls-20076330?s=2/#2
- ↑ https://www.mayoclinic.org/healthy-lifestyle/fitness/multimedia/core-strength/sls-20076330?s=2/#3
- ↑ https://www.mayoclinic.org/healthy-lifestyle/fitness/multimedia/core-strength/sls-20076330?s=2/#4
- ↑ https://www.mayoclinic.org/healthy-lifestyle/fitness/multimedia/core-strength/sls-20076330?s=2/#6
- ↑ Adam Shuty. Certified Strength & Conditioning Specialist. Expert Interview. 26 August 2020.
- ↑ https://m.youtube.com/watch?v=iY4hQd24_d0&t=1m46s
- ↑ https://m.youtube.com/watch?v=iY4hQd24_d0&t=2m3s
- ↑ https://m.youtube.com/watch?v=iY4hQd24_d0&t=3m39s
- ↑ https://m.youtube.com/watch?v=HtrYVS1c6mI&t=4m19s
