This article was co-authored by wikiHow Staff. Our trained team of editors and researchers validate articles for accuracy and comprehensiveness. wikiHow's Content Management Team carefully monitors the work from our editorial staff to ensure that each article is backed by trusted research and meets our high quality standards.
There are 14 references cited in this article, which can be found at the bottom of the page.
wikiHow marks an article as reader-approved once it receives enough positive feedback. This article received 19 testimonials and 96% of readers who voted found it helpful, earning it our reader-approved status.
This article has been viewed 403,416 times.
Learn more...
Drying herbs is an easy and useful way of preserving them for use in cooking and craft. Many herbs lend themselves well to drying, and in some cases, you can dry the leaves, flowers and stem portions of an herb. Drying herbs so that they retain their flavor relies on knowing which herbs are best for drying, picking them at the right time and storing them well.
Steps
Choosing the herbs for drying
-
1Choose herbs for drying. Some herbs are easier to dry than others owing to their stronger leaves and oils. However, almost all herbs can be dried in one or another. Trial and experiment is the best way to find out which herbs dry best for you, with the expectation that some herbs will shrivel up and look like a brown mess when dried, while others will retain color and texture well.[1]
- Strong leaved herbs tend to be the easiest herbs to dry. These include bay leaves, rosemary, thyme and sage. A dried bay or rosemary leaf will usually retain its color and shape without any difficulty.
- Tender broad leaved varieties can be a bit trickier, as they are easily affected by moisture and can quickly turn moldy if not dried properly. The types of herbs in question include basil, parsley, mint, tarragon, cilantro and lemon balm. These need to be dried quickly to prevent molding.
-
2Harvest herbs for drying just before their flowers open. There will be plenty of buds to signify that flowering is about to occur. As for the time of day, generally it is best to harvest herbs after the dew has evaporated but before the sun has had a chance to evaporate the volatile oils in the herbs. This is usually early morning, give or take a bit for the specifics of your location.
- Although generalist advice is to harvest herbs before the flowers open, it pays to experiment. Sometimes it's better to harvest after. It all depends on which form will allow the herbs to hold their shape and flavor best. And if you actually want flowers, then it makes sense to wait until the herb flowers first.
Advertisement -
3Prepare for drying as soon as you've harvested the herbs. The herbs will preserve best if they're dealt with immediately; allowing them to wilt or sit around and gather moisture or dust will spoil their flavor, color and appearance.
-
4Clean the herbs if needed.[2] Some herbs may need rinsing first, and a pick over to remove debris such as dried grass or weeds. Herbs can be gently rinsed under cool water, and given a minimal shake to remove excess moisture.
- Discard leaves with blemishes, bruising or imperfections.


Simple quick dry for cooking
This method deals with having dry fresh (and clean) herbs rather than dried herbs! This is best done at least a half hour before cooking with the herbs, to allow adequate drying time.
-
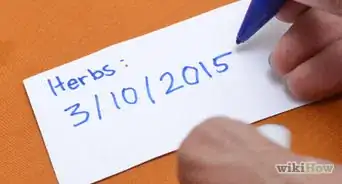
1Pick the herbs for cooking with.
-
2
-
3Wash the herbs gently. Use the least amount of water possible to avoid crushing or bruising the herbs. Perhaps lay herbs in a colander under running water, or just hold the herbs under the water. Finish with a gentle shake over the sink to dislodge as much of the water as possible.
-
4Lay each herb stem/stalk or sprig on the tea towel. Lay across the tea towel if you have more than one. Try to prevent too much overlapping.
-
5Let dry in a warm kitchen. Touch to feel if the herbs are dry. When the herbs are dry enough, use in the recipe as required.


Drying in the sun or outdoors
This is the least preferred method for drying. The reason for this is that the herbs will tend to be bleached and lose their flavor. It can be useful for craft though.
-
1Cut the herbs when the dew has dried off them.
-
2Tie into a bundle with a rubber band. Keep the leaves and flowers facing downward.
-
3Hang somewhere on the porch or off a hanger in a spot that gets full sun. Leave for several days to dry, checking every now and then.[3]
- Be sure to tie on securely in case of windy days.
-
4Dry outdoors inside a paper bag. After bundling, tie a paper bag around the bundle. Hang the whole bag outside. The bag will provide more protection against the sunshine. It will also catch any seeds that dry too, if you want to collect them.
-
5Remove when dried. The herbs are dried when they just become crisp and no moisture can be felt.


Air drying indoors
Indoor drying is preferred as it will keep the flavor, color and qualities of the herb better intact than outdoor drying. Air drying is good for tender leaved herbs. It's also an easy one to do as once the herbs have been prepared, you can leave them to dry without having to do more.
-
1Bundle the herbs into a bunch.[4] Tie a rubber band around the stems of the herbs. Any flowers on the herbs should face downward.
- Drying times will likely vary if bundling together different types of herbs, so consider only making bundles of a single type of herb until you're more experienced and can mix the herbs knowing the drying times specific to each.
- If you're doing a set of herb bundles, you might consider keeping the bundles sizes similar, so that the drying times coincide. This makes it easier when it comes time to store or used the dried herbs, so that you don't have to wait for the next bunch to dry. But it all depends on what you're doing with the herbs and your immediate needs.
-
2Choose whether or not to use a paper bag. The paper bag can speed up the drying process and catch falling seeds, leaves, etc. On the other hand, having no bag means you can have some lovely bunches of herbs on display in your home.
-
3Select a suitable drying hanger. All sorts of items can be used to hang herbs from, including ladders, ceiling beams, coat hangers, a nail, etc.
- Herbs can also be dried on a rack or screen. An old window screen can be used if clean and in decent shape. Position such a screen to allow the air to move freely both sides of the screen. If using a screen, you'll need to turn the herbs daily to prevent curling.
-
4Leave to dry. Herbs should dry away from direct sunlight and moisture or they will spoil. Drying times will take anywhere from 5 days to a few weeks, depending on the types of herbs you're drying.[5]
-
5Remove when dried. The herbs are dried when they just become crisp and no moisture can be felt.
-
6Use for culinary, medicinal, display or craft purposes. Many dried herbs will crumble readily, making them easy to turn into herb mixes such as bouquet garni. Dried herbs are often great additions to potpourri too.


Drying in the Oven
Herbs can be dried in an oven and will be suitable for culinary and medicinal purposes.
-
1Set the oven to a very low temperature, the lowest it will go.[6] Leave the door open.
-
2Arrange the picked herbs across a baking sheet.
-
3Place the sheet in the lowest level of the oven. Let dry but turn the herbs frequently. When they appear a little crisp, remove from the oven.
-
4For those with a wood oven, screen racks can be placed on top of the wood stove. Lay the herbs across it to dry in their own time.


Drying by microwaving
If you need dried herbs in a hurry for craft work, this method is excellent! However, due to the toxicity of silica gel (and not to mention the microwaved herbs as well), this method is not suitable for either culinary or medicinal herb drying. Do be prepared to experiment as drying times can vary wildly depending on the herbs and using the microwave to dry herbs can be a very frustrating learning experience!
-
1Sprinkle a thin layer of silica gel on the base of a microwave-safe container.
-
2Add the herb leaves or flowers to this layer. Spread evenly and avoid touching leaves or flowers between each herb piece.
-
3Microwave the herbs. Use a lower power setting, such as the half power or defrost power settings. Dry for 2 minutes, then let sit for 10 minutes. Check for the level of dryness. If it is sufficient, then use the herbs as required. If not, do another dry for about 1 minute.
- If the drying of 2 minutes proves too long and the herbs have dried out too much, use a new set of herbs and reduce the drying time by 30 seconds. Keep experimenting to reach the right timing, depending on the type of herb.
- Herbs that tend to air dry well with little shrinkage (such as thyme) will need less time in the microwave than herbs that don't air dry as well (such as basil).
-
4Use for craft and display projects only. As already noted, the silica use means that the herbs are no longer safe for consuming.[7]


Drying using desiccants
Herbs dried in this method are for use in crafts or displays. Do not use this method for herbs intended to be consumed for culinary or medicinal purposes.
-
1Choose a desiccant. A desiccant is a substance that draws moisture out. Suitable desiccants for herbs include cornmeal, sand, orris root, borax, silica gel and even kitty litter.[8]
- Silica gel is popular because it is light and won't crush the herbs; it is easily obtainable from craft stores. However, when working with it, wear a mask to avoid breathing in its fumes.
-
2Pick the herbs. Pick when moisture won't affect the herbs or their flowers.
-
3Sprinkle 2.5cm/ 1/2 inch of desiccant across the base of a glass or plastic container. Glass and plastic won't create moisture.
-
4Place the herbs onto the desiccant. Keep any flowers separate from one another (not touching). Leaves and petals that are close together will require pulling apart to ensure the desiccant goes in between gaps and dries out every part of the herb.
- If the shape of the petals or leaves is important, check for any that get bent out of shape and realign them as you're rearranging the desiccant.
- You can layer desiccant and herbs if wished; just be aware that the more weight on top, the more the plant matter beneath risks being crushed.
-
5Remove from the desiccant as soon as they have dried. This will only take a few days. Desiccant will leave herb leaves and flowers bone-dry and therefore somewhat brittle. To remove desiccant, use a small brush or a camera cleaning bellows to shift desiccant off the plant matter without damaging the plant. Handle with care.
- Avoid over drying the herbs or they may simply fall apart when handled.
-
6Use for craft and display projects only. The herbs are not suitable for consumption.


Drying in Place
Some herbs will dry easily where they are placed, such as in a flower arrangement or as a part of a craft project.
-
1Choose an appropriate herb for drying in place. Not all herbs will dry well in this manner but some leaves and flowers will dry this way, such as yarrow, fennel and rosemary.
-
2Use the fresh herb to add to the position where you want it to dry. For example, in a vase/bouquet with other plants being arranged or add to a craft project such as a wreath or a woven plant object.
-
3Place in a dry area without moisture. Allow to dry as is, but do check on it regularly. If you see signs of mildew or anything else that doesn't look right, remove the herbs.


Drying by pressing
-
1For information on pressing plant material, see further How to press leaves. Pressed herbs can be used to decorate craft projects such as scrapbooks, framed prints, bookmarks and collages.[9]
-
2Finished.


Community Q&A
-
QuestionAfter crushing the dried herb, can you use a non-airtight container?
 Community AnswerIf your container is not airtight, the herbs will lose flavor and become stale. An airtight container is recommended if you plan to use the herbs in cooking.
 -
QuestionHow do I dry bay leaves?
 Community AnswerFirst, remove any damaged or dying leaves. Then tie the remaining leaves together at the stem and hang to dry in a place out of direct sunlight.
 -
QuestionWhat is the best way to dry basil, so it won't get moldy?Community AnswerRinse basil & pat dry. Remove leaves and lay on a paper towel. Be sure the leaves are not touching each other. Cover them with another paper towel. Place on a table or counter away from the sun. Check them about every 4 days. They should be dry in about 1 week. Once dry, crush until it is fine and store in a metal or dark spice bottle.
Warnings
- Damp herbs will go musty and moldy. If this happens, discard them.⧼thumbs_response⧽
- High temperatures will destroy herbs; avoid using too much heat for drying.⧼thumbs_response⧽
- Many herbs will shrivel and look browned and nondescript after drying. Much drying of herbs is a self-learned art, using trial and error with the herbs from your garden. Sometimes, you'll also need to choose between fragrance, taste or appearance and only go for the one that matters when all three cannot be kept by drying.⧼thumbs_response⧽
- Avoid drying herbs in areas of high moisture, such as the bathroom and kitchen. If you can keep your kitchen toasty warm and draw moisture out immediately, your kitchen might be an exception.⧼thumbs_response⧽
- Use rubber bands rather than string for drying. The reason for this is simple––rubber bands tighten around the herb stems that contract as they dry. String doesn't, which means that the herbs can slip out and fall to the ground when hanging up to dry.⧼thumbs_response⧽
- Silica gel is poisonous. Keep out of the reach of children and pets, keep away from its fumes as you use it (wear a mask) and do not consume any herbs dried using silica gel.⧼thumbs_response⧽
Things You'll Need
- Herbs
- Drying gear
- Paper bags (optional, where relevant)
- Airtight storage containers


References
- ↑ https://nchfp.uga.edu/how/dry/herbs.html
- ↑ https://www.cookinglight.com/cooking-101/techniques/how-why-to-wash-fresh-herbs
- ↑ https://www.tasteofhome.com/article/how-to-dry-herbs/
- ↑ https://extension.illinois.edu/herbs/tips.cfm
- ↑ http://www.gardenherbs.org/preserving_herbs.htm
- ↑ https://extension.illinois.edu/herbs/tips.cfm
- ↑ https://edis.ifas.ufl.edu/pdffiles/EP/EP00400.pdf
- ↑ https://www.bhg.com/gardening/vegetable/herbs/drying-herbs/
- ↑ https://edis.ifas.ufl.edu/pdffiles/EP/EP00400.pdf
- ↑ https://theherbalacademy.com/6-tips-for-storing-dried-herbs/
- https://modernfarmer.com/2015/08/how-to-harvest-dry-herbs/
- https://www.motherearthnews.com/real-food/drying/drying-herbs-zm0z13fmzmat
- https://extension.psu.edu/lets-preserve-drying-herbs
- Nerys Purchon, Herbcraft, (1993), ISBN 0-340-51639-9 – research source
- Elizabeth Walker, Making Things With Herbs, (1977), ISBN 0-87983-156-1 – research source
- Nora Blose and Dawn Cusick, Herb Drying Handbook, (1993), ISBN 0-8069-0281-7 – research source (note that this book is an excellent source for precise details on drying individual types of herbs)
About This Article

To quickly dry herbs for cooking, pick the herbs you want, wash them gently in water, and lay them out on a towel. Allow them to dry in a warm kitchen for at least 30 minutes before use. Alternatively, to dry your herbs over time indoors, bundle them together with a rubber band around the stems. Then, pick a drying surface, like a rack, screen, clothes hanger, or ladder, and hang up the herbs. Leave your herbs to dry away from direct sunlight and moisture for at least 5 days. To learn how to dry your herbs in the oven, keep reading!