This article was co-authored by Susana Jones, C-IAYT. Based in San Diego, Susana Jones is a Yoga Therapist and Educator with 12 years of experience serving groups, individuals and organizations. She is certified with the International Association of Yoga Therapists, registered as an E-RYT 500 with Yoga Alliance and holds a Bachelor’s degree from the University of Colorado. Susana offers therapeutic yoga to private clients through Shakti Urbana and mentors students of the internationally accredited Soul of Yoga. Susana dedicates her work to peaceful living on a healthy planet.
wikiHow marks an article as reader-approved once it receives enough positive feedback. In this case, 100% of readers who voted found the article helpful, earning it our reader-approved status.
This article has been viewed 174,355 times.
Kundalini yoga is thought to be the most powerful type of yoga, and some believe that it can generate results much faster than other types of yoga. Kundalini is considered to be a large pool of potential that exists in everyone and is often not used. Visually it is seen as a coiled or sleeping serpent normally at the base of your spine. Using Kundalini yoga helps to ‘awaken’ this serpent so your body can take advantage of its power. Eventually you’ll notice a beneficial difference in yourself.
Steps
Energizing Your Breaths
-
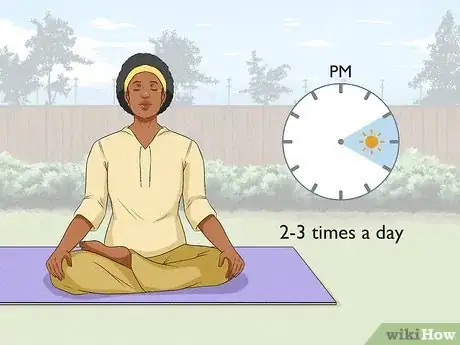
1Know when and how often to do this breathing exercise. This breathing exercise can be done when you’re feeling tired or drained emotionally. The result of doing this exercise should be that you feel revived, re-energized and ready-to-go.[1]
- These exercises can be done 2-3 times a day.
- Experts recommend trying this exercise in the mid-afternoon (2-4pm) to help avoid that afternoon slump.
-
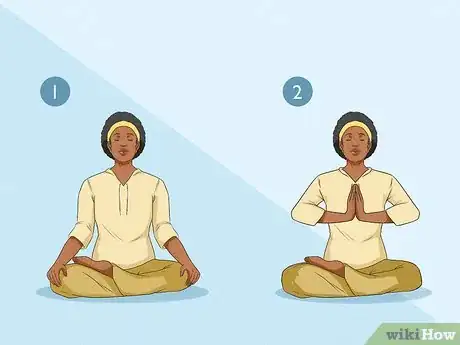
2Get into position. Sit straight up. Put your palms together in front of you with your fingers pointed upwards. Close your eyes lightly.[2]Advertisement
-
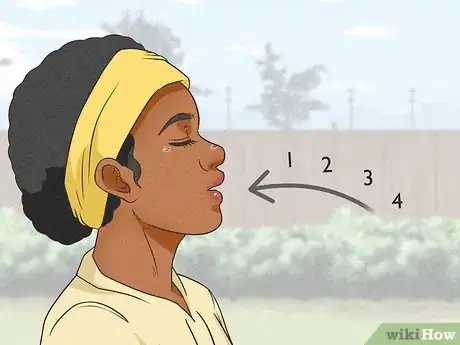
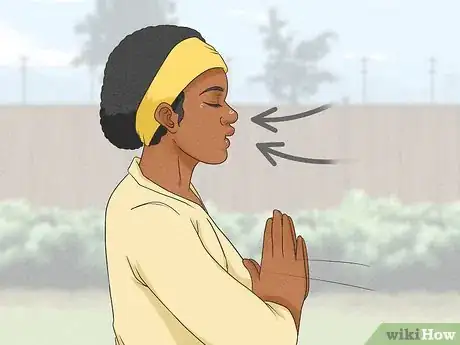
3Inhale. Start by inhaling your breath. Break your inhale into four parts where you’re able to fill your lungs completely on the 4th part.[3]
- One inhale broken into four parts means that you pause during your inhale four times. Your inhale will seem like four inhales, but without any exhales in-between.
-
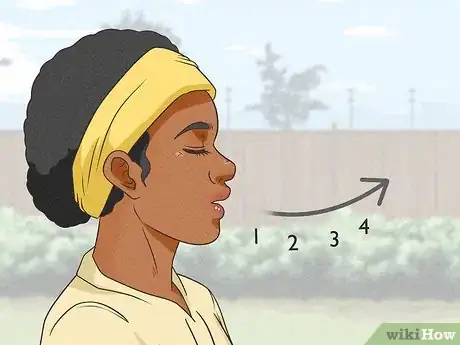
4Exhale. Once you’ve filled your lungs, start the exhale. Just like the inhale, break your exhaling breath into four parts. You’re lungs should be empty by the 4th part of the exhale.[4]
- One exhale broken into four parts is the same as the inhale. While exhaling, pause four times so it seems like you’re exhaling four times, but without any inhales.
-
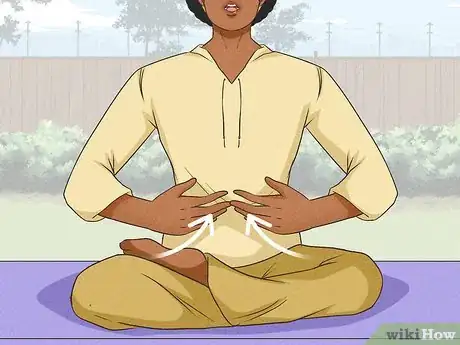
5Pull in your belly button. Every time you do a part breath on both the inhale and exhale, pull your belly button area in towards your spine. This means you’ll do this movement four times on an inhale and four times on an exhale.[5]
-
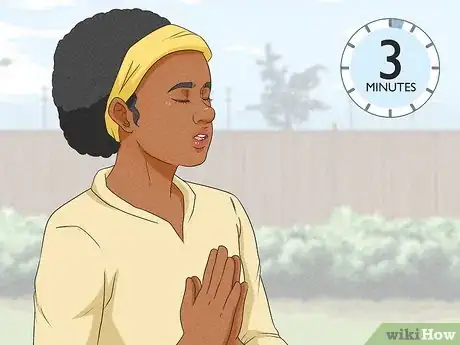
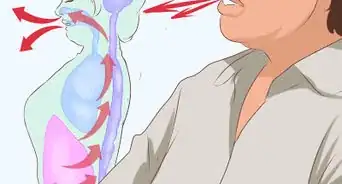
6Continue the breathing activity for up to 3 minutes. Each breath (an inhale and an exhale) should take a total of 7-8 seconds. Continue breathing using this method for up to 3 minutes before relaxing.[6]
-
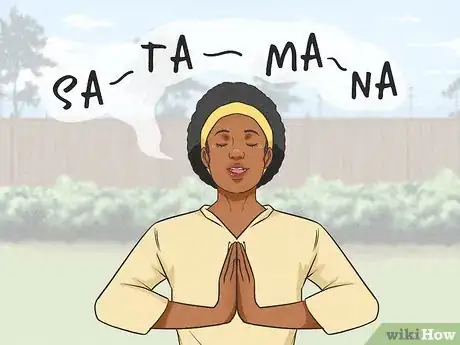
7Introduce a mantra. If you’re having trouble concentrating on your breathing because you’re distracted, add a mantra. The simple mantra “Sa - Ta - Na - Ma” can be done once for an inhale and once for an exhale. Each syllable of the mantra would coincide with a part of the breath.[7]
- Because this is a breathing exercise you won’t be able to say the mantra out loud, instead just say it in your head.
- The mantra “Sa - Ta - Na - Ma” means “Infinity - Life - Death - Rebirth."
-
8End the breathing exercise. After you’ve done the breathing exercise for about three minutes, end by doing one last big inhale. At the same time push the palms of your hands together hard and hold them together like that for about 10-15 seconds.[8]
- Pushing your hands together while breathing inwards should make your body feel tense. This is done on purpose.
- Relax your hands and exhale with force.
- Repeat the inhale (with hands pressed together) and exhale one more time each.
-
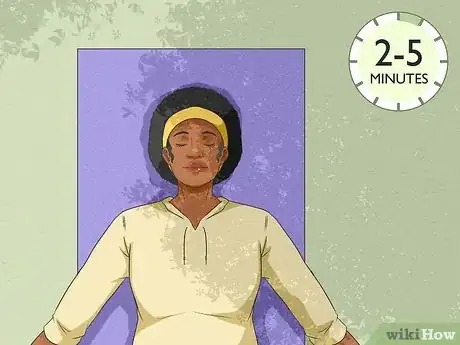
9Rest if needed. If you need to relax and rest for a few minutes afterwards, that’s okay. Lie on your back and close your eyes for 2-5 minutes. Take a few deep breaths while lying on your back and stretch your body out. Then get going![9]
Tuning Into Your Rhythm
-
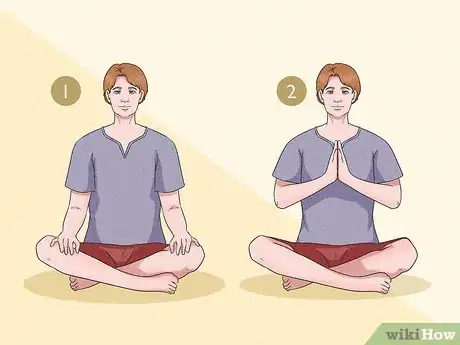
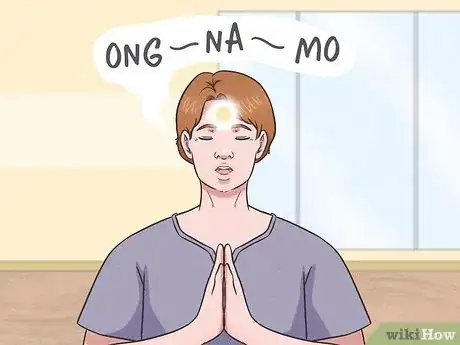
1Get comfortable. Sit in a comfortable position where you’re able to keep your spine straight and breathe deep. Place your palms together in front of your chest with your fingers pointing upwards.[10]
- The position of your palms is called the Prayer Mudra. Your hands are located at the Heart Centre. Your fingers should be pointed upwards but at a 60 degree angle (i.e. not straight upwards). The bottom of your thumbs should press against your sternum (the bone between your breasts).
-
2Chant the first part of the Adi Mantra. Start by inhaling. Then, while exhaling focus on the 3rd Eye Point and your heart while chanting “ONG NA MO.”[11]
- Your 3rd Eye Point is the centre of your forehead, just above your eyebrows. To focus on this point, close your eyes and focus them upwards and inwards — as if you were trying to look at your 3rd Eye Point.[12]
- ONG NA MO means I call on Infinite Create Consciousness."[13]
- The ONG sound will vibrate the back of your throat, cranium and your nasal passages. This will activate the pituitary and pineal glands.
- ONG should sounds like “Oooooong.” NA is short and simple. MO sounds like “Moooo."
- In both ONG and MO the ‘o’ sound is like ‘oh.'
-
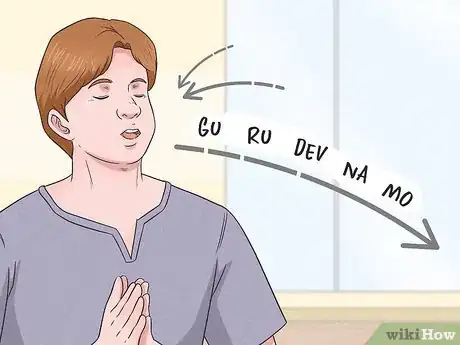
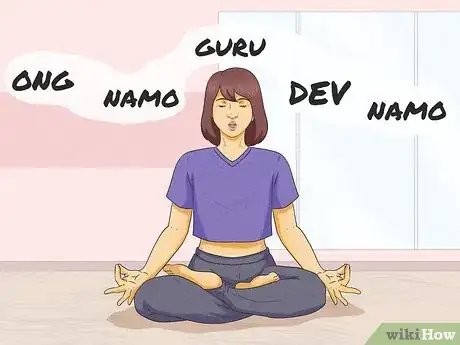
3Add the second part of the Adi Mantra. Either in one deep breath, or two breaths broken by a quick inhale through your mouth, chant “GURU DEV NA MO."
- Do not breathe through your nose while doing this part of the mantra.
- Both GU and RU are short and simple.
- DEV sounds like “deeeeeev."
- NA is short again.
- MO sounds like “mooooo."
-
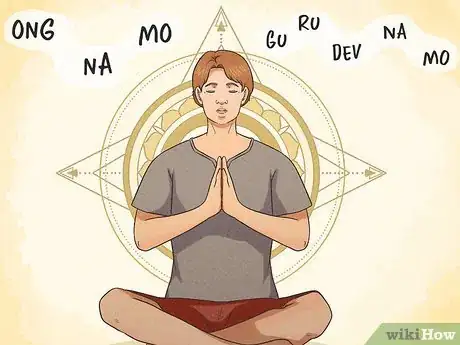
4Repeat the mantra several more times. There is no limit to the number of times you can repeat the mantra, it depends on how long it takes you to ‘tune into’ your body and your rhythm.[14]
- This chant also connects you with the Golden Chain. The Golden Chain represents the teachers who introduced Kundalini yoga.
- Ong means ‘creator.’ Namo means to call upon or to greet. Guru means ‘the teacher’ or the energy that brings the light. And Dev means transparent or non-physical.
Improving the Flexibility of Your Spine
-
1Learn how to perform a Root Lock. A Root Lock should be done quickly and smoothly by: contracting your anal sphincter (as if you’re trying to hold in a bowel movement); drawing up your sex organ; and then pulling your navel or belly button back towards your spine. All three steps should be done while holding your breath.[15]
- A Root Lock is also known as a Mulbhand.
-
2Start by focusing on your breathing. Sit somewhere quiet where you can concentrate. Focus on your breathing. Make sure you’re breathing from your abdomen. Pay attention to the sensations your body is feeling. Do this for a few minutes until you've reached a calm state.[16]
- If you need help paying attention to the sensations of your body, try focusing on your head for a few moments and then move down your body to your toes, paying attention to each part of your body as you go. These sensations are simply what your body (or part of your body) is feeling at the moment you focus on it. Is it tense or relaxed? Is it painful or normal?
-
3Tune in by performing the Adi Mantra. Before starting any Kundalini yoga, always perform the Adi Mantra after you’ve reached a calm state.[17]
-
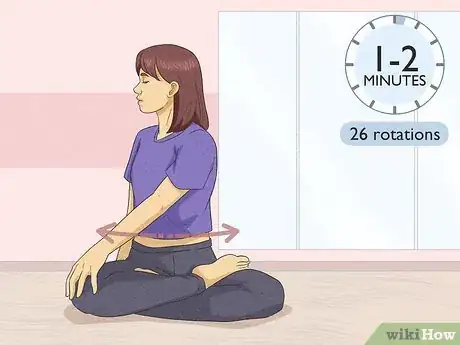
4Rotate your pelvis. Sit in the Easy Pose (back straight with your legs bent in front of your but your ankles not crossed). Put your hands on your knees. Rotate or roll your pelvis around while in this position. Try to relax while doing this.[18]
- Complete 26 rotations in each direction. This should be equivalent to 1-2 minutes in each directions.
-
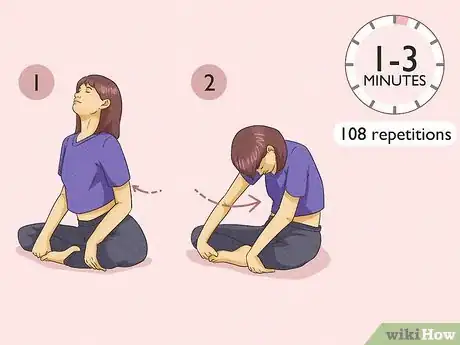
5Flex your spine. Sit in the Easy Pose with your hands on your ankles. Throughout this exercise keep your shoulders in a relaxed position and keep your head straight. Also try not to move your head while doing this exercise.[19]
- As you inhale, flex your spine forward like you’re arching your back.
- As you exhale, relax your spine back to a resting position.
- Repeat these movements for 1-3 minutes which is also equal to 108 repetitions.
- Once all repetitions are done, inhale deeply and hold your breath. Perform a Root Lock and then exhale and relax.
-
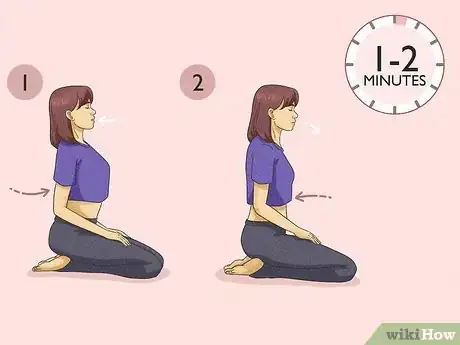
6Complete the spinal flex while on your heels. To do this exercise, first start by sitting on your heels on the ground. Place your hands flat down on your thighs. As you inhale, flex your spine forward. As you exhale, relax your spine back into a resting position.[20]
- Repeat this exercise for about 1-2 minutes.
-
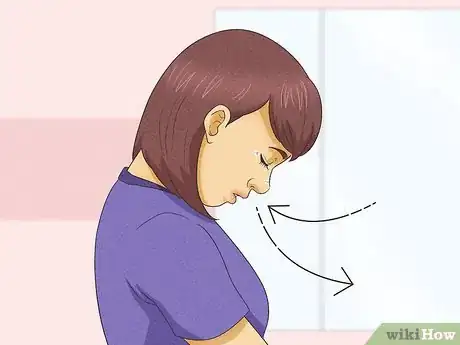
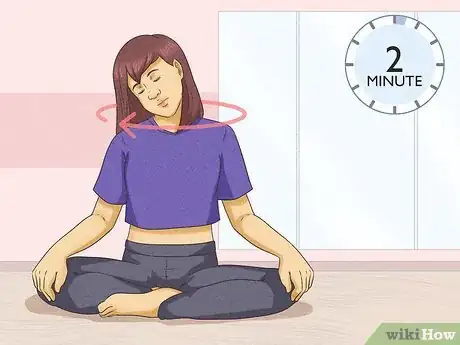
7Perform neck rolls. Sit comfortably with your back straight. Move your head so that it’s balanced on the top of your spine. Roll your neck to the right slowly and then back to the left.[21]
- Use the weight of your head to roll your neck, don’t force it.
- Focus on the tight spots in your neck and work to release them.
- Continue the neck rolls for about 2 minutes — 1 minute in either direction.
-
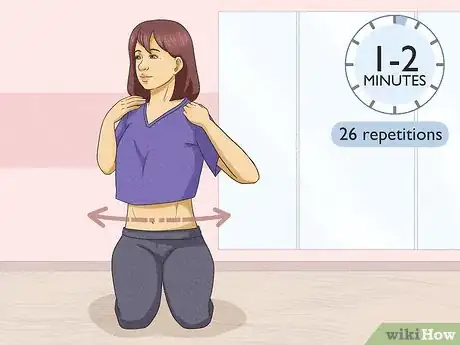
8Twist to the side. Sit on your heels on the ground. Put your hands on your shoulders with your thumbs towards your back. While you inhale, twist yourself to the left. While you exhale, twist yourself to the right.[22]
- Twist your head while you’re twisting your body.
- With each twist, try to twist a little bit farther than the time before.
- Your elbows should remain parallel to the ground and should swing as you twist your body.
- You can also do this exercise while standing up.
- Repeat this exercise for about 1-2 minutes, or about 26 repetitions on each side.
- When you’re done your repetitions, inhale and hold your breath. Perform a Root Lock and then exhale.
-
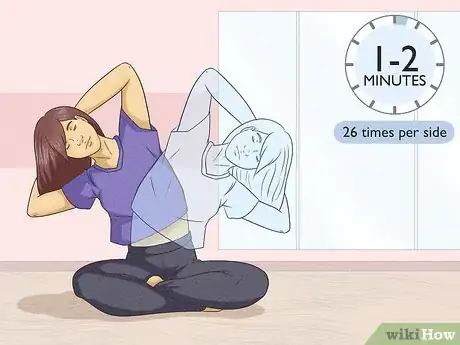
9Bend to the side. Sit in the Easy Pose. Put your hands behind your head with your fingers interlocked together. First bend your body — from the waist — to the right side. Try to bend until you touch your right elbow to the ground beside your right hip. Repeat the movement to the left side.[23]
- To be consistent, inhale when you’re bending to the left and exhale when you’re bending to the right.
- Only bend sideways, not to the front or back.
- Try not to arch your back while you’re bending to the side.
- You can also perform this exercise while you’re standing up if you prefer.
- Repeat this exercise for 1-2 minutes or approximately 26 times per side.
-
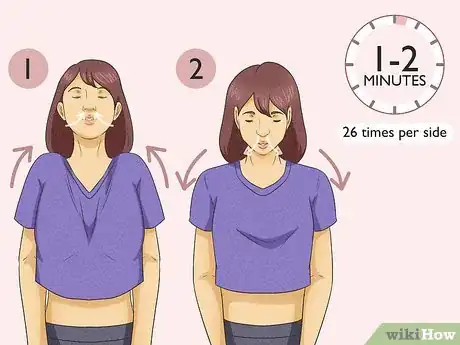
10Shrug your shoulders. Perform this exercise while you’re sitting on your heels or in the Easy Pose. While you inhale, shrug your shoulders upwards. While you exhale, shrug your shoulders downwards.[24]
- Repeat these movements for about 1-2 minutes.
- After you’ve completed these exercises, inhale and hold your breath. Perform a Root Lock and then exhale.
-
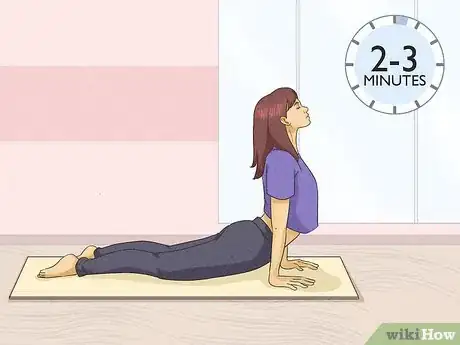
11Do the Cobra exercise. Start by lying on your stomach on the floor (preferably on a yoga mat). You should start with your hands on the ground, palms down, under your shoulders. While you inhale, arch your spine upwards slowly. Lead with your nose, then your chin, then push off with your hands. Stop when you’ve arched your back as far as you can go without causing any pain in your lower back.[25]
- Breath deeply while performing this exercise.
- Hold each stretch for a while and then relax. Repeat the process for about 2-3 minutes.
- Finish with an inhale, then hold your breath. Complete a Root Lock and then exhale slowly (explained in Tips).
-
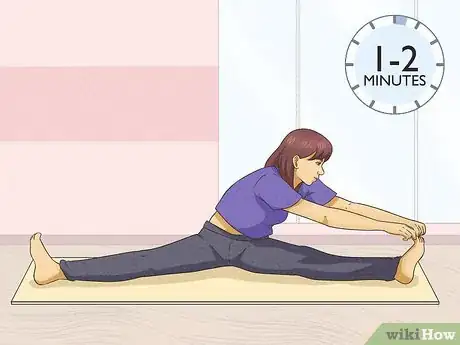
12Alternate stretching your legs. Sit on the ground with your legs as far apart as you can do without pain. Grab your toes with your hands (or anywhere else on your leg that you can comfortably grasp). Inhale, then exhale and bend down towards your left leg. Inhale while you sit back up, then exhale as you bend down towards your right leg.[26]
- Keep your back straight throughout this exercise.
- Repeat these movements for 1-2 minutes.
- Once you’re finished your repetitions, inhale and hold your breath. Perform a Root Lock then exhale.
-
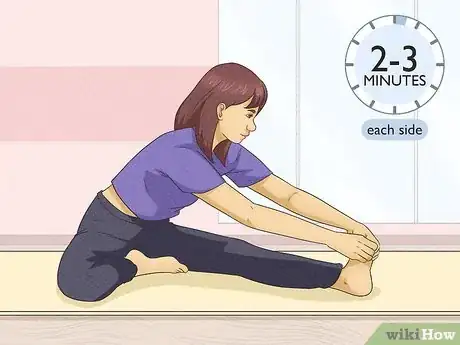
13Stretch your legs with the Life Nerve Stretch. Sit on the ground with your legs out in front of you. Bend your left leg inwards and press your left foot against your right thigh. Bend over your right leg and grab your right foot or ankle.[27]
- Breathe deeply while stretching.
- Perform the stretch for about 1-2 minutes on each side.
-
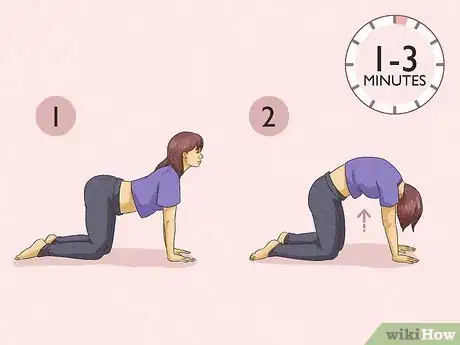
14Perform the Cat Cow stretch. Get down on your hands and knees on a yoga mat. Your knees should be about shoulder-width apart. As you inhale, flex your spine upwards. As you exhale, flex your spine downwards.[28]
- Increase the speed of your movements the longer you perform this exercise.
- Repeat the exercise for 1-3 minutes.
EXPERT TIPBased in San Diego, Susana Jones is a Yoga Therapist and Educator with 12 years of experience serving groups, individuals and organizations. She is certified with the International Association of Yoga Therapists, registered as an E-RYT 500 with Yoga Alliance and holds a Bachelor’s degree from the University of Colorado. Susana offers therapeutic yoga to private clients through Shakti Urbana and mentors students of the internationally accredited Soul of Yoga. Susana dedicates her work to peaceful living on a healthy planet.Certified Yoga Therapist & Educator
 Susana Jones, C-IAYT
Certified Yoga Therapist & EducatorExpert Trick: Keep your arms slightly bent at the elbow as you perform this exercise. A soft bend will engage the muscles in your arm, so you'll be more stable and able to do the exercise much more easily.
-
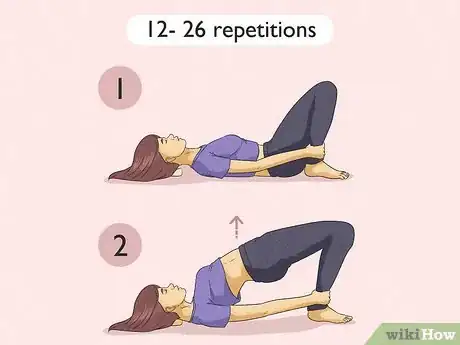
15Move your body in the Pick Me Up exercise. Lie on your back on a yoga mat with your knees bent upwards. Grab your ankles with your hands and pull your heels into your butt. Keep your feet flat on the floor at all times.[29]
- While holding your ankles, slowly lift your hips up and off the ground. Keep lifting your hips until you’re able to arch your lower spine.
- Inhale slowly as your lift your hips upwards. Inhale through your nose. Hold your breath as you reach the top of the movement.
- Exhale through your nose as you relax your hips and spine.
- Repeat these movements at least 12 times but no more than 26 times.
- Once you’re done your repetitions, inhale and hold your breath. Perform a Root Lock and exhale. Relax your body and stretch your legs out in front of you.
Finishing Each Set
-
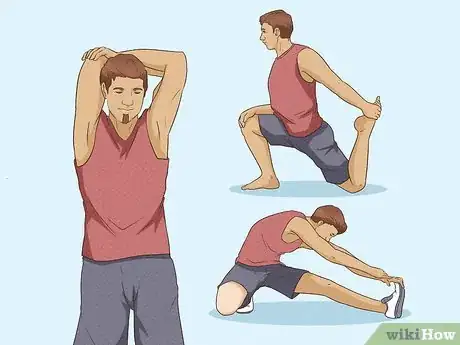
1Conduct stretches to finish each set of exercises or a meditation session. After you’ve completed a meditation or a set of yoga exercises you may feel the need to stretch and bring yourself back down to earth.[30]
-
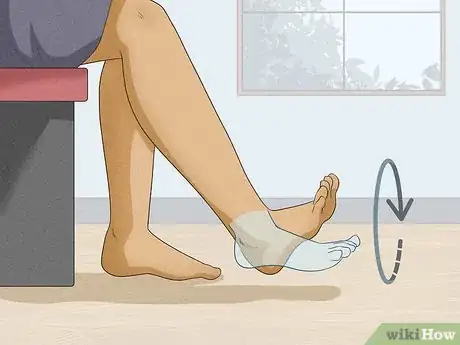
2Rotate your feet. While lying on your back, rotate your feet (at the ankles) in small circles for 30 seconds. Change directions and rotate your feet for another 30 seconds.[31]
-
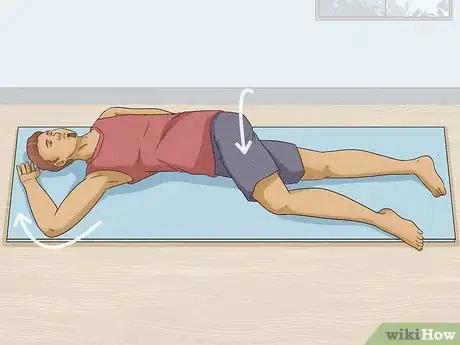
3Complete the cat stretch. Lie on your back on the ground. Keep your shoulders and your left leg flat on the ground. Lift up your right knee and move it over top of your left leg until it’s lying on the ground on the other side of your left leg. Move your right arm so that it’s stretched directly above your head, but still flat on the ground.[32]
- Hold the position until your feel the stretch and then switch sides.
-
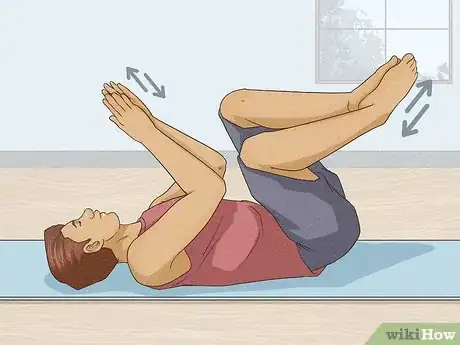
4Rub your soles and palms together. Lie on your back on the ground. Lift up your knees so they’re bent above you. Hold the soles of your feet together and rub them. Hold your palms together and rub them too. Rubbing both your soles and palms should generate some heat.[33]
- Do this exercise for about 1 minute.
-
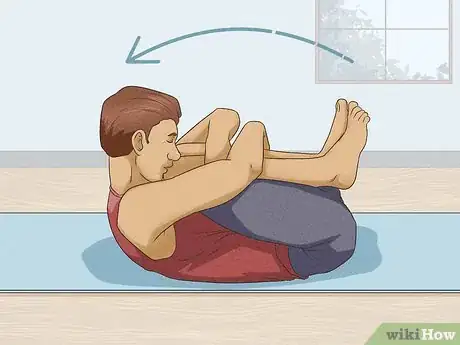
5Roll on your spine. Lie on your back on the ground. Lift your knees up so you can tuck them into your chest. Put your arms around your legs to help pull your knees closer. Roll forwards and backwards on your spine.[34]
- Repeat the roll at least 3-4 times in a row.
-
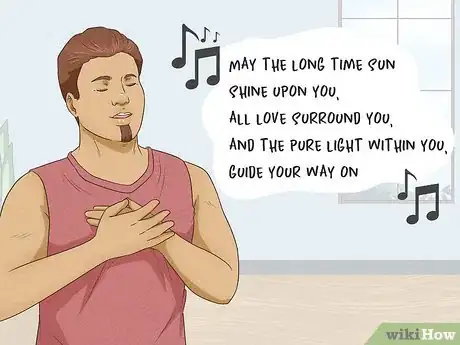
6Say a prayer of thanks. While sitting with your spine straight and your hands together in front of your heart, close your eyes. Inhale and say a prayer of thanks, then exhale.[35]
- You can sing the following as well: May the long time sun shine upon you, all love surround you, and the pure light within you, guide your way on."
- You can also repeat the following chant three times: “Saaaaaaaat Nam."
Warnings
- If you develop any pain or feel uncomfortable during these exercises, stop. If the pain continues, seek the advice of your doctor.⧼thumbs_response⧽
References
- ↑ http://www.yogatech.com/kysets/44breath
- ↑ http://www.yogatech.com/kysets/44breath
- ↑ http://www.yogatech.com/kysets/44breath
- ↑ http://www.yogatech.com/kysets/44breath
- ↑ http://www.yogatech.com/kysets/44breath
- ↑ http://www.yogatech.com/kysets/44breath
- ↑ http://www.yogatech.com/kysets/44breath
- ↑ http://www.yogatech.com/kysets/44breath
- ↑ http://www.yogatech.com/kysets/44breath
- ↑ http://www.kundaliniyoga.org/prep.html
- ↑ http://www.kundaliniyoga.org/prep.html
- ↑ https://www.3ho.org/kundalini-yoga/eye-focus
- ↑ http://www.kundaliniyoga.org/prep.html
- ↑ http://www.kundaliniyoga.org/prep.html
- ↑ http://www.kundaliniyoga.org/bhandas.html#MULBHAND
- ↑ http://www.kundaliniyoga.org/spinal.html
- ↑ http://www.kundaliniyoga.org/prep.html
- ↑ http://www.kundaliniyoga.org/spinal.html
- ↑ http://www.kundaliniyoga.org/spinal.html
- ↑ http://www.kundaliniyoga.org/spinal.html
- ↑ http://www.kundaliniyoga.org/spinal.html
- ↑ http://www.kundaliniyoga.org/spinal.html
- ↑ http://www.kundaliniyoga.org/spinal.html
- ↑ http://www.kundaliniyoga.org/spinal.html
- ↑ http://www.kundaliniyoga.org/spinal.html
- ↑ http://www.kundaliniyoga.org/spinal.html
- ↑ http://www.kundaliniyoga.org/spinal.html
- ↑ http://www.kundaliniyoga.org/spinal.html
- ↑ http://www.kundaliniyoga.org/spinal.html
- ↑ http://www.kundaliniyoga.org/prep.html
- ↑ http://www.kundaliniyoga.org/prep.html
- ↑ http://www.kundaliniyoga.org/prep.html
- ↑ http://www.kundaliniyoga.org/prep.html
- ↑ http://www.kundaliniyoga.org/prep.html
- ↑ http://www.kundaliniyoga.org/prep.html






-Step-6-Version-3.webp)
