X
This article was co-authored by Laura Martin. Laura Martin is a Licensed Cosmetologist in Georgia. She has been a hair stylist since 2007 and a cosmetology teacher since 2013.
There are 8 references cited in this article, which can be found at the bottom of the page.
This article has been viewed 130,803 times.
The distinctive shiny finish of chrome nails makes for a striking manicure. If you already do your own gel nails, it’s easy to do chrome nails because you only need to purchase a few extra items.[1] By adding chrome powder to your gel manicure and finishing it with a protective top coat, you can get this trendy look for a fraction of the nail salon price.
Steps
Part 1
Part 1 of 2:
Applying a Gel Manicure
-
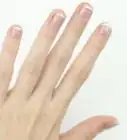
1File and buff your nails to prepare them for gel polish. Use a nail file to create the desired shape, and use a cuticle stick to press back any skin that is overlapping the nail. Buff nails with a buffer and use a soft brush to remove the nail dust.
- It is important to buff your nails because gel nail polish will not stick to a smooth, shiny nail surface.
-
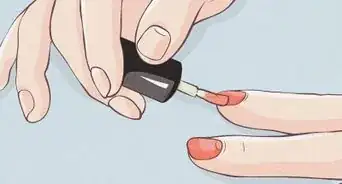
2Paint on a gel nail polish base layer. When painting on the nail polish, make sure the brush bristles are parallel to the nail’s growth direction to create a smooth and even surface.[2] The base coat will help your manicure last longer and will protect you nails for becoming stained.[3]
- Make sure to cure the base layer for 60 seconds before you apply the gel polish.
Advertisement -
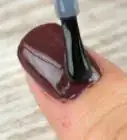
3Brush on colored gel nail polish. For a more visible chrome effect, use a dark color like black.[4] If you are using a lighter color, you may want to add a second coat.
- Using a lighter colored polish will give your nails a more understated shimmer instead of a bold mirrored look.
-
4Place your hands under a UV or LED lamp to cure the polish. Follow the nail polish manufacturer’s instructions for how long to keep your hands under the lamp. You can also use a handheld UV or LED light, but it will take longer since you can only hold it over one nail at a time.
-
5Finish the gel manicure with a top coat or another layer of base coat. Use a “no wipe” gel top coat or another layer of base coat for the best results when adding the chrome powder. Place your nails under a UV or LED lamp until the top coat is completely dry.[5]
- Be careful not to touch the top coat. You can transfer natural oils from your skin that will keep the chrome powder from going on smoothly.[6]
Advertisement
Part 2
Part 2 of 2:
Adding the Chrome Powder
-
1Collect a tiny amount of chrome powder on the applicator. If your chrome powder didn’t come with an applicator, you can use a foam eyeshadow applicator or a rubber-gloved finger.[7] Since chrome powder is expensive, start with a very small amount. You can always add more if needed.
- Chrome powder is made of glass, metal, and pigment. It doesn’t actually contain any chrome, because chrome is a heavy metal that cannot safely be used in cosmetics.[8]
- Chrome powder is available in many different colors as well as a neutral silver.[9] It can be purchased online or from a beauty supply store.
-
2Work the chrome powder into the nail in a single brushing motion. Pressing down slightly, start at the cuticle and work towards the end of the nail. Make sure that the entire nail is covered with powder, using multiple strokes if needed.[10]
-
3Rub the chrome powder across the nail with the applicator. Keep rubbing until the entire nail is shiny.[11] You will know that you are finished when the nail can reflect light.
- While the powder looks like it becomes solid, actually it remains a very fine powder. The particles get very close together to create that effect.[12]
-
4Brush off the excess powder with a fluffy brush. The extra powder will look like sparkly particles.[13] Instead of a brush, you can use a lint-free pad or paper towel to wipe away excess powder.[14]
- It is important to remove the excess powder because it will leave the finish slightly sparkly instead of completely mirror-like.
- However, if you want a slightly sparkly finish, you can leave the powder in place.
-
5Paint on a gel top coat to seal the chrome layer. If you use a regular top coat, the chrome can become streaky and lose its shine.[15] Wipe the brush clean on paper towel or tissue before dipping it back into the bottle to keep the polish from becoming contaminated with chrome powder.
-
6Place your hands under under a UV or LED lamp to cure the top coat. If there is a sticky layer of residue after curing the top coat, wipe it off with a cotton ball dipped in isopropyl alcohol. You can add another top coat layer to make your chrome manicure more durable.[16]
Advertisement
Things You’ll Need
- Nail file
- Cuticle stick
- Buffer
- Soft brush
- Gel nail polish base layer
- Colored gel nail polish
- No wipe gel nail polish top coat
- UV or LED lamp
- Chrome powder
- Powder applicator
- Paper towel
References
- ↑ https://fashionista.com/2016/08/chrome-nails
- ↑ https://www.nailsmag.com/qa/117634/how-can-i-make-sure-my-chrome-nails-have-a-mirrored-finish
- ↑ https://www.goodhousekeeping.com/beauty/nails/a34522/why-base-coat-is-important/
- ↑ https://www.nailitmag.com/get-chrome-nails
- ↑ https://www.beautyheaven.com.au/hands/nail-tools-accessories/how-to-use-chrome-powder-for-super-shiny-nails/chrome-nails-inspo
- ↑ https://www.nailsmag.com/qa/117634/how-can-i-make-sure-my-chrome-nails-have-a-mirrored-finish
- ↑ https://fashionista.com/2016/08/chrome-nails
- ↑ https://www.theatlantic.com/science/archive/2018/04/the-chemistry-of-nail-art/558113/
- ↑ https://www.glamourmagazine.co.uk/gallery/best-chrome-nails
- ↑ https://www.nailsmag.com/video/116086/how-to-apply-chrome-pigment-powder
- ↑ https://www.beautyheaven.com.au/hands/nail-tools-accessories/how-to-use-chrome-powder-for-super-shiny-nails/chrome-nails-inspo
- ↑ https://www.theatlantic.com/science/archive/2018/04/the-chemistry-of-nail-art/558113/
- ↑ https://www.nailsmag.com/qa/117634/how-can-i-make-sure-my-chrome-nails-have-a-mirrored-finish
- ↑ https://fashionista.com/2016/08/chrome-nails
- ↑ https://www.beautyheaven.com.au/hands/nail-tools-accessories/how-to-use-chrome-powder-for-super-shiny-nails/chrome-nails-inspo
- ↑ https://fashionista.com/2016/08/chrome-nails
About This Article
Advertisement

