This article was co-authored by Kristin Pulaski. Kristin Pulaski is a Professional Nail Artist and the Founder of Paintbucket, a self-owned and operated nail salon based in Williamsburg, Brooklyn. She has over five years of experience running Paintbucket and is licensed as a nail technician. Paintbucket offers nail art manicures, pedicures, and soft gel extensions along with customized packages for wedding and bridal parties. She holds a BA in Managerial Science from Manhattan College.
There are 8 references cited in this article, which can be found at the bottom of the page.
wikiHow marks an article as reader-approved once it receives enough positive feedback. In this case, 100% of readers who voted found the article helpful, earning it our reader-approved status.
This article has been viewed 211,942 times.
Painting press-on fingernails is a great way to express your style without having to groom and grow out your natural nails. You can add polish to press-on nails before applying them to your nails using some tape and a cotton swab, or easily paint press-on nails once they’re already adhered to your fingernails.
Steps
Adding Polish Before Application
-
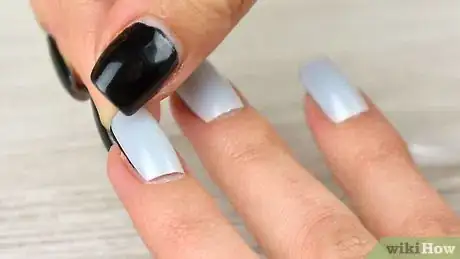
1Try on different nail sizes to find which fits each finger. Before painting press-on nails, you’ll likely need to try on a few sizes and shapes to find ones that fit over each of your fingernails. Your goal is to find nails that closely mimic the shape and curve of your natural nails so they’ll fit snuggly once applied.[1]
- Once you’ve found the right sizes, lay them out in the order you’ll apply them so they don’t get mixed up.
- Most press-on nails are sold in a pack with multiple sizes and shapes, so you’ll likely be able to find a size that fits each one of your nails.
- Some press-on nails come with a size chart, so you may want to write down the size you’re using for each finger to save yourself a bit of time in the future.[2]
-
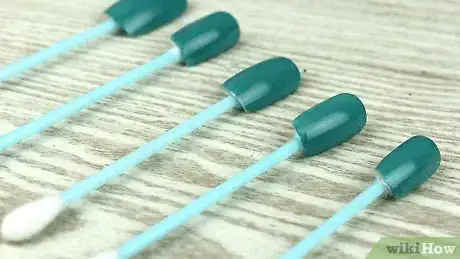
2Press a thin strip of tape on the back of each nail. Using scissors, cut a small strip of tape that is thin enough to fit on the back of the press-on nails. Then, fold the tape edges inward with the adhesive side facing out so that the edges overlap and adhere together. Flip each of the press-on nails over so the bottom faces up and press the tape rolls onto the back of each nail.
- This will form a little adhesive roll that will allow you to stick the nails onto the cotton swabs.
- Instead of tape, you can roll a tiny piece of adhesive tack into a ball and press it onto the back of each nail.[3]
Advertisement -
3Stick the end of a cotton swab onto the tape that’s adhered to the nails. Press down on the tape to make sure that the cotton swab and nail are both securely adhered. Then, flip each of the nails over so you can start painting.
- If you’re using adhesive tack instead of tape, you can use a toothpick instead of a cotton swab by pressing the end of the toothpick into the tack.[4]
-
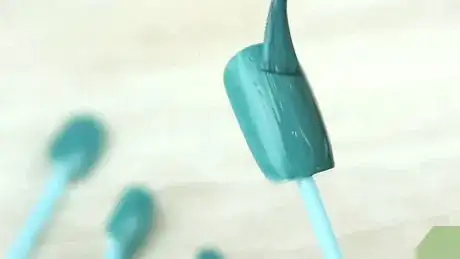
4Paint each of the nails with the polish color of your choice. Hold one of the cotton swabs with your non-dominant hand so that the top of the press-on nail faces up. Then, use your dominant hand to paint the nail with the nail polish color of your choice.[5]
- Painting the middle of the nail from the back of the nail to the front and then the sides from back to front will help you apply the polish evenly and avoid any clumping.[6]
-
5Set each nail off to the side to dry. Once you’ve completely coated one of the nails with nail polish, gently place it off to the side on a flat surface to dry. Repeat this process with each of the nails until all of them are painted with nail polish.[7]
- If you want to get creative with your polish, you can try doing nail art to create some fun, interesting designs.
- Lay a paper towel down over the flat surface to protect it in case any nail polish drips off the press-on nails.
-
6Apply a second coat if you want the polish color to be more opaque. Nail polish tends to be much more opaque on fake nails that on your natural nails, so you might not need a second coat.[8] However, if you want the color to be more opaque, you can apply another coat of paint to each of the nails after 2 minutes.
- After applying the second coat, place each of the nails off to the side on a flat, protected surface to dry.
-
7Use a top coat polish to protect the color on the press-on nails. If you want to add an extra layer of protection, paint each of the nails with a layer of top coat polish after 2 minutes. After applying the top coat, place each nail off to the side to dry completely before applying the press-on nails to your natural nails.
- Let the nails dry for 20 to 60 minutes. If you applied multiple coats, you’ll likely want to leave them to dry for the full 60 minutes to make sure the polish is completely set.
Painting Press-On Nails on Your Fingers
-
1Choose the right press-on nail size for each of your nails. Go through the pack of press-on nails and try the various sizes to find a size that fits each one of your nails. Make sure the sizes you choose closely mimic the shape and curve of your natural nails so they’ll fit snuggly once applied.[9] Then, lay them out in the order you need to apply them.
- If the press-on nails come with a size chart, write down the size you’re using for each finger to save yourself a bit of time in the future.[10]
-
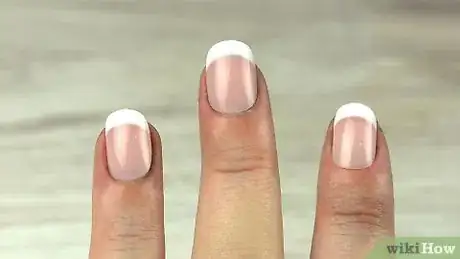
2Apply the press-on nails on top of your natural nails. Using a dab of nail glue, press each of the nails onto your natural fingernails, holding each down for 10 seconds to ensure they’re tightly sealed to your real nails.[11] Then, file the nails to your desired length and shape.
-
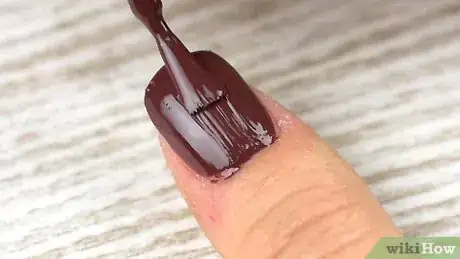
3Paint the press-on nails as you would your normal nails. Once the press-on nails are adhered to each of your fingers, use the nail polish color of your choice to paint each of the nails. First, press the pads of your fingers into a flat surface to keep your fingers from moving too much. Then, paint each nail from back to front, swiping with the brush down the middle of the nail first and then filling in the sides with the excess polish on the brush.[12]
- Make sure that the first coat you apply is thin.
-
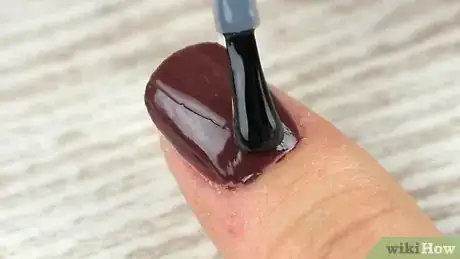
4Apply a second coat of polish if you want the color to be more opaque. While polish is generally more opaque on press-on nails than it would be on your nautral nails, you still might want to apply a second coat to make the polish even more opaque. When applying a second coat, let the first coat dry for about 2 minutes. Then, paint each nail with another thin coat of polish.
- Apply the second coat of paint to each of the nails once the first coat is partially dry but not completely set.
- To add a bit of pizazz to your press-on nails, use a glitter polish as your second coat.[13]
-
5Protect the color polish with a layer of top coat polish. To add an extra layer of protection for the color polish on your press-on nails, paint each nail with a layer of top coat polish 2 minutes after applying the second color coat. Then, let your nails dry completely for 20 to 60 minutes before using your fingers.[14]
- To get your press-on nails to dry quickly, you can soak them in an ice bath, or use a quick-dry spray or cooking spray.
- Nail polish takes about 24 hours to totally cure.
Community Q&A
Did you know you can get answers researched by wikiHow Staff?
Unlock staff-researched answers by supporting wikiHow
-
QuestionHow do you wear fake nails without damaging your real nails?
 wikiHow Staff EditorThis answer was written by one of our trained team of researchers who validated it for accuracy and comprehensiveness.
Staff Answer wikiHow Staff EditorStaff AnswerPress-on nails are pretty gentle on your real nails, but removing them can sometimes cause damage. If you need to soak your nails in acetone to dissolve the glue, moisturize your hands and nails afterwards to prevent drying. The glue itself can also cause damage over time, so try to limit how often you use it. Save fake nails for special occasions so your real nails have time to breathe and recover between manicures.
 -
QuestionWhy do my press-on nails hurt?
 wikiHow Staff EditorThis answer was written by one of our trained team of researchers who validated it for accuracy and comprehensiveness.
Staff Answer wikiHow Staff EditorStaff AnswerIt’s possible that the nails don’t fit right and are pressing uncomfortably on your cuticles or nail beds. Or, if you’re experiencing an itching or burning sensation, you may be having a bad reaction to the nail glue. If you’re having a lot of pain or other worrisome symptoms, see your doctor and get advice about how to safely remove the nails.
 -
QuestionHow do you paint your fingernails without getting it on your skin?
 wikiHow Staff EditorThis answer was written by one of our trained team of researchers who validated it for accuracy and comprehensiveness.
Staff Answer wikiHow Staff EditorStaff AnswerIf you’re using press-on nails, you can avoid this by painting the nails before putting them on your fingers. If you’d rather paint the nails on your fingers, rub some petroleum jelly on your cuticles before you start painting. The jelly will keep the polish from sticking to your skin. Simply wipe it away with a cloth or paper towel once you’re done painting your nails.
Things You’ll Need
Adding Polish Before Application
- Press-on nails
- Nail glue
- Tape or adhesive tack
- Cotton swab or toothpick
- Nail polish color
- Nail polish top coat
Painting Press-On Nails on Your Fingers
- Press-on nails
- Nail glue
- Nail polish color
- Nail polish top coat
References
- ↑ https://youtu.be/A_-2NC5FHNQ?t=54
- ↑ https://www.rookiemag.com/2015/01/diy-artificial-nails/
- ↑ https://youtu.be/A_-2NC5FHNQ?t=58
- ↑ https://youtu.be/A_-2NC5FHNQ?t=134
- ↑ https://youtu.be/A_-2NC5FHNQ?t=215
- ↑ https://www.cosmopolitan.com/style-beauty/beauty/how-to/a5101/things-about-painting-your-nails-you-might-not-know/
- ↑ https://www.rookiemag.com/2015/01/diy-artificial-nails/
- ↑ https://www.rookiemag.com/2015/01/diy-artificial-nails/
- ↑ https://youtu.be/A_-2NC5FHNQ?t=54
- ↑ https://www.rookiemag.com/2015/01/diy-artificial-nails/
- ↑ https://www.self.com/story/fake-nails-manicure-tips
- ↑ https://www.cosmopolitan.com/style-beauty/beauty/how-to/a5101/things-about-painting-your-nails-you-might-not-know/
- ↑ https://youtu.be/0KBpLn1GZF0?t=143
- ↑ https://www.rookiemag.com/2015/01/diy-artificial-nails/
About This Article
Painting press-on nails is a great way to express your style without having to wait for your natural nails to grow out. If you want to paint them before you apply the nails, stick the back of each nail to a cotton swab using adhesive tape or a tack to hold them in place. Then, you’ll want to paint each nail in the color of your choice. Once you complete each nail, set it aside to dry for 5 to 10 minutes. You can then apply a second coat if you want the color to look more opaque. Finally, apply a clear top coat to protect the color and let your painted nails dry for up to 60 minutes. If you’re already wearing your press-on nails, you can paint them in the same way you would paint your real nails. However, you may find this harder than painting them before you apply them. For tips on how to choose the right size of press-on nails for your fingers, keep reading!
