This article was co-authored by wikiHow Staff. Our trained team of editors and researchers validate articles for accuracy and comprehensiveness. wikiHow's Content Management Team carefully monitors the work from our editorial staff to ensure that each article is backed by trusted research and meets our high quality standards.
This article has been viewed 13,929 times.
Learn more...
Crocheting into the back loop is a common instruction in crochet patterns, and it’s quite easy to do. All this crochet technique requires is inserting your hook into a different part of the existing stitch. You can use the back loop technique with any crochet stitch. Try using the back loop crochet technique to add texture, dimension, and folds to your crochet work.
Steps
Crocheting the Basic Stitch
-
1Create a foundation row. You cannot work through the back loop until you have a back loop to work through. Chain and crochet at least the first row of your work.[1] If you are using a pattern, pay close attention to where you need to begin working into the back loop. You may need to begin on a specific row, or you may need to start further into the row.
- For example, the pattern may indicate something like, “Row 3: single crochet into the back loop” or “Row 5: *SC, SC into back loop, repeat from * to the end of the row.”
-
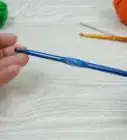
2Wrap the yarn around the hook once or twice. If you are doing a single crochet stitch, then you do not need to wrap the yarn around the hook at all before inserting it into the back loop. Consult the pattern if you are unsure about what type of crochet stitch you should use.Advertisement
-
3Insert the hook in through the center of the stitch. Instead of crocheting under both strands of the stitch, insert your crochet hook in between the 2 strands. Push the hook through the center of the stitch and towards the back of your work, which is the part of the stitch that is furthest away from you.[4]
-
4Loop the yarn over the hook. Take your working yarn and bring it around the end of your hook to create a new stitch. Loop the yarn around the hook going from the back of the hook to the front of it.[5]
- Only loop the yarn around the hook 1 time.
-
5Pull the yarn through the stitch. Hold the yarn taut to keep the loop tight on the hook. Then, pull the hook back through the center of the stitch.[6]
- You should have 2 loops on your hook after you pull the yarn through.
-
6Yarn over again and pull through both stitches. Bring the working yarn over the hook again going from the back to the front. Hold the yarn taut, and then pull this new loop through both loops on the hook.[7]
- This will complete your first back loop single crochet stitch.
-
7Pull through once or twice more for a double or triple crochet stitch. If you are doing a double or triple stitch, then you will need to yarn over and pull through 1 or 2 more times. Consult your crochet pattern if you are unsure about what type of stitch to use.

Using the Back Loop Crochet Stitch
-
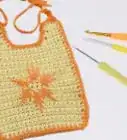
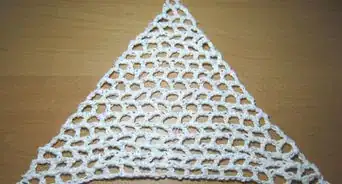
1Try the back loop stitch to add texture to a project. Using the back loop crochet stitch for all of your rows will create a ridged effect and this adds texture.[10] You may want to add texture to a garment or for something where texture would be functional, such as a washcloth.
-
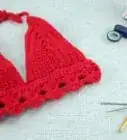
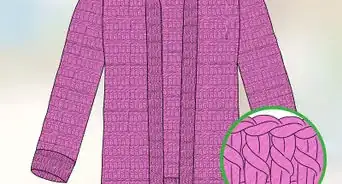
2Use the back loop to add dimension to a stitch. Crocheting into the back loop also creates a visible ridge in your crocheted item, so it is a great way to add interest to a project. If you want to make your stitches look more prominent, or if you want to intensify the divide between different color rows, then do a back loop row.[11]
- For example, if you are crocheting a blanket using a wave pattern, then you could do a back loop row every time you change colors to make the waves look more prominent. This will give them a 3-D effect.
-
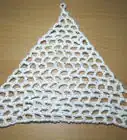
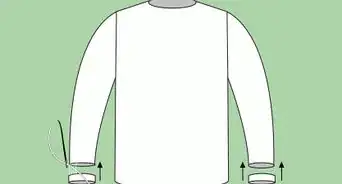
3Add a row of back loop stitches to create a fold. If you want to create a fold in your work, then you can work 1 row of back loop stitches.[12] This will change the way that the stitches are oriented and the material will have a natural fold when you are finished. This might be helpful if you are crocheting a purse or a pair of slippers.
- For example, you could add the back loop row where you want the bottom of the purse to meet the side of the purse.
Things You'll Need
- Yarn
- Crochet hook
- Crochet pattern (optional)
References
- ↑ https://www.woolandthegang.com/how-to/crochet/single-crochet-through-the-back-of-the-stitch
- ↑ https://www.craftyarncouncil.com/mar06_dc.html
- ↑ http://newstitchaday.com/how-crochet-triple-crochet-stitch/
- ↑ http://newstitchaday.com/blsc-back-loop-single-crochet/
- ↑ http://newstitchaday.com/blsc-back-loop-single-crochet/
- ↑ http://newstitchaday.com/blsc-back-loop-single-crochet/
- ↑ http://newstitchaday.com/blsc-back-loop-single-crochet/
- ↑ https://www.craftyarncouncil.com/mar06_dc.html
- ↑ http://newstitchaday.com/how-crochet-triple-crochet-stitch/
About This Article