X
wikiHow is a “wiki,” similar to Wikipedia, which means that many of our articles are co-written by multiple authors. To create this article, 16 people, some anonymous, worked to edit and improve it over time.
This article has been viewed 171,873 times.
Learn more...
This bath puff looks intricate, but all the curlicues happen naturally from a very simple pattern. Once you get started, it's very easy to keep going as long as you want, or until you run out of yarn.
Steps
-
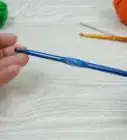
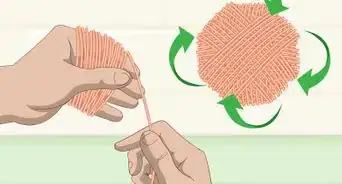
1Begin with at least one full ball of cotton yarn and an appropriately sized hook.
- The exact gauge for this project does not matter.
- This demonstration uses a two ounce ball of four-ply, worsted weight yarn and an H/8 or 5.0mm hook. The result is a ball about 5" in diameter.
- The diameter increases more slowly, the more you crochet. Be prepared to use at least one full ball of yarn.
-
2Tie a slip knot.Advertisement
-
3Chain two.
-
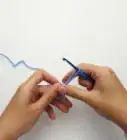
4Single crochet four stitches into the second chain from the hook.
- The exact number of stitches does not matter much. You may start this project with any start you usually use to crochet in the round, and with any number of stitches that seems comfortable.
-
5Single crochet two in each previous stitch. Don't worry if the first ring or two doesn't look like much.
- Go ahead and join rounds. There's no need to count stitches in this pattern.
-
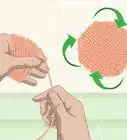
6Continue around subsequent rings, placing two single crochets in each previous stitch for as long as you want.
- The circumference doubles with each subsequent row, because you are crocheting two stitches per stitch. As the circle gets bigger, the circumference gets much bigger.
- Add as many rows and as much yarn as you wish. Each subsequent row will take twice as long to crochet, but it will also make the puff curlier.
- The puff will become progressively more curly, the longer you crochet. It could go further still, but it will require more and more yarn.
-
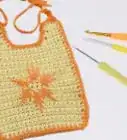
7Attach a ribbon or braid to the center to allow for hanging the puff to dry, or leave a long tail at the beginning and chain or tie a loop.


Advertisement
Community Q&A
-
QuestionIt falls apart when it gets wet and is very heavy. Any ideas?
 Community AnswerUse netting and a very loose stitch. Bind at the core with a tight rubber band like the kind used in girls' braids.
Advertisement
References
About This Article
Advertisement