This article was co-authored by Sarah Stearns. Sarah Stearns is a DIY Specialist, Artist, Maker, Blogger, and the Founder of SarahMaker.com. With over ten years of experience, she specializes in fun, approachable crafts like crocheting, making polymer clay jewelry, quilting, and creating Cricut projects. Her work has been featured in several publications, such as Scientific American, Good Housekeeping, Vox, and Apartment Therapy. Sarah holds a BA in Psychology from Vanderbilt University.
This article has been viewed 64,316 times.
Baby hats can be a moderately challenging project for beginning crocheters, but with a little practice, you can craft a variety of designs using only a few basic stitches.
Steps
Single Crochet Beanie
-
1Tie the yarn onto the crochet hook. Create a slip knot on the hooked end of your crochet hook using one end of the yarn.
- Note that the unattached end of the yarn will be left alone for the remainder of the pattern and is referred to as the "tail end." The end still attached to the skein is the "working end," and you will be drawing yarn from that end as you make the hat.
-
2Chain two. Make two chain stitches from the loop on your hook.Advertisement
-
3Form a ring. Work six single crochets into the second chain from the hook. This should form your first round.
- Note that the second chain from the hook is also the first chain you created.
-
4Single crochet into each stitch. To complete the second round, make two single crochets into each stitch of the previous round.
- When done, this round should have a total of 12 single crochets.
- Mark the last stitch of the round with a plastic stitch marker. If you do not have one, use a safety pin or paperclip.
-
5Single crochet the third round. Work one single crochet into the first stitch of the previous round. Work two single crochets into the stitch that follows. Repeat this pattern to complete the remainder of the round, working one single crochet into each odd numbered stitch and two single crochets into each even numbered stitch.
- When done, this round should have 18 stitches.
- Move the pin marker to the last stitch of this round.
-
6Increase the size of the next round. Work one single crochet into the first stitch of the previous round. Work another one single crochet into the second stitch. For the third stitch, work two single crochets. Repeat this pattern, making one single crochet, another one single crochet, and two single crochets around the rest of the round.
- When done, you should have 24 single crochets in this round.
- Move the stitch marker to the last stitch in this round before continuing.
-
7Work additional single crochets for the fifth round. Make one single crochet in each of the first three stitches of the previous round. Afterward, make two single crochets into the fourth stitch of the previous round. Repeat this pattern until you reach the end of your round.
- You should make a total of 30 single crochets for this round.
- Mark the end of round five with your stitch marker.
-
8Increase the stitch count over the next four rounds. For rounds six through nine, you will continue to increase the number of stitches receiving only one single crochet in between the stitches receiving two single crochets.
- For round six, work one single crochet into the first four stitches of the previous round, then work two single crochets into the fifth stitch. Repeat until you reach the end of the round.
- For round seven, work one single crochet into the first five stitches of the previous round, then work two single crochets into the sixth stitch. Repeat until you reach the end of the round.
- For round eight, work one single crochet into the first six stitches of the previous round, then work two single crochets into the seventh stitch. Repeat until you reach the end of the round.
- For round nine, work one single crochet into the first seven stitches of the previous round, then work two single crochets into the eighth stitch. Repeat until you reach the end of the round. Note that this round will have 54 stitches in it by the end.
- Note that you should be marking the end of each round with your stitch marker as you work.
-
9Complete 16 more rounds. For the remaining rounds, you will only need to make one single crochet in each stitch of the previous round.
- Each of the remaining rounds should have 54 stitches.
- Move the stitch marker to the last stitch of each round before moving onto the next to help you keep track of where you are at in the pattern.
- This pattern should be followed for rounds 10 through 25.
-
10Slip stitch across. For the final round, you should make a slip stitch into each of the stitches from the previous round.
-
11Tie off the yarn. Cut the yarn, leaving a 2 inch (5 cm) tail. Pull it through the loop on your hook and tighten it to form a knot.
- Weave in the remaining tail to hide it and complete the baby hat.
Double Crochet Beanie
-
1Tie the yarn onto the hook. Make an adjustable slip knot on the hooked end of your crochet hook with one end of your yarn.
- The unattached end of the yarn, or "tail end," will be ignored for the remainder of the pattern. The end still attached to the skein, or the "working end," will be the side you draw from as you make the hat.
-
2Chain four. Make four chain stitches from the loop of yarn on your hook.
-
3Form a ring. Make one slip stitch through both loops of your original chain stitch, which is also the fourth chain from the hook. This will join the last and first stitches and form a starting ring.
-
4Double crochet into the middle of the ring for your first round. Make two chain stitches. Then, work 13 double crochets into the middle of the ring previously created. Slip stitch through both loops of the first double crochet to join the last and first stitches, completing the round in the process.
- Note that the first two chain stitches do not count as a stitch in this round.
-
5Double your double crochets. For the second round, work two double crochets into each stitch of the previous round. Slip stitch the first and last double crochets of this round to join them together.
- When done, you should have 26 stitches in this round
- Note that you should not turn your work around for this step. Your stitches should be made in the same direction as those made previously.
-
6Work an alternating pattern of double crochets for the third round. Chain two. Make one double crochet in the first stitch of the previous round, then two double crochets in the next stitch, followed by one double crochet in the stitch after that. For the rest of the round, make two double crochets in one stitch followed by one double crochet in the next. Your last stitch should be a set of two double crochets.
- When completed, you should have 39 stitches in this round.
- Join the last and first stitches with a slip stitch.
-
7Increase the stitches in round four. Chain two. Work one double crochet into each of the next two stitches, then two double crochets into the third stitch of the previous round. Repeat this pattern around the rest of the way, making one double crochet, then another one double crochet, then two double crochets.
- This round should have 52 stitches when you finish it.
- Join the last and first stitches with a slip stitch.
-
8Complete rounds 5 through 13. The pattern for each of these rounds will be the exact same. Chain two at the start of the round, then work one double crochet into each stitch of the previous round. Join the last and first stitches of each new round with a slip stitch.
- Each of these rounds should still have 52 stitches.
-
9Turn and continue. Chain two, then flip your hat around. Continue making one double crochet in each stitch of the previous round as before, and conclude the round with a slip stitch.
- Rounds 15 and 16 are also made using this pattern, but you should not flip the hat around any more when making your rounds.
- Each of these three rounds should have 52 stitches.
-
10Make a decorative edge. Chain one, then make one single stitch into the first stitch of your previous round. Follow this pattern around the entire previous round, making one chain then one single crochet.
- Do not skip any stitches of the previous round.
- Join the last and first stitches of this round using a slip stitch.
-
11Tie off the end. Cut the end, leaving a 2-inch (5-cm) tail. Pull this tail through the loop on your hook and tighten to create a secure knot.
- Weave the excess end into a few stitches of the hat to hide it.
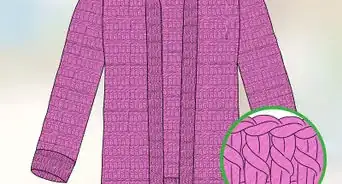
- Turn up the last three rows of double crochet to form a cuff on the hat and finish the project.
Baby Bonnet[1]
-
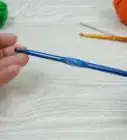
1Tie the yarn onto the hook. Make a slip knot on the hooked end of the crochet hook using one end of the yarn.
- The "tail end" or unattached end of the yarn will be ignored for the remainder of the pattern. The "working end," or the end still attached to the skein, will be the side you draw from as you complete the hat.
-
2Chain two. Work two chain stitches from the loop on your hook.
-
3Half double crochet into the second chain from the hook. Chain two, then make nine half double crochets into the second chain from the hook to complete your first round.
- To make a half double crochet:
- Wrap the yarn over the hook once.
- Insert the hook into the stitch.
- Yarn over the hook again.
- Pull the yarn and the hook back through to the front of the stitch.
- Yarn over the hook once more.
- Pull the yarn through all three loops on your hook.
- Note that the second chain from the hook is also the first chain you completed.
- The two chain stitches made at the beginning of this round count as your first half double crochet. This is true for this round and in all the following rounds.
- To make a half double crochet:
-
4Half double crochet twice around. Chain two. Make one half double crochet into the same stitch you worked the chain from. For the rest of round two, make two half double crochets into each stitch of the previous round until you reach the end. Join the last and first stitches together with a slip stitch.
- You should have 20 stitches in this round.
-
5Alternate half double crochets for the third round. Chain two and make one half double crochet into the same stitch. Half double crochet once into the next stitch, then twice into the stitch after that. Repeat this alternating pattern until you reach the end of your round.
- Join the last and first stitches with a slip stitch.
- You should have 30 stitches at the end of this round.
-
6Increase the stitch count again in round four. Chain twice and half double crochet once into the same stitch. Half double crochet once in each of the next two stitches. For the rest of the round, alternate your stitch count: complete two half double crochets in the next stitch, followed by one half double crochet in each of the next two stitches.
- Join the end and beginning of the round with a slip stitch.
- This finished round will have 40 stitches.
-
7Reduce the stitch count slightly. Chain two. For the rest of round five, half double crochet once into each of the next 37 stitches.
- You should have 38 stitches in this round.
-
8Turn and repeat. Turn the hat around. Chain two, then half double crochet once into each of the next 37 stitches to complete round six.
- This round will also have 38 stitches.
-
9Make seven more rows. Repeat the same pattern used in the previous round for rows 7 through 13.
- Chain two, then half double crochet once into each of the next 37 stitches.
- Each round should have 38 stitches in it.
-
10Single crochet the next round. Turn the hat and chain one. Single crochet once into the same stitch, then single crochet once across the remaining stitches of the row.
- Work in one decrease in the center of the round by single crocheting two stitches together.
- The round should have 37 stitches.
-
11Make a scalloped edge. A scalloped edge will need a series of single crochets and double crochets. You will make a total of six scallops when done.
- Turn the hat.
- Chain once, then single crochet once into the same stitch. Skip two stitches. Make five double crochets into the next stitch, skip another two, then single crochet once into the next stitch.
- Skip two stitches and double crochet five times into the next stitch. Skip another two stitches, then single crochet once into the stitch that follows. Repeat this substep until you work your way across the previous round.
-
12Fasten off the end. Cut the yarn, leaving a 2-inch (5-cm) tail. Pull this tail through the loop on your hook and tighten to form a knot.
- Weave the ends into the stitches of your hat to hide them.
-
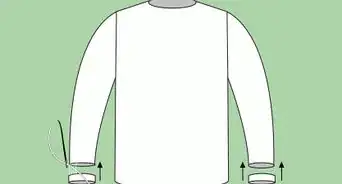
13Tie on a ribbon. To complete the bonnet look, you need make two ribbon ties on the corners of the bonnet.
- Cut two lengths of ribbon, each measuring 20 inches (50 cm).
- Double one ribbon over and loop it through one of the front corners of the bonnet. Repeat with the other ribbon.
- The baby bonnet is now complete. Use these ties to secure the hat on your baby's head as needed.


Community Q&A
-
QuestionHow should I make the hat for a 9-year-old?
 Community AnswerIt depends on the size of their head! Size up by using a thicker yarn and larger crochet hook - this will increase the size of the beanie proportionally, with the same amount of stitches. Alternatively, work more "rounds" around the beanie and work more loosely (less tension), as this will elongate and widen your hat.
Things You'll Need
- Yarn
- Crochet hook
- Yarn needle
- Scissors
- Ribbon (for bonnet only)
About This Article

To crochet a baby hat, start by tying some yarn onto a crochet hook. Then, make 2 chain stitches, and work 6 single crochets into the second chain to form a ring. Next, make 2 single crochets into each stitch from the previous round to make the second round. Repeat this pattern to stitch the third and subsequent rounds, increasing the stitch count each round until you reach round 9. Finally, complete 16 more rounds, only making 1 single crochet in each previous stitch, before slip stitching across. To learn how to make a double crochet baby hat, scroll down!