This article was co-authored by wikiHow staff writer, Travis Boylls. Travis Boylls is a Technology Writer and Editor for wikiHow. Travis has experience writing technology-related articles, providing software customer service, and in graphic design. He specializes in Windows, macOS, Android, iOS, and Linux platforms. He studied graphic design at Pikes Peak Community College.
This article has been viewed 3,527 times.
Learn more...
Do you want to create a Selenium Maven project? Selenium is an open-source (free) project that contains a variety of tools used for web browser automation and user interaction emulation, which is extremely useful for testing web applications.[1] Maven is a project management system that makes it easier for developers to comprehend a project by providing a uniform build system and quality information about a project. This wikiHow article teaches you how to create a Selenium Maven project using Eclipse IDE.
Steps
Creating a New Maven Project
-
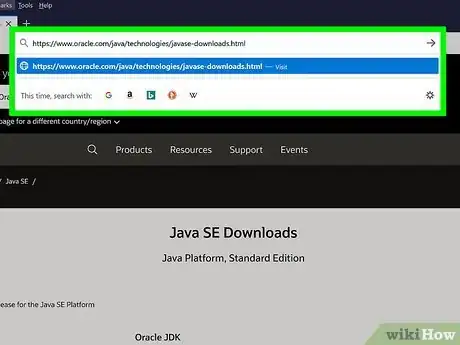
1Download and install Java JDK. Maven primarily works with Java projects. If you haven't already done so, you will need to download and install the Java Development Kit in order to create new Java projects. You can download and install the Java JDK from https://www.oracle.com/java/technologies/downloads/
-
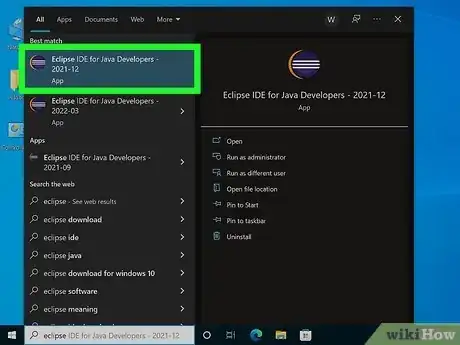
2Open Eclipse. Eclipse is an integrated development environment you can use to write scripts and manage projects for Java and other programming languages. Eclipse has an icon that resembles a blue circle with white stripes and a yellow crescent on the left. Click the Eclipse icon to open Eclipse.
- If you have not downloaded and installed Eclipse IDE yet, you can download it from https://www.eclipse.org/ide/. When installing Eclipse, be sure to select the option to install Eclipse IDE for Java Developers.
Advertisement -
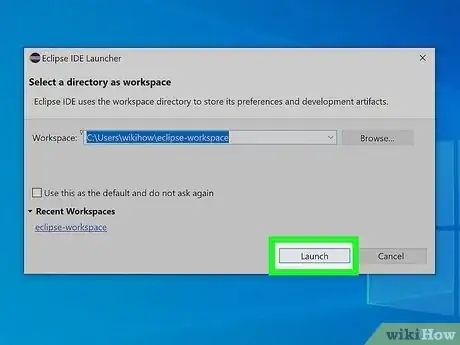
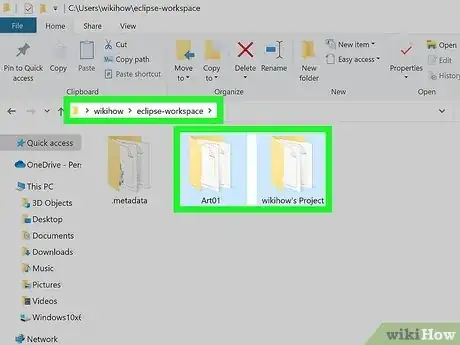
3Select a workspace location and click Launch. When you first open Eclipse, it asks you to select a folder location where your project files will be saved to. You can go with the default location or click Browse and select a folder location. Click Launch when you are ready to continue.
- If this is the only Eclipse project you are working on, you can click the checkbox that says "Use this as the default and do not ask again" so that you do not have to select a workspace folder every time you open Eclipse.
-
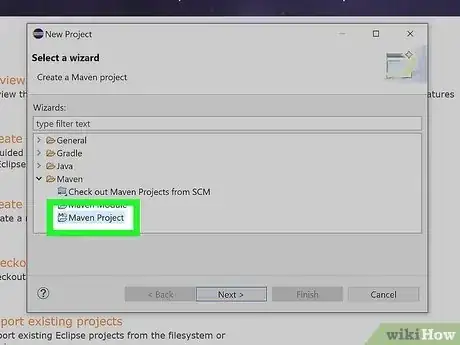
4Open a new Maven project. After you launch Eclipse, use the following steps to open a new Maven project:
- Click File in the menu bar at the top.
- Click New.
- Click Project.
- Expand the Maven folder.
- Select Maven Project and click Next.
- Click the checkbox next to Create a simple project and click Next.
-
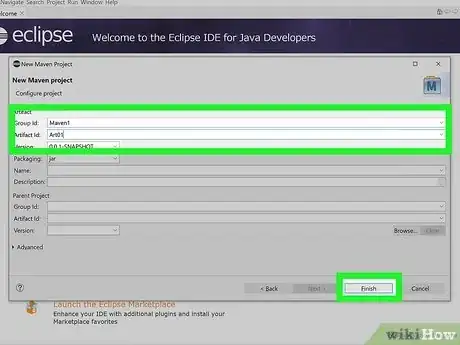
5Enter a Group ID and Artifact ID and click Finish. The Group ID and Artifact ID are required. All other entries in the menu are optional. The Group ID is the folder name that your project will be created in. The Artifact ID is the name of your project. This adds a new Maven project in your Package Explorer panel to the left.
- Neither the Group ID or Artifact ID can contain any spaces or special characters. This creates a new Maven project.
- Additionally, you can enter a name and a description for your project.
Adding the Dependencies
-
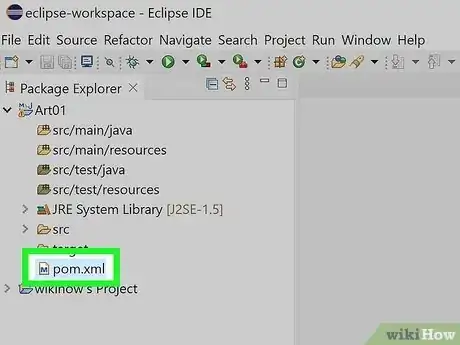
1Open the pom.xml file. To do so, expand your project name in the Package Explorer window to the right. Then click double-click the "pom.xml" file. It should be one of the last files in your Maven project in the Package Explorer panel.
- If you don't see XML code in the main window, click the pom.xml tab below the main window.
-
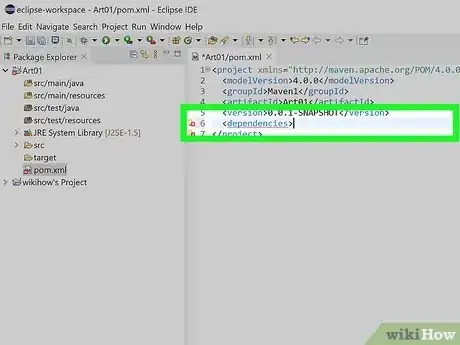
2Add a dependencies opening and closing tag. To do so, scroll to the bottom of the "pom.xml" file and type <dependencies> on the second-to-last to line before the "</project>" closing tag. When you see "dependencies" appear in the pop-up menu, click it to add an opening "<dependencies>" and closing "</dependencies>" tag.
- Unlike regular Java project which require you to add JAR files to your project build, Maven allows you to add dependencies to your POM file, which gives you an easy location to manage all your dependencies.[2] [3]
- To keep things organized and clear, you may want to add a couple of line spaces in between the opening "<dependencies>" and the closing "</dependencies>" tag.
-
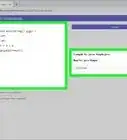
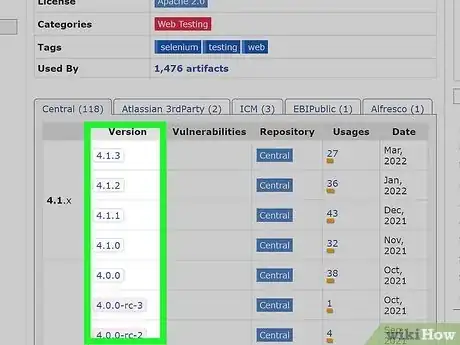
3Locate the Selenium dependency code from the Maven repository. Navigate to https://mvnrepository.com/artifact/org.seleniumhq.selenium/selenium-java in your web browser to find Selenium dependencies. Then click on whichever version of Selenium you want to use.
-
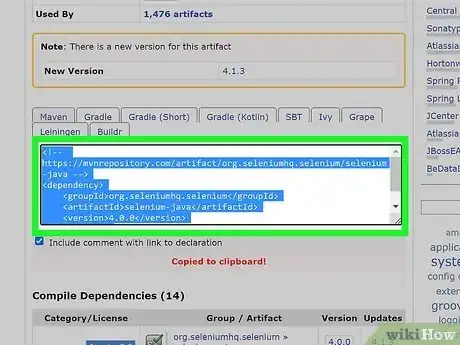
4Copy the Selenium dependency code. When you click on the version of Selenium you want to use, it will display a code box containing code you can use to add the Selenium dependency to your "pom.xml" file. Highlight the code and press Ctrl + C"' (or Command + C on Mac) or right-click the code and click Copy to copy the code.
- Make sure you have the "Maven" tab selected at the top of the code box.
-
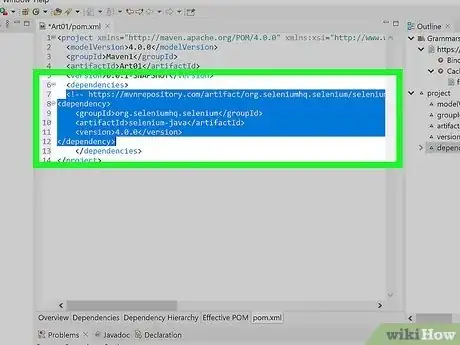
5Paste the Selenium dependency code into your pom.xml file. Return to your project in Eclipse and make sure you still have your "pom.xml" file open. Paste the code copied from the Maven repository in between the opening "<dependencies>" and closing "</dependencies>" tag. Right-click and click Paste to paste the code.
- POM dependencies should contain three tags. One for the group ID of the dependency (i.e., "<groupId>org.seleniumhq.selenium</groupId>"), the artifact ID (i.e, "<artifactId>selenium-java</artifactId>"), and the version number (i.e, "<version>4.1.3</version>".)
-
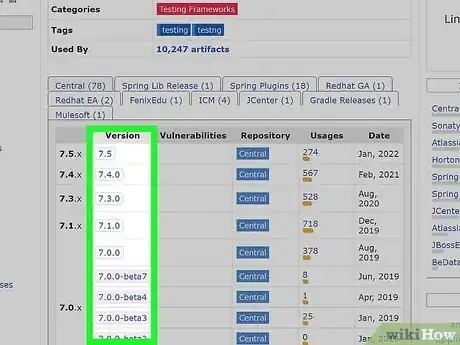
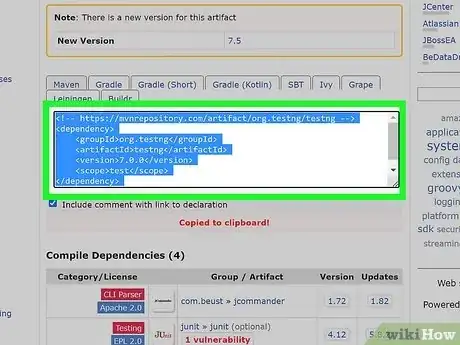
6Locate the TestNG dependency code. TestNG is an execution engine that is often used alongside Selenium to test web applications. Go to https://mvnrepository.com/artifact/org.testng/testng and click the version of TestNG you want to use.
- If you prefer to use a different test engine, or you want to add your own dependencies to your Selenium Maven project, go to https://mvnrepository.com/ in a web browser and use the search bar at the top of the page to search for the dependencies you want to add. Click the dependency you want to add and copy and paste the code into your "pom.xml" file.
-
7Copy the TestNG dependency code. To do so, highlight the code and press Ctrl + C (or Command + C on Mac) or right-click the code and click Copy.
-
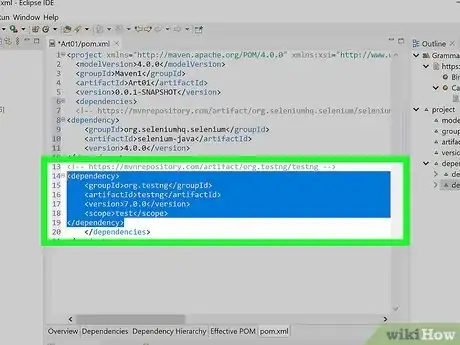
8Paste the TestNG dependency code into your "pom.xml" file. Be sure to paste the code in between the opening and closing "<dependencies>" tags, but not in the middle of the code for the Selenium dependency or another other dependencies you may have added. Right-click and click Paste to paste the code.
-
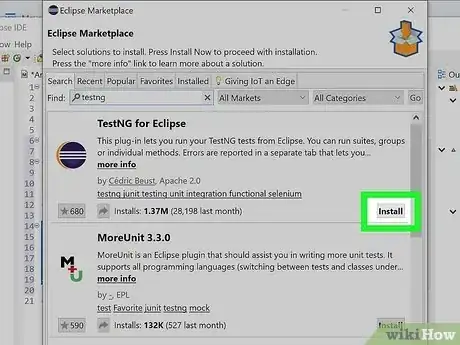
9Install the TestNG plugin. In addition to adding the TestNG dependencies to your project, you will also need to install the TestNG plugin for Eclipse in order to be able to run tests from within Eclipse. If you are using TestNG, use the following steps to download and install the TestNG plugin:
- Click Help in the menu bar at the top.
- Click Eclipse Marketplace.
- Type TestNG in the search bar next to "Find" and press Enter.
- Click Install below the "TestNG" banner.
-
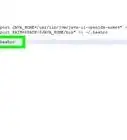
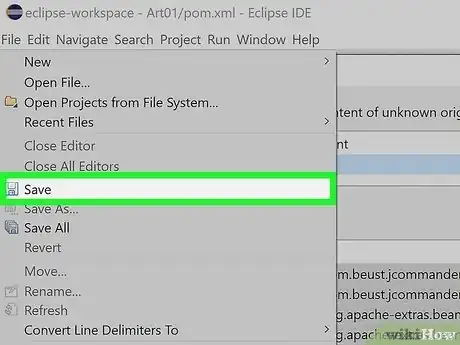
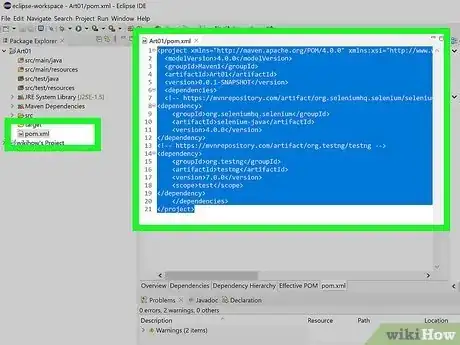
10Save your file. To do so, click File in the menu bar at the top, followed by Save to save your work. When you save the "pom.xml" file, you should see a new class path called "Maven Dependencies" appear in the Package Explorer panel on the left. If you expand "Maven Dependencies" in the Package Explorer panel, you should see all the Selenium and TestNG JAR files downloaded automatically. Your "pom.xml" file should look something like the follow:[4]
  <project xmlns="http://maven.apache.org/POM/4.0.0" xmlns:xsi="http://www.w3.org/2001/XMLSchema-instance" xsi:schemaLocation="http://maven.apache.org/POM/4.0.0 https://maven.apache.org/xsd/maven-4.0.0.xsd">
  <modelVersion>4.0.0</modelVersion>
  <groupId>Test_Selenium_Project</groupId>
  <artifactId>Test_Selenium_Project</artifactId>
  <version>0.0.1-SNAPSHOT</version>
  <name>Test Selenium project</name>
  <description>A demo to create a new Selenium project.  </description>

	<dependencies>

<!-- https://mvnrepository.com/artifact/org.seleniumhq.selenium/selenium-java -->
<dependency>
    <groupId>org.seleniumhq.selenium</groupId>
    <artifactId>selenium-java</artifactId>
    <version>4.1.3</version>
</dependency>

<!-- https://mvnrepository.com/artifact/org.testng/testng -->
<dependency>
    <groupId>org.testng</groupId>
    <artifactId>testng</artifactId>
    <version>7.5</version>
    <scope>test</scope>
</dependency>

</dependencies>
</project>
Understanding the Structure of a Selenium Maven Project
-
1Understand the "pom.xml" file. We've already looked at the "pom.xml" file. "POM" stands for "project object model." This is the most important file of your project. It contains all the dependencies of your project, information about how your project is configured and structured, as well as textual information, such as README files that other users need to read first.
-
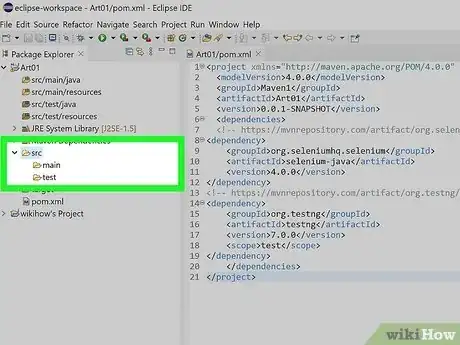
2Understand the "src" folder. All source code and source material goes in the "src" folder of your project. The "src" folder contains two folders called "main" and "test."
- Main: The "main" folder in "src" is where all your primary source material is stored. All your main project code and source material used to build your project goes here..
- Test: The "test" folder in "src" is used to store any test code or additional resources needed to execute your project.
-
3Understand the Target folder. The Target folder is where all output from your project is stored. This includes compilations results and test reports.
-Step-42.webp)
