This article was co-authored by wikiHow staff writer, Travis Boylls. Travis Boylls is a Technology Writer and Editor for wikiHow. Travis has experience writing technology-related articles, providing software customer service, and in graphic design. He specializes in Windows, macOS, Android, iOS, and Linux platforms. He studied graphic design at Pikes Peak Community College.
This article has been viewed 586,845 times.
Learn more...
After having completed your project in Eclipse, your next goal will be to create a runnable version of your project. While Eclipse doesn't have the ability to export a Java project as an ".exe" file, you can export it as a runnable JAR (.jar) file, which works similar to an executable (.exe) file. You can then use a program called Launch4j to convert the JAR file to an executable file. This wikiHow teaches you how to transform a typical ".jar" file to an executable file!
Steps
Exporting from Eclipse
-
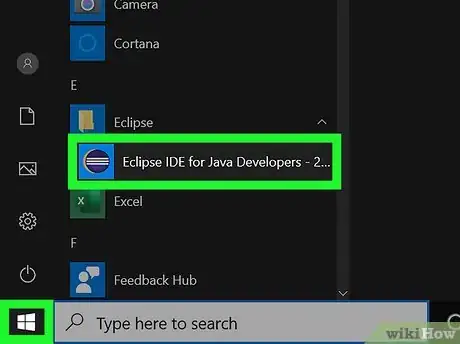
1Open Eclipse. Eclipse has an icon that resembles a blue circle with lines through it and a yellow crescent. Click the icon to open Eclipse. This will open your most recent Java project in Eclipse.
- If Eclipse does not open the Java project you want to export, see if you can find the project folder in the Package Explorer to the left. If you can't, click File in the menu bar and click Open file. Navigate to the ".java" file you want to open and click Open. You can also find recent project under Open recent in the "File" menu.
-
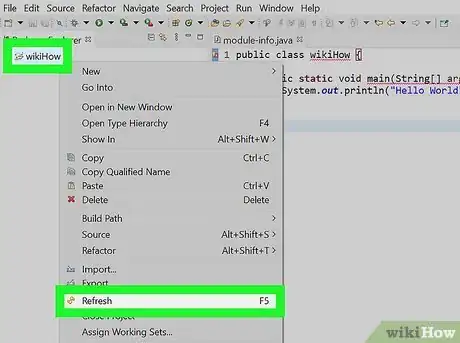
2Right-click your project and click Refresh. You project is listed in the panel to the right. Right-click it and click Refresh near the bottom of the menu. This is to ensure all your code is up to date and won't conflict when you try to export it.
- Alternatively you can right-click and hit F5 on your keyboard.
Advertisement -
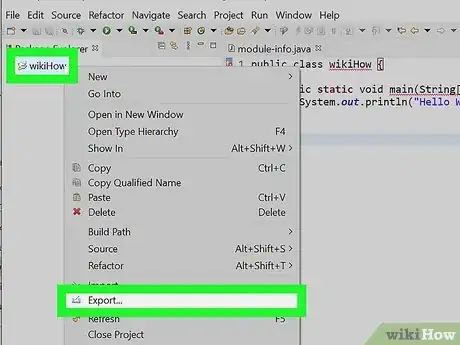
3Right-click your project and click Export. It's in the menu that appears when you right-click your project in the Package Explorer panel to the left.
-
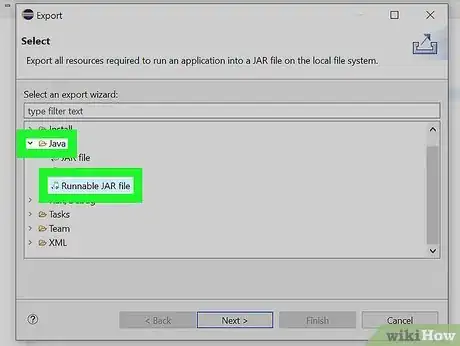
4Expand the "Java" folder and double-click the Runnable JAR file option. This option allows you to save your project as a runnable JAR file.
-
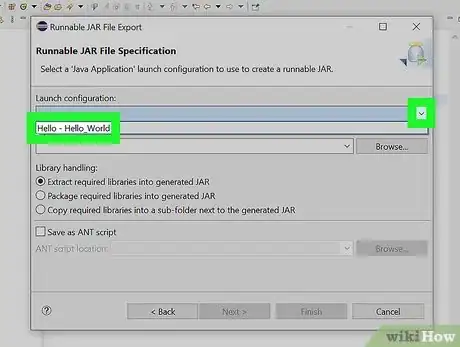
5Select the main class. The main class is the class that contains the method with the identifier called "main". This is the class that indicates where your program begins. Use the drop-down menu under "Launch configuration" to select the main class of your project.
-
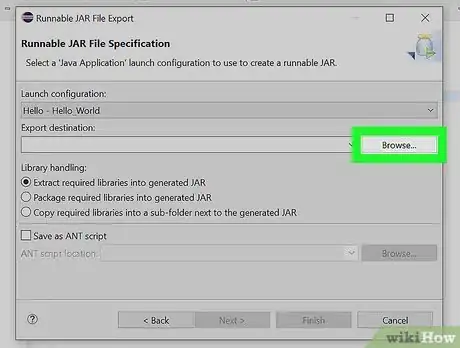
6Select an export destination and file name. This is the location you will export the JAR file to. You can either type the destination in the field below "Export destination" or use the following steps to select an Export destination:
- Click Browse.
- Navigate to the folder you want to save the JAR file to.
- Type a name for the JAR file next to "Filename".
- Click Save.
-
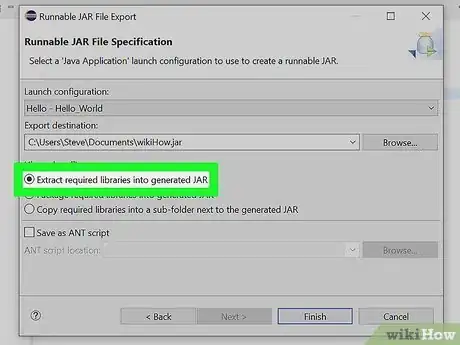
7Ensure the "Extract required libraries into generated JAR" radio button is selected. Do not worry about the rest of the menu.
-
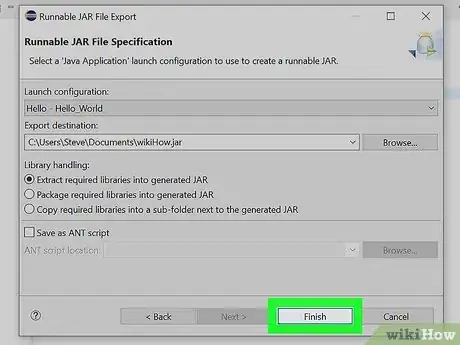
8Click Finish. This exports your Java project as a JAR file.
Creating an Icon
-
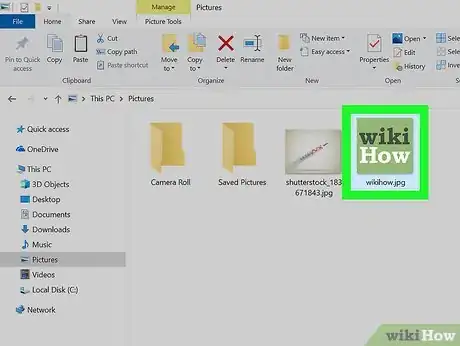
1Find or create an image. This is the icon you will use to click on your program. You can search for an icon to use online, or you can use a graphics program like Photoshop, GIMP, Paint, or Preview to create your own graphic.
- The image size must be 256x256 in order to work properly as an icon.
-
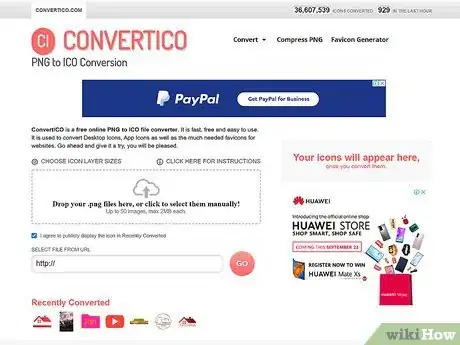
2Go to https://convertico.com/. This is a free site that converts common image files (.png, .jpg) to a usable ICO (.ico) file.
-
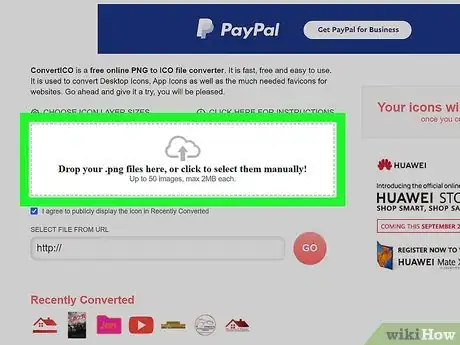
3Drag your icon to the box with dashed lines. It's in the center of ConvertICO. This will upload your image file and convert it to a ICO file.
- Alternatively, if you have an image from the internet, you can enter the web address in the bar that says "Select file from URL".
-
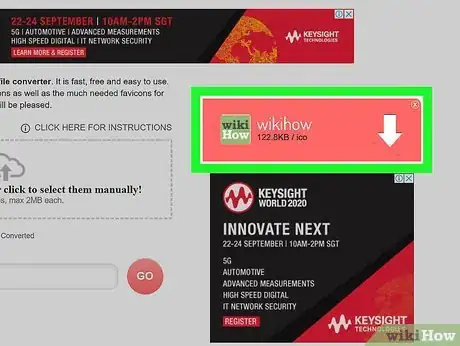
4Click the arrow icon. It's in the box to the right. Once your file is uploaded, this box turns pink and an arrow pointing down appears. Click the arrow to download the image as an .ICO file.
- By default, you can find your downloaded files in your Downloads folder.
Creating the Executable File
-
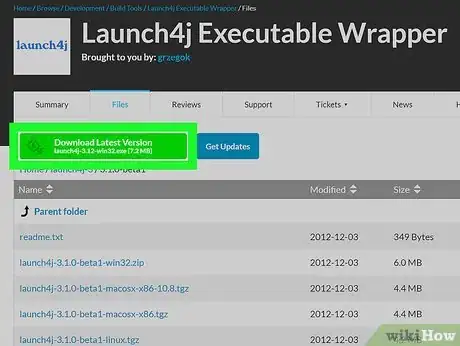
1Download Launch4j. This is a free program designed to compile all your resources into one executable file. Use the following steps to download and install Launch4j.
- Go to http://sourceforge.net/projects/launch4j/files/launch4j-3/3.1.0-beta1/
- Click Download the latest version.
- Wait 5 seconds for the download to start.
- Open the "launch-3.12-win32.exe" in your web browser or Downloads folder.
- Click Yes
- Click Next.
- Click I agree.
- Click Browse to select an install location (optional).
- Click Install.
- Click Finish.
-
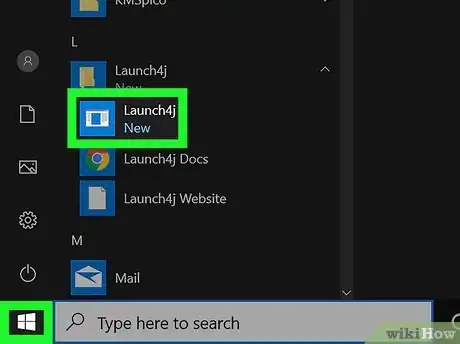
2Open Launch4j. To open Launch4j, click the Windows Start menu and type "Launch4j". Click the Lanuch4j icon. It resembles a computer screen with an IDE program open.
-
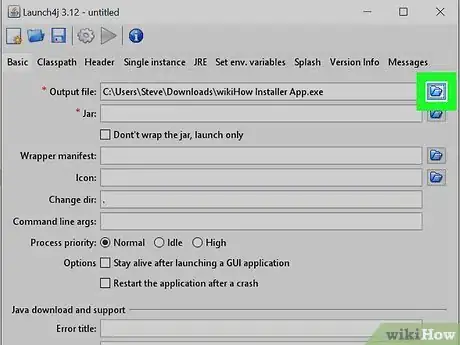
3Select a destination and name for the output file. Use the following steps to select a destination and name for the executable file that will be exported.
- Click the blue folder icon next to the "Output file" bar.
- Navigate to the location you want to save the file to.
- Type the name of the file next to "Filename" (make sure it has the ".exe" file extension at the end).
- Click Save.
-
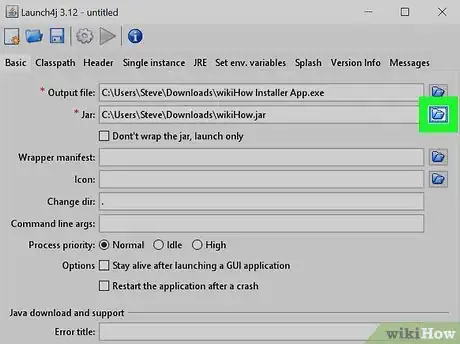
4Select the JAR file. Use the following steps to select the JAR file you exported from Eclipse.
- Click the blue folder next to the bar labeled "Jar".
- Navigate to the folder with your "JAR" file.
- Select the JAR file and click Open.
-
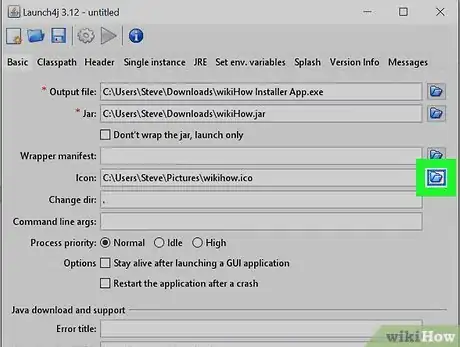
5Select the ICO file. Use the following steps to select the ICO file.
- Click the blue folder next to the bar that says "Ico".
- Navigate to the folder with your ICO file.
- Select the ICO file and click Open.
-
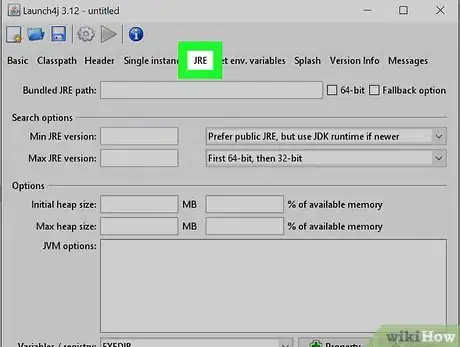
6Click the JRE tab. It's the fifth tab at the top. This tab allows you to select which version of Java you want to use.
-
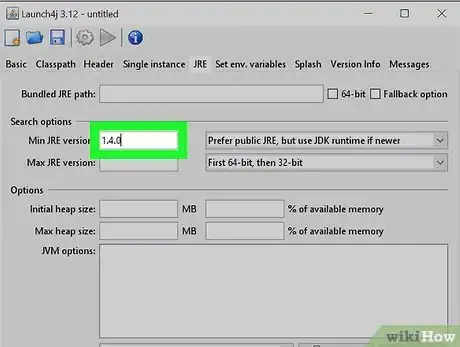
7Type 1.4.0 next to "Min JRE version". This ensures that the users have a sufficient version of Java to use your program. You can enter a different version if needed. Version 1.4.0 is a safe version for most users.
-
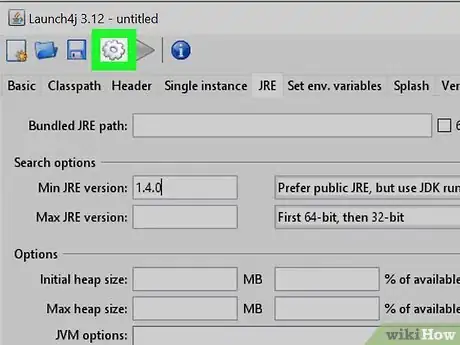
8Click the gear button at the top. This is the gear button that says "Build Wrapper" when you hover over it.
-
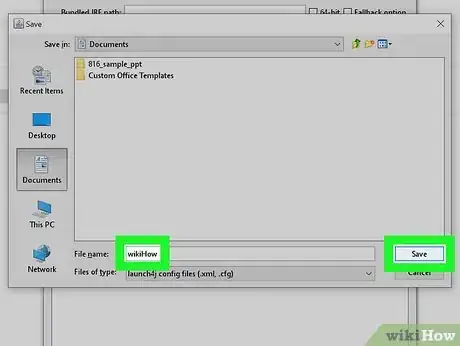
9Give the XML (.xml) file an appropriate name and click Save. Most users won't see the XML file. Give it any name you choose. Type the name of the file next to "Filename" and click Save. Your executable file will now be created!
- You may need to temporarily disable your antivirus software to run the executable.
Community Q&A
-
QuestionWhat should I do if the executable file doesn't open?
 Community AnswerCheck if you exported JAR properly, defined all the paths, and launched configuration according to your main class. The JAR export might be damaged, in which case your .exe file wouldn't work.
 -
QuestionIs it possible to wrap an appropriate version of JRE with the executable so that the end user doesn't need any JRE installed to run the program?
 Community AnswerYes. In Launch4j, under the JRE tab, it's the first field at the top.
 -
QuestionWhere should I get a .ico file?
 Community AnswerYou can create a .ico file yourself with SIB icon editor, or download from the web.
About This Article
1. Open Eclipse.
2. Press F5 to refresh your project.
3. Right-click your project and click Export.
4. Expand "Java" and double-click Runnable JAR file followed by Next.
5. Select the main class under "Launch configuration".
6. Click Browse and select a destination and filename.
7. Ensure "Extract required libraries into generated JAR" is selected and click Finish.
8. Find or make a 256 x 256 image to use an as icon.
9. Convert the image to an "ico" file at https://convertico.com/
10. Download Launch4j at http://sourceforge.net/projects/launch4j/files/launch4j-3/3.1.0-beta1/.
11. Open Launch4j and type and destination for the file next to "Output File".
12. Select the JAR location next to "Jar".
13. Select the Ico file next to "Ico".
14. Click the JRE tab and type "1.4.0" next to "Min JRE".
15. Click the gear icon and type a name for the ".xml" file next to "Filename" and click "Save'.
-Step-42.webp)
