This article was co-authored by wikiHow staff writer, Darlene Antonelli, MA. Darlene Antonelli is a Technology Writer and Editor for wikiHow. Darlene has experience teaching college courses, writing technology-related articles, and working hands-on in the technology field. She earned an MA in Writing from Rowan University in 2012 and wrote her thesis on online communities and the personalities curated in such communities.
This article has been viewed 17,645 times.
Learn more...
This wikiHow will teach you how to create your own location on Instagram if you have a business account. To do this, you'll need to have a Facebook profile created and linked to your Instagram business account.
Steps
-
1Open Facebook. This mobile app icon looks like a white "f" on a blue background that you'll find on one of your Home screens, in the app drawer, or by searching.
-
2Switch to your business account. You can do this by tapping the three-line menu option and then tap your business account.Advertisement
-
3Tap Post. You can create a new post by tapping the Post option that's under your business name and cover photo.
-
4Tap Check In. You'll find this near the middle of the menu at the bottom of your screen.
-
5Tap in the text field that says "Search for places." Since the address most likely does not exist yet, you'll want to search first.
-
6Search for your page's name or a location. The search results will update as you type, but don't hit "Enter" or your keyboard equivalent.
-
7Tap Add a new place. You'll see this at the bottom of the menu next to a blue plus sign.
-
8Choose a category. Tap to choose from the suggested categories. If, for example, you want to create a custom location for your bake sale and fundraiser, you can choose "Event."
-
9Choose a city. You can either search for a city or you can use a suggested location, which includes using your phone's GPS.
-
10Type the street address and tap Create. You'll see the Create button in the top-right corner of your screen.
-
11Tap Share. You can compose a post to accompany the location tag, but you'll need to publish the location first.
-
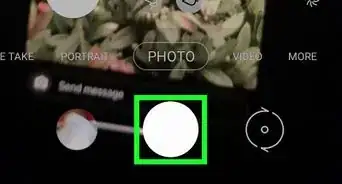
12Create a new Instagram post. If you need an in-depth tutorial on posting to Instagram, refer to How to Post on Instagram.
-
13Tap Search under "Add Location." You may have to scroll inside the menu.
-
14Search for and select your new location. If you can't find it, you may have to return to the post you created on Facebook and claim the location as your business.[1]
- If done successfully, your post will be added to your feed with the location tag you created on Facebook.


About This Article

1. Open Facebook.
2. Switch to your business account..
3. Tap Post.
4. Tap Check In.
5. Tap in the text field that says "Search for places" and search for your page's name or a location.
6. Tap Add a new place.
7. Choose a category, city, place, and tap Create.
8. Tap Share.
9. Open Instagram and create a new post.
10. Tap Search under "Add Location."
11. Search for your created location and select it.