This article was co-authored by wikiHow staff writer, Travis Boylls. Travis Boylls is a Technology Writer and Editor for wikiHow. Travis has experience writing technology-related articles, providing software customer service, and in graphic design. He specializes in Windows, macOS, Android, iOS, and Linux platforms. He studied graphic design at Pikes Peak Community College.
The wikiHow Tech Team also followed the article's instructions and verified that they work.
This article has been viewed 353,207 times.
Learn more...
Did you finally replace an old remote and need to connect the new remote to your Amazon Fire TV Stick? Fortunately, you have a few different options to do this, which include power cycling the TV and new remote, using Settings, and enabling HDMI-CEC on your TV. This wikiHow article teaches you how to pair a new remote to an Amazon Fire TV Stick.
Things You Should Know
- Power cycle the TV and remote to pair a replacement remote.
- If you have another remote or the mobile app, you can connect a second remote to your Fire TV Stick in "Settings > Controllers & Bluetooth Devices > Amazon Fire TV Remotes > Add New Remote."
- Let your Fire TV remote control your TV by enabling HDMI-CEC.
Steps
Pairing a Fire Stick Remote to a TV
-
1Unplug the Fire Stick from power. You can remove it from your TV to make sure it isn't getting power.
- Do this if you don't have the original remote, like if you're pairing a replacement.
-
2Remove the batteries from your Fire Stick remote. The goal here is to power cycle both the Fire TV Stick and your Fire Stick remote.Advertisement
-
3Connect the Fire TV Stick to power and put the batteries back into your remote. After about 30 seconds, the power should be drained from both of those pieces and they have been power cycled.
- Turn on your Fire TV Stick and wait for the Home screen to load. Sometimes, just power cycling both devices triggers the remote to automatically pair when the Fire TV Stick is on, so try your remote just in case. If it's not working yet, continue to the next step.
-
4Press and hold the ⇱ Home button on the remote. Hold it for around 10 seconds or until the light at the top of the remote starts to blink quickly.
- You should see a notification on your screen that the remote was paired successfully. You can use the remote to control your Fire TV Stick![1]
Pairing an Additional Remote
-
1Make sure you're on the Home screen of your Fire TV Stick. If you don't have the original remote handy, you can also use the mobile app to control your TV with your smartphone or tablet.
- Your Fire TV Stick can be connected with up to 7 remotes at the same time, including 3rd-party remotes! Use this method if you have a way to control the TV (either the original remote or the mobile app) and want to add another remote.
- You can use this method to pair a replacement remote instead of the other method as long as you have the mobile app ready.
-
2Navigate to Settings. You'll see the gear icon all the way to the right side of your screen. Use the right button in the circular pad to navigate to the right and press the down button to navigate inside the Settings menu.
-
3Select Controllers & Bluetooth Devices. It's next to an icon of a remote.
-
4Select Amazon Fire TV Remotes. Press the button in the middle of the circular pad to make a selection.
-
5Select Add New Remote. You'll see this option appear once you select the previous menu item.
- You're done with the original remote and can move on to using the new remote.
-
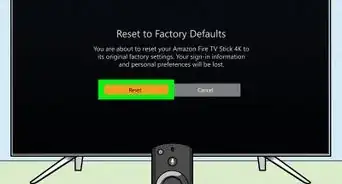
6Press and hold the ⇱ Home button on the new remote. You should hold this button down for about 10 seconds so the new remote and the TV can pair.
- You may need to press the Select button on your original remote to confirm this pairing.[2]
- As long as you have more than one remote paired with the Fire TV Stick, you can unpair or disconnect it.
Using Your TV Remote With HDMI-CEC
-
1Connect the Firestick to a TV. You can connect the Firestick to your TV using an empty HDMI port on the back of your TV.
- This is the best way to use a 3rd-party remote with your Fire TV.
-
2Power on your TV. Press the power button on the front of your TV, or use the TV remote to power on the TV.
-
3Select the Amazon Firestick HDMI source. Press the source button on your TV remote until it selects the HDMI port that your Firestick is connected to. You should see the Amazon Fire home screen.
-
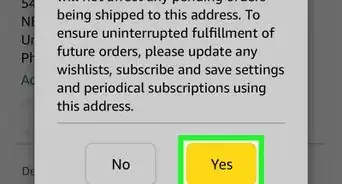
4Go to System Settings on your TV. The way you open your system settings varies from one TV to another. On some TVs, you press the "Menu" button on your remote. On other TVs, you may press the Home button and then select Settings, or Options.[3]
-
5Find your HDMI-CEC settings. Again, this option is going to be different from one TV to another. In some cases, it may be under Input Settings, or System Settings, or something similar. Also, each TV brand has a different trade name for HDMI-CEC. Here's a list of TV brands and their associated HDMI-CEC trade names.[4]
- AOC: E-link
- Hitachi: HDMI-CEC
- LG: SimpLink
- Mitsubishi: Net Command for HDMI
- Onkyo:Remote Interactive over HDMI (RIHD)
- Panasonic: HDAVI Control, EZ-Sync, or VIERA Link
- Philips: Easy Link
- Pioneer: Kuro Link
- Runco International: RuncoLink
- Samsung: Anynet+
- Sharp: Aquos Link
- Sony: BRAVIA Sync, Control for HDMI
- Toshiba: CE-Link or Regza Link
- Vizio: CEC
-
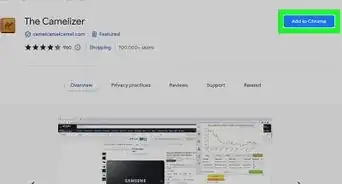
6Enable HDMI-CEC. Once you find the appropriate setting in your TV's settings menu, enable HDMI-CEC. Most TVs have it turned off by default. Once enabled, you can use your TV remote to control many devices, including your Amazon Firestick, or even a PlayStation 4.


References
- ↑ https://s3-us-west-2.amazonaws.com/customerdocumentation/Amazon+Fire+TV+User+Guides/Fire+TV+Remote+Documentation/Alexa+Voice+Remote+with+TV+Control_Quick_Start_Guide_US.pdf
- ↑ https://www.amazon.com/gp/help/customer/display.html?nodeId=G56RUV6X2KGHMSWS
- ↑ https://www.youtube.com/watch?v=V9HwQwPXHBU
- ↑ https://www.howtogeek.com/207186/how-to-enable-hdmi-cec-on-your-tv-and-why-you-should/
- ↑ https://www.amazon.com/gp/help/customer/display.html?nodeId=GBSC9NRB9A9SNM2Y#:~:text=Restart%20your%20Fire%20TV%20device,with%20your%20Fire%20TV%20device.
About This Article