This article was co-authored by wikiHow staff writer, Darlene Antonelli, MA. Darlene Antonelli is a Technology Writer and Editor for wikiHow. Darlene has experience teaching college courses, writing technology-related articles, and working hands-on in the technology field. She earned an MA in Writing from Rowan University in 2012 and wrote her thesis on online communities and the personalities curated in such communities.
This article has been viewed 322,446 times.
Learn more...
Changing your IP address can be useful if you want to avoid being attacked by other users who are targeting your IP address, or if you simply want a new online identity from an IP standpoint. You can change your IP address on a Mac at any time through System Preferences.
Steps
Changing the IP Address
-
1
-
2Click System Preferences. You'll see this under "About This Mac."Advertisement
-
3Click Network. You'll see this in the third organized row next to "iCloud."
-
4Click on the network you’re using in the left sidebar. For example, if you’re using a Wi-Fi connection, click on “Wi-Fi.”
-
5Click Advanced. You'll find this at the bottom right corner of the window.
-
6Click the TCP / IP tab. You'll see this along the top of the window with tabs for DNS, WINS, 802.1X, Proxies, and Hardware.
-
7Click the dropdown menu next to “Configure IPv4,” and select “Manually.”
- Alternately, you can click on “Renew DHCP Lease” to have your computer automatically generate a new IP address for you.[1]
-
8Enter your desired IP address into the field labeled “IPv4 Address.” You can take your current IP address and change the last part of the number. For example, your current IP address is "10.0.1.8," so your new IP address can be something like "10.0.1.129."
-
9Click OK, then Apply. Your IP address will now be changed.


Using a Proxy Server
-
1
-
2Click System Preferences. You'll see this under "About This Mac."
-
3Click Network. You'll see this in the third organized row next to "iCloud."
-
4Click on the network you’re using in the left sidebar. For example, if you’re using a Wi-Fi connection, click on “Wi-Fi.”
-
5Click Advanced. You'll find this at the bottom right corner of the window.
-
6Click the Proxies tab. You'll see this along the top of the window with tabs for DNS, WINS, 802.1X, TCP/IP, and Hardware.
-
7Click to select a protocol under the header “Select a protocol to configure.”
- Select “SOCKS Proxy” if you are unsure about which protocol to choose. The “SOCKS Proxy” protocol is often used to route network packets between clients and servers through a proxy and is effective at boosting general security and hiding the client address of applications.
- Web Proxy (HTTP) and Secure Web Proxy (HTTPS) are also commonly used but are less protected than a SOCKS Proxy.[2]
-
8Enter the IP address of the desired proxy server into the blank field.
- If using a SOCKS proxy, navigate to the SOCKS proxy list at http://sockslist.net/ to select a type 4 or type 5 IP address.
-
9Click OK, then click Apply. You will now be connected to the proxy server indicated.


Unplugging Your Router/Modem
-
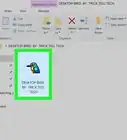
1Unplug your router or modem. Sometimes the router and modem are in the same unit so you can unplug them both from one plug. If the router and modem are separate, you can unplug either to reset your IP address.
- Wait a couple of seconds or minutes. Most residential connections have what is called a Dynamic IP Address. This means that your Internet Service Provider gives you a new IP address each time your router or modem connects to their network.[3]
-
2Plug the router back in. Wait for the router to reconnect to the internet.
-
3Check the new IP address. You can find this in the "Network" section of "System Preferences."
- If that didn't work, unplug your modem again and wait a few hours before plugging it back in.[4]


Community Q&A
-
QuestionI have a school computer that won't let me change that. What can I do?
 Community AnswerYou'll want to take a look at UltraSurf or Psiphon for that. You may also want to look at using a proxy server.
 -
QuestionWill this help to connect to the internet?
 Natalie TellecheaTop AnswererNo.
 -
QuestionIs there any way I can do Method 1 but still connect to the Internet?
 Community AnswerYou'll have to make sure to still follow the subnet mask, which means is you need to find your old IP address. Make sure you keep the first three octets of numbers the same (192.168.0.x or 10.0.0.x, for example). If you don't, your router will get confused and think your traffic is coming from outside.


References
About This Article

1. Click the Apple logo and click System Preferences.
2. Click Network.
3. Click your current network and click Advanced.
4. Click the TCP/IP tab.
5. Choose Manually from IPv4.
6. Type a new IP Address.
7. Click OK and Apply.