This article was co-authored by wikiHow staff writer, Nicole Levine, MFA. Nicole Levine is a Technology Writer and Editor for wikiHow. She has more than 20 years of experience creating technical documentation and leading support teams at major web hosting and software companies. Nicole also holds an MFA in Creative Writing from Portland State University and teaches composition, fiction-writing, and zine-making at various institutions.
The wikiHow Tech Team also followed the article's instructions and verified that they work.
This article has been viewed 25,775 times.
Learn more...
When you cascade your open windows in Windows 10 or 8, each window's title bar is visible, making it a cinch to find and navigate open apps. Windows 11 no longer has a cascade feature—its nearest equivalent is Snap Layouts, which lets you view your open windows in a custom layout. This wikiHow article will teach you how to cascade open windows in Windows 10 and 8, and how to create a Snap Layout in Windows 11.
Steps
Windows 10 and 8
-
1Right-click an empty spot on the taskbar. The taskbar is bar on which you'll find the Start menu and the clock, typically at the bottom of the screen. Right-clicking an empty spot will bring up a menu.
- Make sure you're not right-clicking on the area near the clock with the small icons—instead, just right-click any blank area between the Start button and the temperature.
-
2Click Cascade windows on the menu. All of your open windows will now cascade on top of one another. All of their title bars are now visible.
- If you don't see this option, you're likely in tablet mode. To exit tablet mode, click the Action Center (the speech bubble icon to the right of the system clock) and click the Tablet mode title.[1]
Advertisement -
3Right-click the taskbar and select Uncascade all windows to undo. If you don't like the way cascading looks, this will undo the last step.


Windows 11
-
1Learn about Snap Layouts. Although there's no longer a "Cascade windows" feature in Windows 11, you can easily view open windows in a Snap Layout on the same screen.[2] The result won't be a "cascade" of Windows on top of one another—instead, you'll see them all arranged neatly in the pattern of your choice.
- This is the closest feature to the old "Cascade windows" feature you know from earlier versions of Windows.
-
2Hover your mouse over the maximize button on an open window. This is the square in the upper-right area of any open window. You'll see some layout options appear.
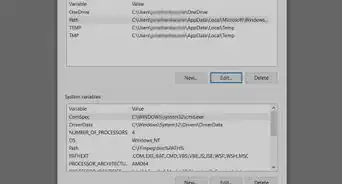
- Snap layouts should be turned on by default. If you don't see layout examples appear when you hover over the Maximize button, open your Settings, select System, choose Multitasking, and then check the box next to "Show snap layouts when I hover over a window's maximize button.[3] "
- You can also press Windows key + Z to open the same layout options.
-
3Click a location on any of the layouts. This "snaps" the current window to the corresponding location on the screen.
- For example, if you want to display your open windows in three columns, click the column in which you want to place the current window.
-
4Hover the mouse over another app's maximize button. Again, the layout options will appear.
-
5Click another location on the same layout option. This places the active window on the screen in the corresponding location.
- Repeat this for other open apps to arrange them all on the screen at once.
- You can resize any of your open windows as needed—the change isn't permanent.


References
- ↑ https://support.microsoft.com/en-us/windows/turn-tablet-mode-on-or-off-add3fbce-5cb5-bf76-0f9c-8d7b30041f30
- ↑ https://support.microsoft.com/en-us/windows/snap-your-windows-885a9b1e-a983-a3b1-16cd-c531795e6241#WindowsVersion=Windows_11
- ↑ https://www.thewindowsclub.com/enable-snap-layouts-on-windows-11
About This Article

1. Right-click the taskbar.
2. Click Cascade windows.
3. If you don't see it, click the Action Center and turn off Tablet Mode.