This article was co-authored by Maria Short. Maria Short is a Baker and the Owner of Short N Sweet Bakery & Cafe in Hilo, Hawaii. With over 24 years of experience, she specializes in specialty desserts and wedding cakes. She graduated from L’Academie de Cuisine’s Pastry Arts Program with honors and studied at Baltimore International Culinary College. In 2019, Maria competed in the 6th season of the Food Network’s Holiday Baking Championship. In 2010, she had a cake named one of “America’s Most Beautiful Cakes” by Brides magazine.
There are 7 references cited in this article, which can be found at the bottom of the page.
This article has been viewed 81,279 times.
Springform pans can be used in place of regular cake pans and allow you to bake some fun specialty items. The detachable base and outer ring make removing your cake from the pan a simple process. By preparing your pan and baking properly, you will be able to bake a variety of cakes with ease.
Steps
Picking and Assembling the Pan
-
1Use a silicon pan for cakes that use runny batters. Silicon pans with glass bottoms protect against leaks better than most metal pans. Leakage from your pan can ruin your cake and make an unwanted mess in the oven.[1]
- Silicon pans peel off the cake much like a wrapper and are easy to store due to their flexibility.
-
2Use a metal pan for cakes that have a crust. The crust needs to be compressed against a supportive pan to take shape and bake properly.[2]
- Pan sizes vary so choose one that fits your purpose.
Advertisement -
3Assemble the pan by attaching the outer ring to the base and securing the side lock. Make sure the outer ring is tight and will not come loose.
- Apply pressure on the base once the pan is assembled to ensure proper locking.
-
4Check the pan for any leaks. Fill your springform pan with water and hold over the sink to inspect it for leaks. Leakage can occur where the outer ring attaches to the base and sometimes near the sidewall latch. If leakage occurs, wrap your pan in 2 layers of tin foil.[3]
- Expect most springform pans to leak a little bit.
-
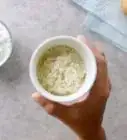
5Grease the pan to ensure quality cooking and prevent the cake from sticking. Apply butter, oil, or cooking spray to your entire pan. Even with nonstick pans, it is a good idea to gently coat the pan to prevent your cake from sticking. Parchment paper can also be placed on the base of the pan to further prevent sticking on the bottom.[4]
- The parchment paper will help you release the cake from the pan after baking so you don't have to cut on the base.
- It's usually a good idea to also cut a strip of parchment paper to line the side of the pan.


Putting the Cake in the Oven
-
1Fill the pan with the proper ingredients for your recipe. If your cake has layers, gently add the ingredients of each layer to avoid the layers getting mixed together. This will ensure your cake looks great and cooks as it is supposed to.
- Springform pans work great for cheesecakes, kuchens with fruit toppings, and tortes since you don't have to flip the pan over to remove the cake.[5]
-
2Place cheesecakes and custards in a water bath. Wrap the springform pan in two layers of tin foil and place into another large shallow pan filled with warm water. You can also place your pan in a slightly larger cake pan before putting it into the water bath to avoid exposure to excessive moisture.[6]
- A water bath creates moisture in the oven while baking to keep delicate cakes from drying out or cracking
-
3Heat your oven to the appropriate temperature. Baking at the right temperature is vital to the texture and taste of your cake. Every cake will cook differently so be sure to follow your recipe for the appropriate temperature and cook time.
-
4Place your springform pan in the oven. Set a timer and check your pan as needed to ensure proper cooking.
- Take note of the color of your pan because darker pans will absorb more heat which can cook your cake faster. Adjust your time appropriately.[7]


Cooling and Serving the Cake
-
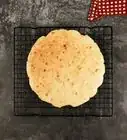
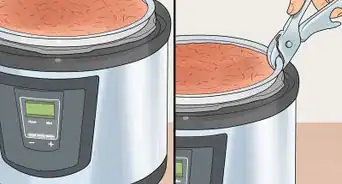
1Pull your cake out of the oven. Depending on what kind of cake you are baking, there will be indications of when it is cooked properly. For most cakes insert a toothpick into the top of the cake to see if any batter sticks. If nothing is on the toothpick, the cake is done.[8]
- To check cheesecakes, gently shake the pan. If only a small portion in the middle of the cake is jiggly, it is done.[9]
-
2Run a knife between the cake and edge of the pan to prevent sticking. It is important to do this right when the pan comes out of the oven before the cake cools and expands. If you are using a nonstick pan, use a rubber spatula instead of a knife to avoid damaging the non-stick coating of the pan.[10]
-
3Cool off the cake by putting it on a cooling rack. Once the cake is cool, you can then open the side lock of the pan.
- Opening the side lock to soon can ruin the shape of your cake. Depending on the type of cake, it may be advised to keep the ring on and set the cake in the refrigerator overnight.
-
4Remove the outer ring. Carefully release the side lock and lift the outer ring upward to detach it from the base. Be sure to use both hands when removing the outer ring to avoid damaging the cake.
- You can also set the base of the pan on a jar and pull the outer ring downward to remove the cake.[11]
-
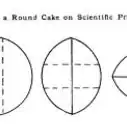
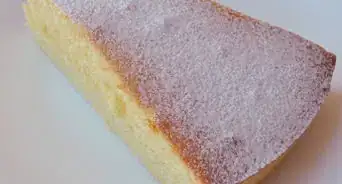
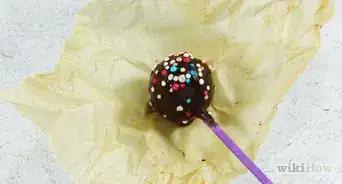
5Serve your amazing cake. Add any additional toppings to the cake before serving. You can serve the cake directly on the base of the pan or carefully slide it onto a platter of your choice. If you have a metal base, cut the cake carefully to avoid damaging the pan coating.[12]


Community Q&A
-
QuestionWill cake batter leak in a springform pan?
 wikiHow Staff EditorThis answer was written by one of our trained team of researchers who validated it for accuracy and comprehensiveness.
Staff AnswerwikiHow Staff EditorStaff AnswerThere is a good chance your pan will leak a little, especially if you’re cooking something with a relatively thin batter. Lining the pan with parchment paper will help minimize leaks. You can also wrap the base of the pan with foil or set it inside another pan or on a baking tray to prevent a mess. -
QuestionDo you grease a springform pan?wikiHow Staff EditorThis answer was written by one of our trained team of researchers who validated it for accuracy and comprehensiveness.
Staff AnswerwikiHow Staff EditorStaff AnswerIt depends on the recipe. Often, you can get away with leaving the sides ungreased or only greasing them lightly (e.g., with a little bit of cooking spray). You can also line the pan with parchment paper to prevent sticking and leaks. -
QuestionWhich way does the bottom of a springform pan go?wikiHow Staff EditorThis answer was written by one of our trained team of researchers who validated it for accuracy and comprehensiveness.
Staff AnswerwikiHow Staff EditorStaff AnswerThe bottoms of springform pans are generally dimpled. Most chefs advise putting the dimpled side down.
References
- ↑ https://www.preparedpantry.com/blog/choose-right-springform-pan/
- ↑ https://www.preparedpantry.com/blog/choose-right-springform-pan/
- ↑ http://dish.allrecipes.com/springform-pan/
- ↑ http://dish.allrecipes.com/springform-pan/
- ↑ http://dish.allrecipes.com/springform-pan/
- ↑ http://dish.allrecipes.com/baking-cheesecake-step-by-step/
- ↑ https://www.preparedpantry.com/blog/choose-right-springform-pan/
- ↑ https://www.thekitchn.com/5-ways-to-tell-when-your-cake-is-done-98927
- ↑ https://www.bhg.com/recipes/how-to/bake/what-is-the-best-way-to-check-if-a-baked-cheesecake-is-done/
About This Article