This article was co-authored by Yuka Arora and by wikiHow staff writer, Janice Tieperman. Yuka Arora is a self-taught makeup artist who specializes in abstract eye art. She has been experimenting with makeup art for over 5 years, and has amassed over 5.6K Instagram followers in just 5 months. Her colorful and abstract looks have been noticed by Jeffree Star Cosmetics, Kat Von D Beauty, Sephora Collection, among others.
There are 11 references cited in this article, which can be found at the bottom of the page.
This article has been viewed 24,642 times.
Illuminating powder is a great way to add some shine to your daily makeup look. While similar to highlighter, illuminating powder is a versatile product that can serve multiple purposes, depending on the makeup style that you’re going for. Once you’ve chosen the best shade for your complexion, feel free to dust some illuminating powder onto your cheeks, cheekbones, and undereye area. You can also use this product as a finishing powder! If you want to emphasize your features, consider using illuminating powder as a highlighter.[1]
Steps
Choosing the Right Shade
-
1Pick a silver shade if you have fair skin. Avoid drowning your complexion out with a colorful illuminating powder. Instead, opt for a lighter, more subtle shade to bring out your features. If aren’t a fan of silver, go for a lilac shade instead.[2]
- If you aren’t satisfied with a normal dusting of powder, feel free to layer more product onto your look!
-
2Select peach or rose gold shades if your skin is medium-toned. Look for products or palettes that have a peachy or light pink tone. While you don’t want to add too much color, you can make your complexion glow with a careful amount of this illuminating powder.[3]
- Subtle peachy tones work best to cancel out the natural warmth in your complexion.
Advertisement -
3Opt for bronze tones to compliment darker skin. Choose an illuminating powder that’s a few shades lighter than your natural skin tone. Keep your skin from looking gray and washed out by adding a bronze illuminating powder to your daily makeup routine.[4]
- Generally, you want to avoid cooler tones, like white and gray.
-
4Go for a pink palette if you’d prefer a rosy look. Invest in a stylish palette with a variety of pink and peach shades to add an extra dimension to your complexion. Before applying the product, swirl a large brush around the palette to get a blended, rosy coating of powder on the surface of your brush.[5]
- Rosy illuminating powders can be paired with blush to create an even brighter makeup look.


Creating Natural Looks
-
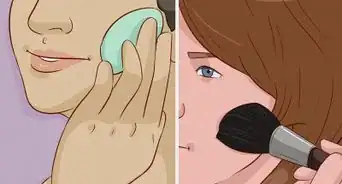
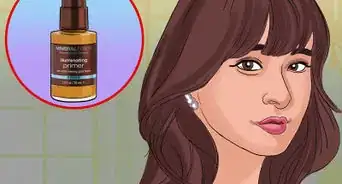
1Add primer, foundation, and concealer as a base. Set the stage for your makeup by applying a few basic products. First, rub some primer into your skin to help your makeup look vibrant for a longer amount of time. Next, even out the tone of your skin with a thin layer of foundation. Once both of these products are in place, dab some concealer in a V-shape around your undereye area and blend it in the direction of your lash line.[6]
- If you use a sponge to add your foundation, try moistening it before adding on any product. This can make the application process much simpler.[7]
- When using makeup brushes, always use a large, fluffy brush to buff and blend your makeup. A kabuki brush will help you apply your foundation evenly, as you can use its dense, flat top to press and buff the product into your skin.[8]
-
2Layer a rosy shade onto your cheeks over your blush. Apply a rosy layer of powdered blush with a medium-sized powder brush over the apples of your cheeks. Next, spin a medium-sized, more fluffy makeup brush around in your illuminating powder palette and apply it over the blush. Don’t overdo the illuminating powder, as you don’t want to overpower the shade of your blush.[9]
- If you prefer to use a cream blush product, feel free to use that instead!
-
3Apply a nude powder over your concealer to give your skin a natural glow. Once you’ve applied your concealer, add a smooth finish to these areas with several sweeps of illuminating powder. Focus especially on your undereye, cheek, and chin areas, as well as any other place where you blended your concealer. Try using a subtle, luminescent shade that provides a slight shimmer to your skin without an over-the-top glow.[10]
- Try using a small, tapered powder brush for this.
-
4Dust a nude shade all over your face to use as a finishing powder. Take a large, fluffy brush and dip it into a nude palette of illuminating powder. Using long, gentle strokes, sweep the powder all over your face to set and finish your look. Focus especially on your cheeks, forehead, chin and nose.[11]
- If you want to go for a bolder, more rosy look, feel free to use a more colorful palette.
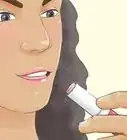
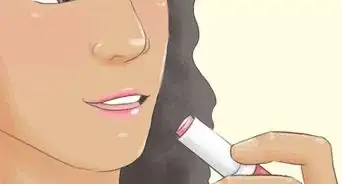
- Try pairing a rosy illuminating powder with a shade of pink lipstick! [12]
Using as a Highlighter
-
1Focus the powder along your cheekbones to make your skin luminous. Take a medium-sized, fluffy makeup brush and swirl it around your illuminating powder. Using long, sweeping motions, apply the powder in a curved line, working from the base of your cheekbone to the outer corner of your eye. Continue sweeping on the powder until you’ve achieved your desired amount of highlight.[13]
- This works especially well with shades that are lighter than your skin tone.
-
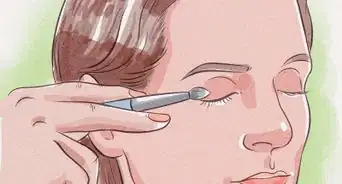
2Dab a small amount of powder into the corners of your eyes. Take a small, tapered brush and dip it into your palette of illuminating powder. Sketch the brush along the inner corners of your eyes to set the product in place. Move your head slightly to see if your eyes catch the light, then add more product if needed.[14]
- Light, neutral shades like white and cream work really well with this kind of highlighting style.
- This makeup style is also known as “eye strobing.”
-
3Brush the powder over your brow bones and cupid’s bow to highlight your central features. Swirl a large makeup sponge or wide makeup brush into your illuminating powder. Take the coated applicator and gently dab it across your brow bone, as well as the center of your cupid’s bow. Add enough product to these areas so they catch the light.
- This look works especially well when you’ve applied illuminating powder to your cheekbones, as well.
-
4Opt for a colorful powder when using neutral eyeshadow tones. Choose a brighter illuminating powder shades, such as reddish, greenish, and bluish tones. Using a medium-sized brush, apply the powder along the crest of your cheekbone, starting near your temple and working down to the level of your nose.[15]
- If you prefer more subtle makeup looks, then this might not be the best style for you.
Expert Q&A
Did you know you can get expert answers for this article?
Unlock expert answers by supporting wikiHow
-
QuestionDo illuminators look good on all skin types?
 Yuka AroraYuka Arora is a self-taught makeup artist who specializes in abstract eye art. She has been experimenting with makeup art for over 5 years, and has amassed over 5.6K Instagram followers in just 5 months. Her colorful and abstract looks have been noticed by Jeffree Star Cosmetics, Kat Von D Beauty, Sephora Collection, among others.
Makeup ArtistIlluminators and highlighters can be tricky when you have textured areas on your skin. When using these products, you’re highlighting that spot on your face and if you have bumps or texture in that spot, you’re making that more obvious. Certain products can look more soft and blended out on your skin, including creamy, balmy highlighting sticks and illuminators with a gel consistency.
Support wikiHow by unlocking this expert answer.
-
QuestionWhere do you put Illuminating Powder?
 Drew Hawkins1Community AnswerStart by adding a primer, foundation, and concealer as a base before you use illuminating powder. Then, take a large, fluffy brush and dip it into a nude palette of illuminating powder. Using long, gentle strokes, sweep the powder all over your face to set and finish your look. Focus especially on your cheeks, forehead, chin, and nose. If you want a more natural glow, focus on applying the powder to your undereye, cheek, and chin areas, as well as any other place where you blended your concealer.
 -
QuestionWhat is illuminating powder used for?Drew Hawkins1Community AnswerIlluminating powder is used to add shine to your finished makeup. It's sort of like highlighter, but it's more versatile and can be used in a few different ways. Choose a shade that works best for your skin. Once you’ve chosen the best shade for your complexion, feel free to dust some illuminating powder onto your cheeks, cheekbones, and undereye area. You can also use this product as a finishing powder, or as a highlighter to emphasize your features.
-Step-16-Version-5.webp)

References
- ↑ Yuka Arora. Makeup Artist. Expert Interview. 30 August 2018.
- ↑ https://www.beaut.ie/beauty/guide-highlighter-skin-tone-405080#
- ↑ https://www.beaut.ie/beauty/guide-highlighter-skin-tone-405080#
- ↑ https://www.beaut.ie/beauty/guide-highlighter-skin-tone-405080#
- ↑ https://m.youtube.com/watch?v=oJ0ZBdFZsO4&t=3m46s
- ↑ https://www.glamourmagazine.co.uk/gallery/order-of-makeup-application
- ↑ Yuka Arora. Makeup Artist. Expert Interview. 30 August 2018.
- ↑ Yuka Arora. Makeup Artist. Expert Interview. 30 August 2018.
- ↑ https://m.youtube.com/watch?v=oJ0ZBdFZsO4&t=3m46s
- ↑ https://m.youtube.com/watch?v=wCGgsC_0PtQ&t=4m11s
- ↑ https://m.youtube.com/watch?v=2uu7LN4W8hI&t=1m31s
- ↑ https://m.youtube.com/watch?v=9ucn2Tro1yw&t=4m4s
- ↑ https://m.youtube.com/watch?v=oJ0ZBdFZsO4&t=2m58s
- ↑ https://www.marieclaire.com/beauty/news/a20707/eye-strobing-trend/
- ↑ https://m.youtube.com/watch?v=n_N8GK9LdX0&t=4m17s
- ↑ https://m.youtube.com/watch?v=wCGgsC_0PtQ&t=4m11s
- ↑ https://www.beautylish.com/a/vxgxn/tips-to-apply-illuminating-powder
About This Article


-Step-16-Version-5.webp)