This article was co-authored by wikiHow Staff. Our trained team of editors and researchers validate articles for accuracy and comprehensiveness. wikiHow's Content Management Team carefully monitors the work from our editorial staff to ensure that each article is backed by trusted research and meets our high quality standards.
There are 13 references cited in this article, which can be found at the bottom of the page.
This article has been viewed 38,940 times.
Learn more...
Your gas furnace may have stopped working, but that doesn’t mean you have to call for a professional repair just yet. If you turned your furnace off for the summer or have noticed it isn’t heating up properly, it could be due to inadequate gas pressure. You can use the gas valve inside the furnace to tweak the pressure setting. Most furnaces have a single valve, but two-stage furnaces will have separate high and low-pressure valves. It’s a simple adjustment that can be done within a few minutes, but contact a licensed heating and cooling specialist if you notice gas leaks or other serious problems.
Steps
Opening and Lighting a Furnace
-
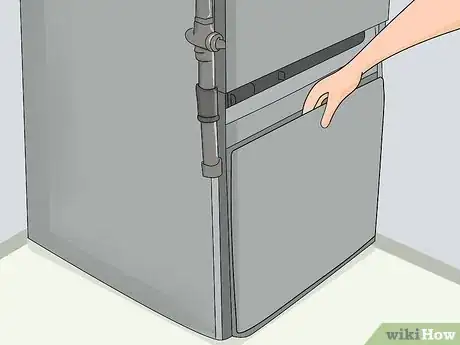
1Unscrew the front access panel on the furnace. On many furnaces, the access panel will be held in place by a series of 4 screws. If your furnace is like this, you will see the screws near the panel's corners. Rotate them all counterclockwise with a Phillips screwdriver. Once they are off, the panel can be lifted off of the furnace.[1]
- If the panel doesn’t have screws, simply lift it up to detach it from the furnace.
- The front panel may have vents or instructional stickers on it that make it more recognizable. The other panels aren't removable.
-
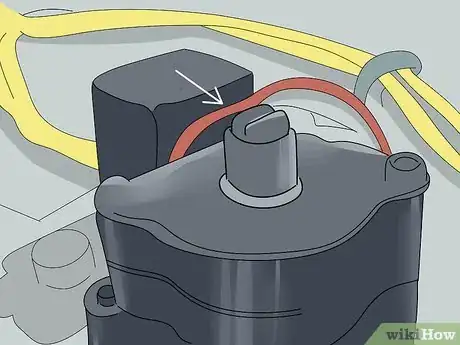
2Locate the metal box containing the valves on the gas pipe. The gas pipe is usually along the lower part of the access point. If you’re unsure where it is, follow the pipe from the wall of your home to where it enters the furnace. You will also spot a big, metal box in the center. Look for a large, round tower with a metal screw sticking out of its top. The screw is what you use to control the gas pressure. Most furnaces have only one of these valves, but some furnaces have 2 of them together.[2]
- The control box containing the valve may have some other components on it, such as a labeled pilot light control knob.
- On a two-stage furnace, one valve is for low pressure and the other is for high pressure. The high-pressure valve doesn’t activate until the furnace gets hot enough. The exact temperature varies between furnaces.
Advertisement -
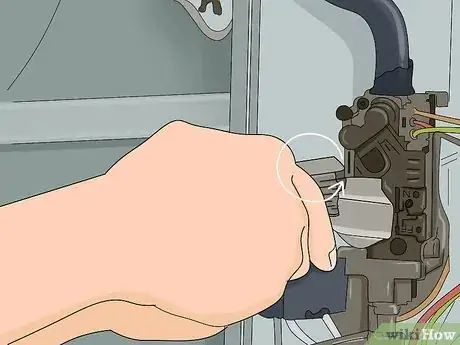
3Relight the pilot light if the furnace isn’t already on. Unless the furnace has gas flowing through it, you won’t be able to monitor its pressure. You may have turned the furnace off during the summer, for instance, or it shut off on its own due to low gas pressure. Start by checking the fuse box or circuit panel in your home to make sure the electricity is on. Once it is on, locate the pilot light switch near the gas valve and turn it off. Wait 5 minutes before activating the pilot light and then relighting it with a long stem lighter.[3]
- For more information on how to turn on your furnace, check the stickers the manufacturer placed near the front access panel. These stickers will have instructions specific to your furnace model.
- The pilot light is along the top part of the furnace. Follow the tube leading from the control box to find it.
- Take your time when relighting a furnace. If the gas isn’t given time to fully dissipate, reigniting the pilot light could cause a fire.
Connecting a Manometer
-
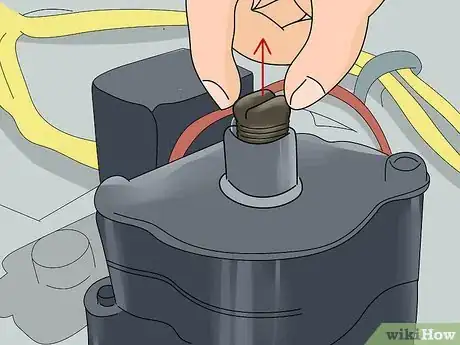
1Twist the outlet port cap counterclockwise by hand to remove it. Check underneath the valve on the side of the box. It will have a hole covered by a metal cap. For many furnaces, you can remove the cap by rotating it counterclockwise. Set the cap aside to reveal the open port. This port allows you to monitor the gas pressure while adjusting the valve.[4]
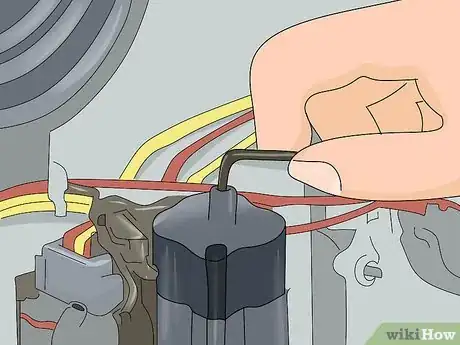
- Some gas valves require you to have a hex key. If you need one, fit a 3⁄32 in (0.24 cm) hex key into the cap and turn it counterclockwise to remove it.
-
2Hook a clear connecting hose to the barbed tip of a manometer. A manometer is a handheld device that measures gas pressure. Get one that measures in inches of water column (WC). The manometer should also come with a clear connecting hose. If it doesn’t, buy a manometer hose separately. Push the hose onto the metal barb on top of the manometer to set it up.[5]
- Dual-port manometers have a pair of barbs. If yours is like this, use a double-ended hose that can connect to both barbs at once.
- You can buy manometers online and at many hardware stores.
-
3Plug the manometer into the outlet port with a tube adapter. A manometer tube adapter is a plug that connects the testing tube to the furnace. To install a new adapter, push the circular end into the manometer hose until it stays in place. Plug the barbed end of the adapter into the furnace’s outlet, then turn it clockwise by hand to lock it in place.[6]
- If the manometer tube doesn’t come with an adapter, purchase one separately. Most furnaces work well with a 1⁄8 in (0.32 cm) adapter. On some furnaces, you can push the tube onto the outlet port without using an adapter.
- If you have a two-stage gas furnace, start with the taller valve, which is responsible for the high-pressure setting. Each valve will have its own outlet, so make sure you have the manometer hooked up to the right one!
Tuning the High-Pressure Valve
-
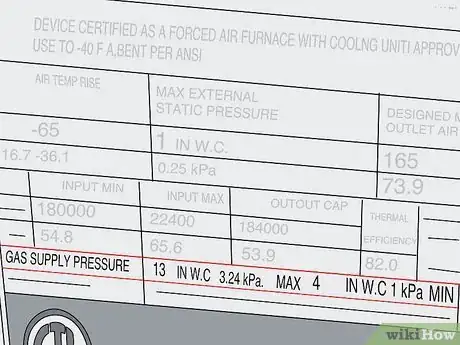
1Check the safe pressure setting listed near the valve. Look all over the furnace for some stickers placed by the manufacturer. They contain a lot of valuable information, including the correct pressure settings for the gas valve. The pressure listings are often on the access panel itself, but they can also be on one of the other exterior panels.[7]
- If you have a two-stage furnace, look for separate high and low-pressure listings.
- If you aren’t able to find the pressure setting used by your furnace, contact a professional. Using the wrong setting can cause the furnace to overheat, so avoid the risk of having to contend with costly repairs.
-
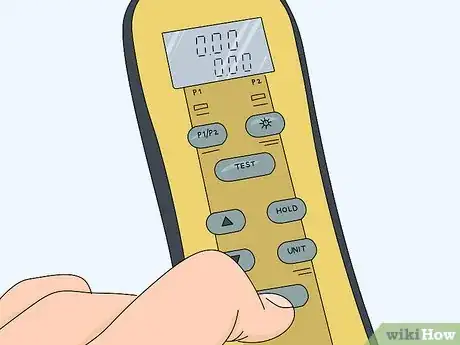
2Turn on the manometer to get an initial pressure reading. Press the power button on the manometer’s front to turn it on. It will light up right away as it detects the gas pressure. Set the manometer in a spot where it is out your way but still readable. Many manometers have a magnet on the back that you can use to hang up the device nearby while you work.
- If the manometer doesn’t light up, make sure it is well-connected to the valve. Check that the gas and pilot light are on as well.
- If the furnace seems to be working, remove the battery cover on the back end of the manometer. They usually run on a single 9-volt battery. Replace it to see if the battery is dead.
-
3Set the high pressure to 3.5 inches of water column (WC) for natural gas. Note that the optimal setting varies between furnaces, so consult the manufacturer’s instructions before making any adjustments. When you’re ready, go back to the screw on the top or side of the gas valve. Use a flathead screwdriver to turn the screw. Rotating it clockwise raises the gas pressure, while rotating it counterclockwise reduces the pressure. If your furnace only has one pressure valve, you can remove the manometer and cover the outlet port.[8]
- For a propane furnace, the valve has to be set to 11 inches of WC or a similar number.
- Keep an eye on the manometer, since its display will change as you adjust the valve.
- Tune the gas pressure gradually. For safety, tune it to the pressure rating recommended by the manufacturer.
Altering the Low-Pressure Valve
-
1Locate the shorter valve if your furnace has one. Find the metal box along the middle part of the gas pipe. The taller valve is the one responsible for the high-pressure setting on a two-stage furnace. Look for a noticeably shorter valve next to it. Besides being a little shorter, the low-pressure valve will look almost identical to the high pressure one. Set the high pressure first, then keep the manometer attached to the outlet port.[9]
- Low-pressure valves often have a much shorter screw than high-pressure valves do, so you can use that to tell them apart.
- Not all furnaces have both valves. If you don’t have a two-stage furnace, you won’t have to worry about setting high and low pressures. The manufacturer’s directions will only have a single recommended pressure listed as well.
-
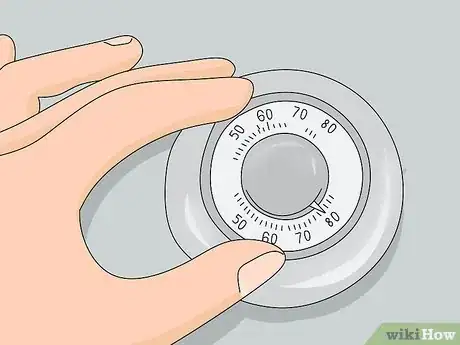
2Turn the heat down low using the thermostat. Turn it down as low as it can go. At a low-temperature setting, your furnace doesn’t need to create as much heat, so the high-pressure valve shuts off. Watch the manometer’s display, since it will change as it detects the lower pressure. You will also be able to hear the furnace get quieter as the temperature drops.[10]
- You won’t have to disconnect the manometer at all. Leave it connected to the outlet valve near the pipe.
-
3Adjust the low-pressure valve to 1.6 WC for natural gas. Check the pressure setting recommended by the manufacturer. When you have it, slip a flathead screwdriver into the valve. Turn it clockwise to raise the pressure and counterclockwise to lower it. Once it’s at the recommended setting, your furnace will be in working order again.[11]
- The proper pressure can vary from furnace to furnace. For instance, on a propane furnace, it will be around 4.0 inches of WC.
- Mixing up the high and low-pressure settings is easy, so double-check the instructional sticker near the access panel. Make sure you’re using the “high fire” number for the high-pressure valve and the “low fire” number for the low-pressure valve.
-
4Remove the manometer and close up the furnace. Unscrew the adapter from the pressure valve outlet, then return the outlet plug. Hang the front access panel on the furnace next. If it had screws, put them back and turn them clockwise to secure it in place.
- If you are sure the gas pressure is correct but are still experiencing problems with the furnace, contact a heating and cooling specialist.
Warnings
- Approach an active furnace carefully to avoid burns or electric shock. Avoid touching exposed electrical wires, and operate gas valves with caution.⧼thumbs_response⧽
- If your furnace is off, reactivating the pilot light can lead to a fire. Make sure you have drained all gas out of the line before reigniting the pilot light.[14]⧼thumbs_response⧽
Things You’ll Need
- Phillips screwdriver
- Flathead screwdriver
- Manometer
- Manometer hose
- 1⁄8 in (0.32 cm) MPT adapter
- Long stem lighter (optional)
References
- ↑ https://www.youtube.com/watch?v=ku-EuCoVNJU&feature=youtu.be&t=10
- ↑ https://www.youtube.com/watch?v=xvQabz6d_4g&feature=youtu.be&t=20
- ↑ https://www.youtube.com/watch?v=4x4v1WAYrFY&feature=youtu.be&t=96
- ↑ https://www.youtube.com/watch?v=a5rpShUvcXQ&feature=youtu.be&t=98
- ↑ https://www.youtube.com/watch?v=a5rpShUvcXQ&feature=youtu.be&t=170
- ↑ https://www.youtube.com/watch?v=Sl5qt-FYxNA&feature=youtu.be&t=23
- ↑ http://www.grayfurnaceman.com/setting-gas-input.html
- ↑ https://www.shearersupply.com/ASSETS/DOCUMENTS/CMS/EN/StaticPage_PDF/FURN-SVB054A-EN%20Manufacture%20GV%20Adjustment%20Policy.pdf
- ↑ https://www.youtube.com/watch?v=LcJArqYjXuo&feature=youtu.be&t=121
- ↑ https://www.youtube.com/watch?v=LcJArqYjXuo&feature=youtu.be&t=112
- ↑ http://www.grayfurnaceman.com/setting-gas-input.html
- ↑ https://www.bobvila.com/articles/furnace-troubleshooting-2/
- ↑ https://www.bobvila.com/slideshow/solve-common-furnace-problems-with-9-easy-fixes-46665
- ↑ https://www.bobvila.com/articles/how-to-light-a-pilot-light/
