This article was co-authored by Mark Spelman. Mark Spelman is a General Contractor based in Austin, Texas. With over 30 years of construction experience, Mark specializes in constructing interiors, project management, and project estimation. He has been a construction professional since 1987.
wikiHow marks an article as reader-approved once it receives enough positive feedback. This article received 20 testimonials and 87% of readers who voted found it helpful, earning it our reader-approved status.
This article has been viewed 1,457,793 times.
Plastic is a tricky surface to paint. Unlike wood, plastic is not porous, so the paint has little to stick to. With the right amount of preparation, however, you can paint plastic with success. Keep in mind, however, that depending on the type of paint and plastic you are working with, the paint may eventually chip off, especially after heavy or frequent use.
Steps
Preparing the Surface
-
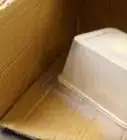
1Choose a plastic item to paint. With the right preparation, you can paint just about anything. Items such as furniture, figurines, toys, containers, and décor items are great choices.
Not every plastic surface is suitable, including: plastic/laminate floors, bathtubs/shower stalls, or counters.
-
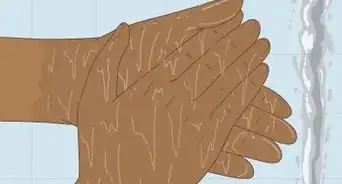
2Clean the item with mild dish soap and warm water. This will remove any surface dirt and reduce the amount of work you have to do in later steps. Use a soft cloth or sponge for smooth surfaces, and a scrubbing brush for textured surfaces (such as patio furniture). Rinse the item with fresh water afterwards, then dry it off.[1]Advertisement
-
3Lightly buff the surface with 220 to 300-grit sandpaper. Use a light touch and a circular motion to avoid scratches. When you are done, wipe the surface down with a tack cloth.[2]
- Sanding is important. It gives smooth surfaces some tooth, allowing the paint to stick on better
-
4Wipe down the surface down with rubbing alcohol. This step is very important, as it will remove any oils that might prevent the paint from sticking. If you don't do this, the paint is more likely to chip off later.[3]
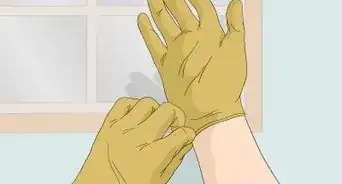
Handle the plastic carefully. Hold the item by the edges or wear disposable gloves.
-
5Mask off any parts that you do not want to be painted with painter's tape. This would be a good idea even if you will be painting the item with a brush. The masking tape will help give you a clean, defined line between the painted and unpainted areas.
-
6Apply a coat of primer. You’ll need to apply a coat of primer, preferably one that bonds well. This will help even out the surface of the plastic and give the paint something to stick to. The spray-on kind would be the easiest to use, but you can get the brush-on kind as well.
- Let the primer dry completely before proceeding.
- If you are using a spray-able primer, be sure to cover your work surface and work in a well-ventilated area.


Painting the Surface
-
1Set up your workspace. Choose an area with good lighting. Cover your work surface with newspaper or a cheap, plastic, tablecloth. If you will be working with spray paint, it would be best if you work in a well-ventilated area; outside would be best.[4]
- If there are any places on your plastic you do not wish to paint, cover them in painter's tape.
-
2Choose a paint that is suitable for plastic. Spray paint works especially well for plastic, but you can use acrylic or enamel/model paint as well. It would be even better if the paint is meant for plastic. Check the label, and look for words such as: "Plastic" or "Multi-Surface."
-
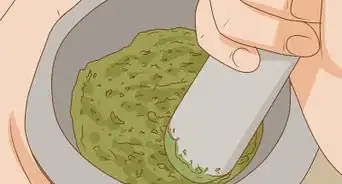
3Prepare the paint, if needed. Some types of paint come ready to use, while others require a little bit of preparation. Before you begin painting, check the label on your can or bottle of paint for any specific instructions.
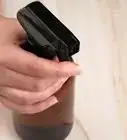
- Shake spray paint cans for a few minutes. This will ready the paint to spray, mixing it and giving you a smoother application.
- Thin acrylic paint with enough water to give it the consistency of creamer. This will give you a smoother application and help reduce brushstrokes.
- Some model/enamel paints need to be thinned as well. In most cases, you will need to use a paint thinner formulated for enamel paints; it's typically sold alongside the other enamel paints.
-
4Apply a light, even coat of paint. Don't worry if the first coat of paint doesn't cover the entire surface; you will be applying several coats of paint. This is important, whether you are spraying or brushing the paint on.
- Hold spray cans 12 to 18 inches (30 to 46 centimeters) away from the surface. Apply the paint in a sweeping motion.
- Apply acrylic paints using a taklon, kanekalon, or sable brush.
- Apply enamel/model paints using a stiff-bristle brush. They are typically sold alongside the other model paints.
-
5Apply more light coats of paint. Allow each coat of paint to dry before applying the next one. Alternate the directions you paint in for each layer: side-to-side for the first layer, top-to-bottom for the second layer, etc. How many layers you apply depends on the coverage you need. In most cases, you'll only need 2 to 3 coats.
How long it takes for the paint to dry depends on the type of paint you are using. For most types of paint, this should only take 15 to 20 minutes. Let final coats dry for 24 hours.
-
6Let the paint to dry completely after your final coat. At this point, your project is complete and ready to use. If you'd like to add some details or a top coat, read on to the next part.
- If you applied masking tape earlier, you should remove it now. Peel it away carefully so that you don't accidentally chip the paint.


Touching Up and Sealing the Surface
-
1Fill in any chips or bare patches with a brush. Carefully inspect your piece. If there are any bare patches or chips, fill them in with more paint and a thin brush. If you used spray paint earlier, you might want to use acrylic paint in a matching color and finish for this step.[5]
-
2Add some details, stencils, or weather, if desired. This step is completely optional, but it can bring more life and character to your piece, especially if it is a prop or figurine. Here are some ideas to get you started:
- Apply stencils to the piece, then paint over them with spray paint or acrylic paint and a foam brush.
- Use a thin, pointed brush to paint on delicate scrollwork or designs.
- Add highlights with lighter shades of your paint color, and shadows with darker shades.
-
3Apply a light coat of polyurethane sealer for extra-durability, if desired. You can use the spray-on or the brush-on kind, but the spray-on kind will give you a smoother finish, however. Apply a single, light coat, then let it dry for at least 30 minutes. Apply one to two more coats, if needed, allowing 30 minutes between each one.[6]
- Choose a sealer in a finish that appeals to you: matte, satin, or glossy.
- Several light coats of sealer are better than one thick coat. If you apply the sealer too thickly, it may turn out tacky.
-
4Allow the paint and sealer to dry completely. Just because something feels dry to the touch does not mean that it is dry throughout. Check the label of your paint and sealer bottle, and see if there are any drying or curing times.[7]
- Many enamel-based paints require several days to cure. During this time, they may be sticky and prone to peeling or chipping.
Expert Q&A
-
QuestionCan plastic receptacle covers be painted?
 Mark SpelmanMark Spelman is a General Contractor based in Austin, Texas. With over 30 years of construction experience, Mark specializes in constructing interiors, project management, and project estimation. He has been a construction professional since 1987.
Construction ProfessionalYes, they can. But be sure to use a good bonding primer and spray paint. -
QuestionWhat paint can I use on a composite door?Mark SpelmanMark Spelman is a General Contractor based in Austin, Texas. With over 30 years of construction experience, Mark specializes in constructing interiors, project management, and project estimation. He has been a construction professional since 1987.
Construction ProfessionalI would use an oil-based primer with a water-based latex paint.
Warnings
- Some types of plastic will repel paint, regardless of your preparation. There is little you can do in this case.⧼thumbs_response⧽
- Items that will see constant use may stat to chip over time.⧼thumbs_response⧽
- Always work in a well-ventilated area to avoid inhaling toxic fumes from the paint, sealer, or mineral spirits.⧼thumbs_response⧽
Things You'll Need
- Plastic item
- Masking tape
- Painter’s rags
- Fine-grit sandpaper
- Tack cloth
- Mild dish soap and water
- Rubbing alcohol
- Newspaper
- Spray paint, acrylic paint, or enamel paint
- Paintbrushes (if using acrylic or enamel paint)
- Painter's tape (optional)
- Paint primer (optional)
- Sealer (optional)


References
- ↑ https://craftsbyamanda.com/tips-for-painting-on-plastic/
- ↑ http://www.krylon.com/how-to/how-to-videos/how-to-spray-paint-plastic-video/
- ↑ https://craftsbyamanda.com/tips-for-painting-on-plastic/
- ↑ https://www.bobvila.com/articles/how-to-paint-plastic/#.WUIhWvrytPM
- ↑ http://www.heytherehome.com/diy-spray-painted-plastic-outdoor-chairs/
- ↑ https://www.bobvila.com/articles/how-to-paint-plastic/
- ↑ https://www.bobvila.com/articles/how-to-paint-plastic/
About This Article

Before you try to paint on plastic, lightly buff the plastic surface with 220 to 300-grit sandpaper, using a circular motion as you sand. This will allow the paint to stick to the plastic better. Wipe down the plastic surface with alcohol to remove any oils that might prevent the paint from sticking, then apply a coat of primer. Choose acrylic, enamel, or spray paint, then apply the paint to the plastic surface in light coats, allowing each coat to completely dry before adding another one. To learn more from our General Contractor co-author, like how to seal your paint to protect it, keep reading the article!