This article was co-authored by wikiHow staff writer, Darlene Antonelli, MA. Darlene Antonelli is a Technology Writer and Editor for wikiHow. Darlene has experience teaching college courses, writing technology-related articles, and working hands-on in the technology field. She earned an MA in Writing from Rowan University in 2012 and wrote her thesis on online communities and the personalities curated in such communities.
The wikiHow Tech Team also followed the article's instructions and verified that they work.
This article has been viewed 49,422 times.
Learn more...
Do you want to share your photos with others without posting them on social media sites? If you and those you want to share with have Apple devices, you can share your albums via iCloud in a snap! This wikiHow article walks you through the process of creating a shared album to accepting an invite on an iPhone.
Things You Should Know
- First turn on "Shared Albums" to be able to share collections of pictures.
- Share an existing album, create a new shared album, accept invites, and access shared albums easily with iCloud Photos.
Steps
Accepting an Invite
-
1Open Photos. This app icon looks like a multicolored pinwheel.
- Do this if the notification is missing from your Notification Center. If you see the shared album invitation in your Notification Center, you can simply tap it to accept the invite.
-
2Tap For You. It's the tab that looks like a card at the bottom of your screen.Advertisement
-
3Tap Accept. If you've been invited to a shared album, you will see that invitation here.


-
1Open Photos. This app icon looks like a multicolored pinwheel.
- This method is useful once you've been invited to a shared album. Accept the invite, then you'll be able to see the album.
-
2Tap Albums. It's at the bottom of your screen.
-
3Tap the shared album. Scroll down and you'll see the "Shared Albums" header. You can see all the albums you've been invited to.


-
1Open Settings. Tap the app icon that looks like a pair of gears on a grey background.
- This method works on iPad and iPod touch as well as iPhone.
- If you're on a Mac, open the Photos app, then open Preferences > iCloud > Shared Albums.
-
2Tap your name. It's the first thing you see when you open the Settings app.
- If your iPhone is older than iOS 11, then you can skip this step.
-
3Tap iCloud. This is next to a blue cloud icon.
-
4Tap Photos. It's the icon that looks like a multicolored pinwheel.
-
5Tap the switch next to "Shared Albums" to turn it on . If you have an older iPhone, this will say "iCloud Photo Sharing" instead.[1]


Sharing an Album
-
1Open Photos. This app icon looks like a multicolored pinwheel.
- Use this method if you already have an album with pictures that you want to share. If you don't have one already, you'll need to create a new one.
-
2Navigate to the album you want to share. Tap Albums at the bottom of your screen to see all of your albums.
-
3Tap Select. This is in the top right corner of your screen.
-
4Tap Select All. Tapping this will select all the pictures in your album. If you want to deselect one or more, tap them so they don't display a blue checkmark in the top right corner of their thumbnail.
-
5
-
6Tap Add to Shared Album. It's usually the second option in the menu.
- You can also follow these steps to add other pictures to your shared album.
-
7Give your album a title and tap Next. This is the album title that everyone else will see, so make sure it has a name that reflects what's in the shared album.
-
8Enter the names of those that you want to share the album with. If that person, phone number, or email address is in your Contacts app, you'll be able to select them as you type.


-
1Open Photos. This app icon looks like a multicolored pinwheel.
- Use this method if you don't have an album that you want to share.
-
2Tap Albums. You should see this tab at the bottom of your screen and it will direct you to your albums.
-
3Tap +. This plus sign should be in the top left corner of your screen and will allow you to create a new album.
-
4Tap New Shared Album. It's usually the last option in the drop-down menu.
-
5Enter a name for your shared album and tap Next. This will be the name that everyone else sees, so make sure it reflects what is shared in the album.
-
6Enter people to invite to your album, then tap Create. You can use their name, email address, or phone number.
- If you're not sure what their information is, but they are in Contacts, tap + to open the Contacts app.
- To add pictures to this album, tap the + tile and then tap to select photos from your photo gallery.
- Add more people to your shared album by tapping the person with a + icon in the upper right corner of your screen.
- Share your photos with people without iCloud by going to the People tab in your shared album and tapping "Public Website." Your photos will share to a public website so your friends without iCloud can see them.


Troubleshooting
-
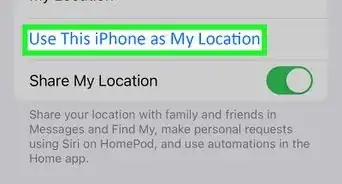
1Make sure your album is shared and not private. If you can't share the album (can't find where to add people to it), you might have created a regular, private album. Share the pictures inside your album to create a new album and share it.
-
2Allow cellular data for Photos. In the case that this is blocked, you may not be seeing photos in a shared album. To fix this, go to Settings > Cellular > Photos.
-
3Check your Wi-Fi connection. If you aren't connected to the internet, you will not be able to share an album with others or make comments on uploads. [2]
-
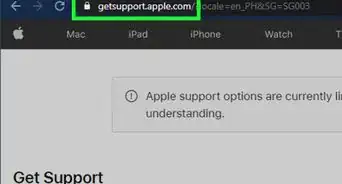
4Check Apple's system status page. If Photos is down, you won't see pictures or be able to share pictures in the shared album.
-
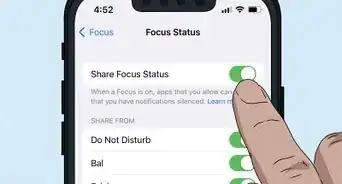
5Turn "Shared Albums" in Settings off and back on again. When you turn this feature off, you'll get a warning that all the shared albums on your phone will be deleted, but that's ok. They will be added again once you turn it back on.
-
6Update your iOS. Only iPhones, iPads, and Macs with at least iOS 7 will be able to see shared albums. If you haven't updated your iOS and are having issues with photos appearing in the shared album, you should try updating.


About This Article