This article was co-authored by Jason Phillip. Jason Phillip is a handyman specializing in mounting and hanging objects onto walls. With over five years of experience professionally mounting and installing objects through his company, Jason's Handyman Services, Jason's work includes working with mounting window AC units, designing art gallery walls, installing kitchen cabinets, and replacing light fixtures on drywall, brick, and plaster. He has been rated a "Top Pro" every year since 2016 by Thumbtack for being one of the highest-rated, most popular professionals on Thumbtack.
This article has been viewed 33,462 times.
A power drill is a versatile tool, and one which most homeowners or DIY builders will need to use for various tasks. Power drills can be either corded or (more commonly) cordless. They come with a variety of different sized drill bits, and often also have regular and Phillips head screwdriver attachments. Familiarize yourself with the parts, functions, and safety precautions for your power drill before you begin drilling or driving screws.
Steps
Using the Drill
-
1Apply steady pressure to the base while drilling. Position your hands so that your dominant hand holds the handle of the drill, and place your other hand on the base or around the body of the drill. When drilling a hole into any material, make sure that the bit is exactly perpendicular to the surface that you want to drill into.[1]
- Slowly squeeze the trigger, and press the drill lightly so the bit sinks down into the material you’re drilling.
-
2Limit the depth of the hole. In some cases, you may not need to drill a hole as deep as the bit will go. If you’d like to limit the depth of the hole, use the “reverse” button to help you draw the drill back out of the material you’re drilling into. Once you’ve drilled deep enough, reverse the drill and spin the bit backwards to help you withdraw the bit from the hole.
- If you only need to drill a specific depth, place a strip of electrical tape around the bit at that depth. The tape will prevent you from accidentally drilling too deep.[2]
Advertisement -
3Drill a pilot hole for screws in thick wood. You’ll need to drill a pilot hole if you’re dealing with dense wood or another substance that’s too thick to drive a screw directly into. Drill the pilot hole with a drill bit sized slightly smaller than the screw, so that the screw won’t be loose in the hole.
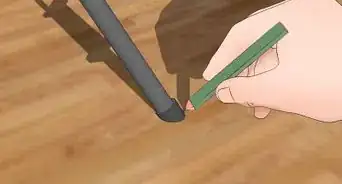
- To find the correct drill bit size, hold the drill bit in front of the screw. The bit should cover the body of the screw, but the threading should be visible above and below the drill bit.[3]
-
4Drill a pilot hole to create large holes. Use one of the smallest drill bits to make a pilot hole. Drill down as deep as the finished hole will be. Then, set the tip of the larger drill bit into the pilot hole, and use the pilot hole as a guide. You’ll risk cracking hardwood in two if you drill a large hole in it without a pilot hole.[4]
Changing the Bit
-
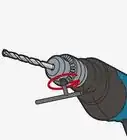
1Loosen the tip of the chuck. The tip of the chuck is designed to fasten tightly around the shank or base of whatever drill or screwdriver bit you insert. To remove one bit and insert another, you’ll need to loosen the chuck. Hold the front portion of the chuck, and rotate it firmly counterclockwise. You should note the three prongs which hold the bit in place loosen and retract into the chuck.[5]
- On older power drills, the chuck may be “keyed.” You’ll need to use a small threaded “key” (provided with the drill) to manually loosen the tip of the chuck.
-
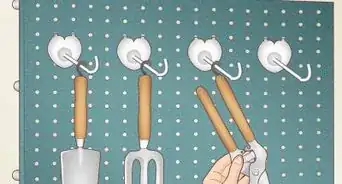
2Select the bit or tool you want to use. Most power drills are sold with a starter pack of drill bits, although many more types can be purchased at your local hardware store, depending on the task you need to perform. These vary from standard twist bits to spur point bits (used to drill into wood), masonry bits, and spade bits (to drill large holes into wood).[6]
-
3Insert the bit and tighten the tip of the chuck. Once you’ve selected the bit you want to use for your project, insert the shank (base) of the bit about ¾ of an inch (1.9 cm) into the tip of the chuck. Then, tighten the chuck. Continue tightening until the three metal prongs emerge from the chuck and firmly fasten around the shank.[7]
- A standard power drill will accommodate bits with a shank up to 3/8 inch (1 cm) in diameter.[8]

Setting Up the Drill Beforehand
-
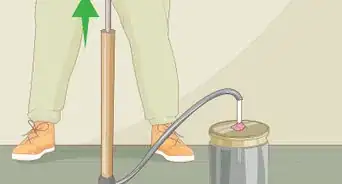
1Charge the battery pack. The removable battery pack is located at the base of the power drill. The battery or the battery charging station should have an LED indicator indicating if the battery is fully charged (green light) or low on battery (red light). Make sure that the battery is fully charged before attempting to use the drill.[9]
- Alternately, if you’re using a corded drill, you’ll need to plug the cord into the wall the entire time you’re using the drill. This will limit your range of motion.
-
2Check the Forward/Reverse control. All power drills have a small button which allows you to toggle the direction of the rotating bit between “forward” or “reverse.” Look along the sides of the drill body, near the trigger. The button will be about 1/4 inch (0.6 cm) long, and may have a directional arrow shape printed beside it.[10]
- When the button isn’t depressed, the drill will spin clockwise. If you press the button, the drill will turn counterclockwise.
-
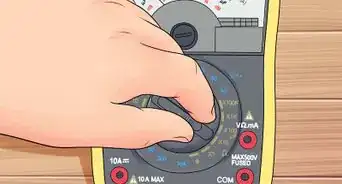
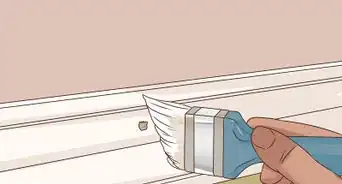
3Set the drill to a speed that suits the job. On the top or side of the main drill body, there should be a switch which sets the drill’s speed. Use the low-speed setting for driving screws and other low-torque tasks, and the higher-speed setting for lower-torque tasks, like drilling.[11]
- Most drills have two speeds, which will be indicated by a clear “1” and “2” next to the respective settings. Some drills may have three speeds.
- Only switch the drill’s speed when the chuck (rounded front part of the drill which houses the bit) is not spinning. Otherwise, you’ll risk damaging the internal workings of the drill.
-
4Set the drill on high torque and low speed to drive screws. Note if the screw you’ll be driving is regular or Phillips head, and place the corresponding drill bit into the head of the chuck. Then line up the screw with the spot you want to screw it into, and slowly drive it in with the power drill.
- Screwdriver heads are often magnetized, to reduce the risk of the screw slipping off the driver head.
-
5Adjust the clutch. At the point where the drill body meets the base of the chuck, you’ll see a ring marked 1–10 or 1–20. You can adjust this clutch to adjust the drill’s torque, based on whether you’re working on a job that requires high torque (e.g. driving screws) or low torque (e.g. drilling holes).[12]
- Torque is the amount of twisting force or power that the drill uses. A higher torque will result in the drill turning at a lower speed.
- Try starting your drill at the lowest speed, and drill until the screw doesn't go in anymore. Then, slowly turn the torque to a higher setting until you get the screw into the wall.[13]
Expert Q&A
-
QuestionHow do I use a power drill?
 Jason PhillipJason Phillip is a handyman specializing in mounting and hanging objects onto walls. With over five years of experience professionally mounting and installing objects through his company, Jason's Handyman Services, Jason's work includes working with mounting window AC units, designing art gallery walls, installing kitchen cabinets, and replacing light fixtures on drywall, brick, and plaster. He has been rated a "Top Pro" every year since 2016 by Thumbtack for being one of the highest-rated, most popular professionals on Thumbtack.
HandymanWhen you use a power drill, start with the lowest setting, which is usually 1. Then, when the screw won't go in anymore, slowly turn it to a higher setting until you get the screw into the wall.


References
- ↑ https://www.lowes.com/n/how-to/how-to-use-a-power-drill
- ↑ https://www.lowes.com/n/how-to/how-to-use-a-power-drill
- ↑ http://www.primermagazine.com/2012/learn/the-power-drill-a-modern-mans-guide-to-tools
- ↑ http://www.primermagazine.com/2012/learn/the-power-drill-a-modern-mans-guide-to-tools
- ↑ http://www.popularmechanics.com/home/tools/how-to/g2661/how-to-adjust-a-drill-driver/
- ↑ http://www.primermagazine.com/2012/learn/the-power-drill-a-modern-mans-guide-to-tools
- ↑ http://www.popularmechanics.com/home/tools/how-to/g2661/how-to-adjust-a-drill-driver/
- ↑ https://www.lowes.com/n/how-to/how-to-use-a-power-drill
- ↑ http://www.popularmechanics.com/home/tools/how-to/g2661/how-to-adjust-a-drill-driver/
- ↑ http://www.primermagazine.com/2012/learn/the-power-drill-a-modern-mans-guide-to-tools
- ↑ http://www.popularmechanics.com/home/tools/how-to/g2661/how-to-adjust-a-drill-driver/
- ↑ https://www.lowes.com/n/how-to/how-to-use-a-power-drill
- ↑ Jason Phillip. Handyman. Expert Interview. 2 July 2020.
- ↑ https://www.lowes.com/n/how-to/how-to-use-a-power-drill
About This Article