This article was co-authored by Ryaan Tuttle. Ryaan Tuttle is a Home Improvement Specialist and the CEO of Best Handyman, Inc. in Boston, Massachusetts. With over 17 years of experience, he specializes in building home service businesses, focusing on creating scalable and efficient brands. With the help of his global team, the companies have achieved over 10+ million in sales and received recognition through magazine features, and enjoy partnerships with wikiHow and Jobber field service software. Boston Magazine and LocalBest.com have named Best Handyman Boston the Best Handyman in Boston. Ryaan holds Construction Supervisor and Home Improvement Contractor Licenses.
There are 9 references cited in this article, which can be found at the bottom of the page.
This article has been viewed 127,822 times.
Air compressors enable the usage of pneumatic tools, which make DIY work a breeze. Compressors are also beginner-friendly, since assembling one is as simple as plugging in the hose and electrical cord. Monitor the pressure gauges to keep the air pressure in the hose below the amount listed on your power tool. Remember to adjust the pressure when you switch tools and release the drain valve when you're finished. Take these precautions every time to make your work safe and efficient.
Steps
Setting up the Compressor
-
1Check the pump oil level if your compressor isn’t oil-free. Old compressors, as well as large ones, tend to be oil-filled. Locate the dipstick near the bottom of one of the compressor’s ends. Pull it out and check to see that the oil level reaches about ⅔ of the way up the stick. If it doesn’t, pour some compressor oil into the tank.[1]
- If you need oil, it can be found at most home improvement, hardware, and auto parts stores.
- If you’re unsure about what kind of compressor you have, consult the owner’s manual. Most small compressors are now oil-free, so that’s why you may not see an oil tank or dipstick.
-
2Attach the hose to the regulator valve. Set the compressor on flat ground. Find the regulator valve, which should be right next to the smaller pressure gauge on 1 end of the compressor. It’s a round, copper-colored, metal plug with a big hole in the middle. Push the pointed end of the hose into the valve to attach it.[2]Advertisement
-
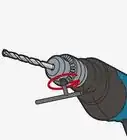
3Plug your power tool into the hose. Hold the hose in 1 hand and the power tool in the other. Slide the tool’s plug into the hose’s free end and twist them together until the tool locks in place. When the tool is on securely, it won’t slide off.[3]
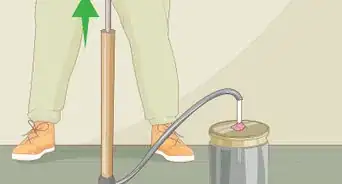
- If you are pumping a tire, push the coupler onto the tire’s valve.
-
4Plug the compressor into a grounded 3-prong outlet.[4] Make sure the compressor’s power switch is turned off before plugging it in. Avoid using extension cords if you can’t reach a working outlet. Instead, get another air hose and plug it into the first one.[5]
- To attach 2 hoses together, slide the plug end of 1 hose into the receiving end on the other hose. It works the same way as attaching a power tool to the hose.
- Extension cords aren’t recommended because they can cause the compressor to overheat.


Operating the Compressor
-
1Put on safety goggles and closed-toed shoes. This is important to do in order to operate power tools safety. Wear polycarbonate goggles to protect your eyes. A good pair of shoes or boots shields your toes from any dropped tools. Put on all your safety gear before attempting to operate the compressor.
- Some tanks and tools can be pretty noisy, so consider wearing ear muffs as well.
-
2Pull on the safety valve to test it. Look for a copper-colored plug near the hose line. It will be tightly in place on the compressor and may have a ring that makes it easier to pull. Tug it towards you to release the valve and listen for the hiss of escaping air.[6] Push the valve back in place before starting the compressor.[7]
- Hearing air hiss out of the valve is a sign that it works. Otherwise, if you are able to pull the valve out and put it back in securely, it should be fine even if you don’t hear any air escape.
-
3Turn on the compressor and wait for the tank to pressurize. Flip the electrical switch on the tank to turn it on. The machine will buzz to life. Watch the larger pressure gauge on the tank's side. Wait for the needle to stop moving, signifying that the air inside has reached the maximum pressure.[8]
- The second, smaller gauge near the hose displays the air pressure in the hose. The display on that gauge won't move at all for the moment, which is fine.
-
4Check your tool to find how much pressure it needs. This information is usually printed on the tool. Look for a sticker or letters on the tool’s underside, near the handle. If you can’t find it there, consult the owner’s manual for more information.[9]
- For example, the information may state that the tool functions with a maximum of 90 PSI. For safety, keep the hose pressure at 75 to 85 PSI.
- Every tool has a different rating, so you will need to adjust the pressure every time you switch tools.
-
5Adjust the pressure regulator knob to match the tool’s PSI.[10] The pressure regulator knob will be on the hose. Twist it counterclockwise to increase the amount of air flowing into the hose. Watch the smaller pressure gauge, also located on the hose, until it shows that the pressure is at the level you need.[11]
-
6Operate the power tool while air is in the tank. Once pressurized air is in the hose, your tool is ready for use. Every time you use the tool, the pressure in the tank will drop and begin refilling automatically. You won’t need to make adjustments until you switch to a different tool.
- Check the pressure gauge again if the power tool suddenly seems to stop working. This happens with smaller tanks that can’t refill fast enough to accommodate larger tools. Wait a moment for the pressure to rebuild.


Shutting off and Maintaining the Compressor
-
1Open the air tank drain valve to let out condensation. The valve will be on the air tank, on the underside. Twist the valve counterclockwise so that the pressurized air blows out any collected moisture. Put the valve back in place by twisting it clockwise until you can no longer hear the air flow.[12]
- If you can’t twist the valve by hand, try using pliers.
- To keep your compressor functional, drain the condensation after every use.
-
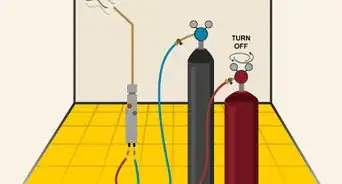
2Turn off the compressor to drain the pressure. Leave the hose in place until the compressor is turned off. Twist the pressure regulator knob near the hose to shut off the hose's air supply first. Then turn off the compressor and wait for the pressure to leave the system. Pull the pressure relief valve to speed up draining process.
-
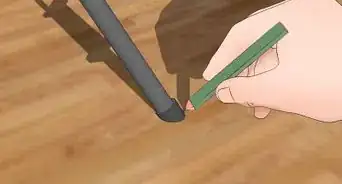
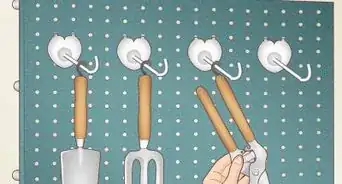
3Remove the hose and store the air compressor. Unplug the compressor from the wall, then remove the hose. Without pressure in the tank, it should slide right out. Store the compressor and hose in a dry, temperature-controlled area such as a closet.
-
4Replace the oil every year if you have an oil-filled compressor. Like with any machine, clean oil is integral for operation. This is typically done by using a socket wrench to remove the plugs on the oil tank. Keep a container on hand to catch the old oil. Then, use a funnel to add new compressor oil.[13]
- Consult your owner’s manual for more instructions on opening the oil tank and changing the oil.


Expert Q&A
-
QuestionWhat should you not do with an air compressor?
 Ryaan TuttleRyaan Tuttle is a Home Improvement Specialist and the CEO of Best Handyman, Inc. in Boston, Massachusetts. With over 17 years of experience, he specializes in building home service businesses, focusing on creating scalable and efficient brands. With the help of his global team, the companies have achieved over 10+ million in sales and received recognition through magazine features, and enjoy partnerships with wikiHow and Jobber field service software. Boston Magazine and LocalBest.com have named Best Handyman Boston the Best Handyman in Boston. Ryaan holds Construction Supervisor and Home Improvement Contractor Licenses.
Home Improvement SpecialistYou shouldn't just plug it in without first draining it. Since you can't be sure if the previous person that used it drained it correctly, the first thing you should always do is let any residual water or air out.
Warnings
- Read the pressure guideline on a tool before using it. Never use it with more pressure than the recommended amount.⧼thumbs_response⧽
- Extension cords can cause the compressor to overheat, leading to a fire. Use extra hoses when you need more reach.⧼thumbs_response⧽
Things You’ll Need
- Compressor oil for oil-filled compressors
- Socket wrench for oil-filled compressors
- Bucket to catch old oil
- 1 or more air hoses
- Air compressor
- Compatible power tools
- 3-pronged outlet
- Safety goggles
- Close-toed shoes
- Pliers


References
- ↑ https://comparoid.com/how-to-use-a-portable-air-compressor/
- ↑ http://www.popularmechanics.com/home/how-to/a151/how-air-compressors-work/
- ↑ https://www.youtube.com/watch?v=tpe4prO1B7U&feature=youtu.be&t=956
- ↑ Ryaan Tuttle. Home Improvement Specialist. Expert Interview. 17 February 2022.
- ↑ http://www.budgetaircompressors.com/air-compressors-safety/
- ↑ Ryaan Tuttle. Home Improvement Specialist. Expert Interview. 17 February 2022.
- ↑ https://www.youtube.com/watch?v=tpe4prO1B7U&feature=youtu.be&t=95
- ↑ https://www.thisoldhouse.com/how-to/how-to-choose-and-use-air-compressor
- ↑ https://www.familyhandyman.com/tools/air-tools/how-to-choose-an-air-compressor/view-all/
- ↑ Ryaan Tuttle. Home Improvement Specialist. Expert Interview. 17 February 2022.
- ↑ https://www.thisoldhouse.com/how-to/how-to-choose-and-use-air-compressor
- ↑ https://www.familyhandyman.com/tools/air-tools/how-to-choose-an-air-compressor/view-all/
- ↑ https://www.youtube.com/watch?v=7oLHtW2psbA&feature=youtu.be&t=150
About This Article

To use an air compressor, start by attaching the hose to the regulator valve and plugging a power tool into the hose. Then, plug in the air compressor, turn it on, and wait for the needle on the pressure gauge to stop moving. Next, adjust the pressure regulator knob so it matches the pressure listed on your power tool. Finally, operate your power tool while there's air in the air compressor tank. To learn how to properly shut off an air compressor, scroll down!