This article was co-authored by wikiHow staff writer, Travis Boylls. Travis Boylls is a Technology Writer and Editor for wikiHow. Travis has experience writing technology-related articles, providing software customer service, and in graphic design. He specializes in Windows, macOS, Android, iOS, and Linux platforms. He studied graphic design at Pikes Peak Community College.
The wikiHow Tech Team also followed the article's instructions and verified that they work.
This article has been viewed 595,200 times.
Learn more...
In 2017, Windows Movie Maker was officially discontinued and replaced with Video Editor (formerly known as Microsoft Story Remix). If you're using an older PC running Windows 8 or 7, you probably still have Movie Maker installed on your computer. If you're using Windows 10 and miss the features of Movie Maker, you can still download an older version using the Way Back Machine. This wikiHow article will teach you how to download Windows Movie Maker if it's not installed on your computer, and show you how to use the app to edit videos on your PC
Steps
Downloading Windows Movie Maker
-
1Download the Windows Live Essentials setup file. If you're using Windows 10, you can download an old official copy of Windows Live Essentials (which includes Windows Movie Maker) from an archived version of Microsoft's website. Visit Windows Live Essentials download page to prompt the WLE setup file to begin downloading.
- This page is largely blank, and may take several seconds to a minute before the file starts downloading.
- Alternatively, you can use Video Editor, which comes pre-loaded on Windows 10 and Windows 11. This is the replacement for Windows Movie Maker. To launch Video Editor, simply click the Windows Start menu and type "Video Editor." Then click Video Editor to launch it.
-
2Open the setup file. Double-click the wlsetup-all.exe file in your computer's default download location to open it. By default, you can open the file in your web browser or your Downloads folder.Advertisement
-
3Click Yes when prompted. This allows the Windows Movie Maker setup file to make changes to your system.
-
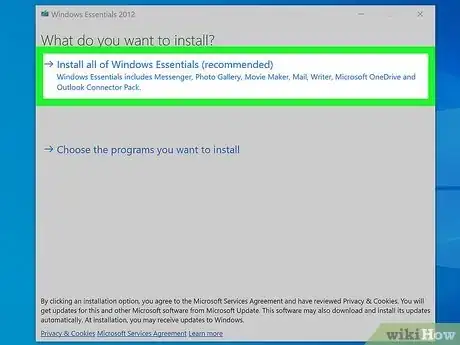
4Click Install all of Windows Essentials (recommended). It's at the top of the page. Most of the Windows Essentials programs aren't compatible with Windows 10, but you can install Windows Movie Maker by clicking this option.
- Alternatively, if you only want to install Windows Movie Maker, click Choose the programs you want to install and uncheck all applications, except for Photo Gallery and Movie Maker. Then click Install.
- If you receive an error messages saying the software couldn't be installed, continue on to check if it was installed anyway. If it was not, click the setup file again and repeat the installation process.
-
5
-
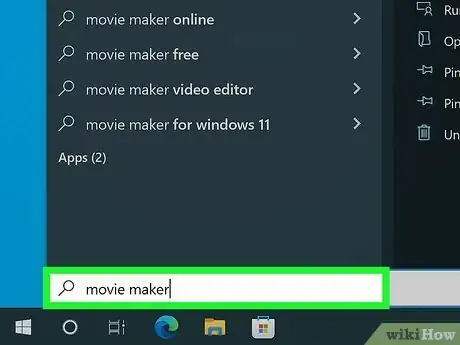
6Type in windows movie maker. This will search your computer for the now-installed Windows Movie Maker app.
-
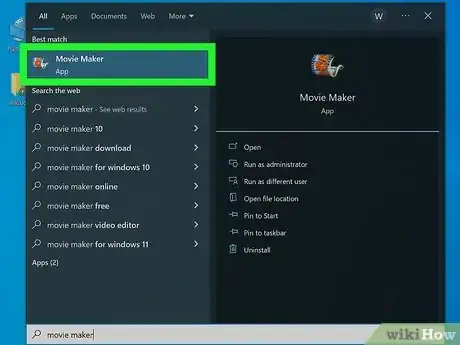
7Click Movie Maker. It's has a film reel icon. It's at the top of the Start menu. This will prompt the Windows Essentials terms of use window to open.
-
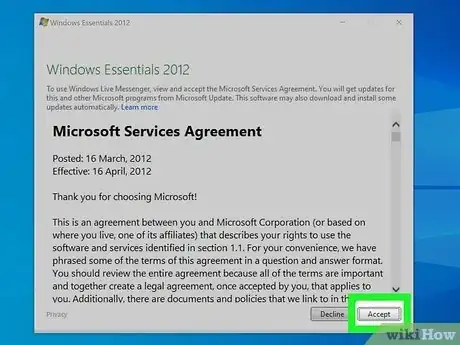
8Click Accept. This option is in the bottom-right corner of the window. Movie Maker should open after you do this.
- If clicking Accept doesn't open Movie Maker, re-open Start, type movie maker back in, and click the Movie Maker result again to open it.
- Don't close the installation window before opening Movie Maker.
-
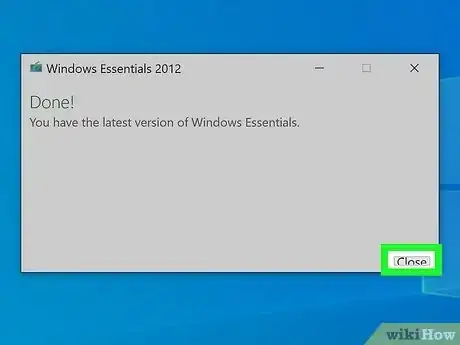
9Close the Windows Essentials installation. When the installation window pops up with an error message, just click Close and confirm the decision when prompted. You can now proceed with using Windows Movie Maker.
Adding Videos & Media
-
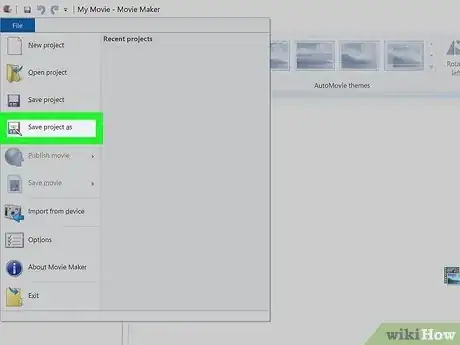
1Save your new project. A new project will be created automatically when you open Windows Movie Maker Go ahead and save your new project. To do so, click File in the menu bar at the top, and click Save project as in the drop-down menu. Enter a name for your project, and select a destination folder on the left side of the window (e.g., Desktop). Then click Save.
- At any point in the creation process, you can save your progress by pressing Ctrl + S.
-
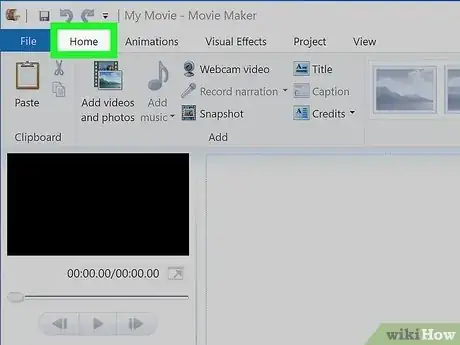
2Click the Home tab. It's the second tab in the menu bar at the top of Windows Movie Maker.
-
3Click Add videos and photos. It's the first icon in the menu bar at the top. It has an icon that resembles a photograph and a filmstrip.
- You can also right-click the large "Project" window and then click Add videos and photos in the drop-down menu.
- If you want to record a video using your webcam, click Webcam video and click Ok to start recording a video with your webcam.
-
4Select photos or videos. To do so, navigate to the video or images files you want to add to your project. Click a file to select it. Hold Ctrl and click to select multiple files. Then click Open to add the video files to your Project window.
-
5Click Music. It's the second icon in the menu bar at the top under the "Home" tab. It has an icon that resembles a music note. Click this icon to select music for your project.
-
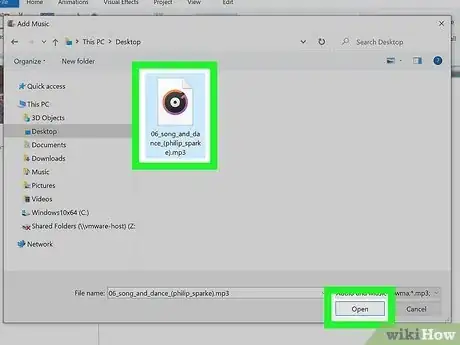
6Select music you want to add. To do so, navigate to folder that contains mp3 or audio files. Click and audio file you want to add and click Open.
- Alternatively, if you want to record a narration for your project, click Record narration to record narration with your microphone.
Organizing and Editing
-
1Determine a file order. Review your project files and decide which one should go first, second, and so on. You should also figure out where you want the music to start.
-
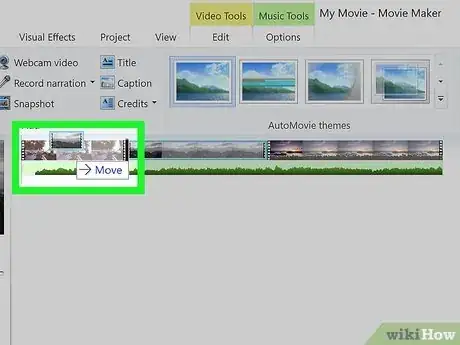
2Re-order your files. Click and drag the file that you want to use at the beginning of the video to the top-left corner of the "Project" window to anchor it there. Then drag the next-up file over and drop it to the right of the first file.
- You should see a vertical line appear between the two files. This signifies that if you release the mouse button, the files will snap together.
-
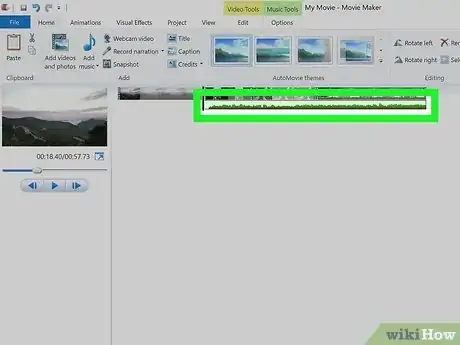
3Position the music. Click the green music bar that's located below the video files in the Project window and drag it to the left or right. Then release it to reposition it.
- Keep in mind that the end of the music will lock to the end of the last video or image if the combined length of the files doesn't add up to the music's play time.
-
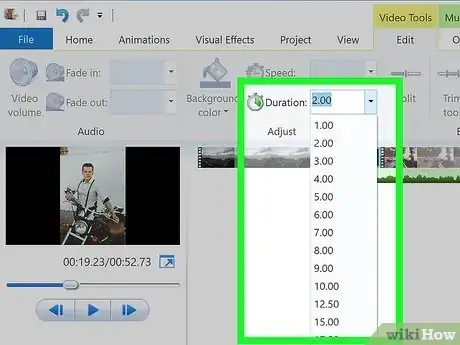
4Edit an image's duration. Double-click an image to open its properties in the toolbar at the top of the window. Then use one of the following options to set how long you want an image to display in your video project:
- Duration - Click the Duration text box, then type in the number of seconds you want an image to display for.
- End Point - Click and drag the black vertical bar in the Project window to a section in the photo or video where you want to cut off the photo or video and move on to the next one. Then click Set end point in the properties panel at the top.
-
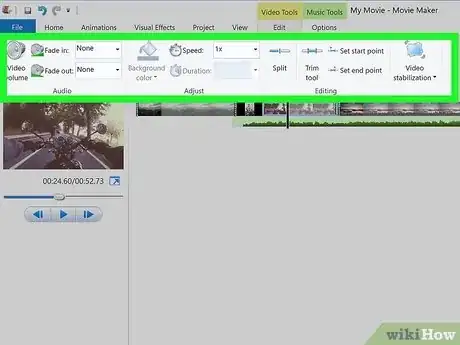
5Edit a video's properties. Double-click a video in the Project window to open its properties in the toolbar. Then change any of the following options in the properties panel at the top:
- Volume - Click Video volume on the far left side of the Properties panel. Then click and drag the volume slider left or right to adjust the audio volume.
- Fade In/Fade Out - A fade-in is when the audio gradually raises from silence at the beginning or a clip. A fade-out is when the audio gradually lowers to silence at the end. To add a fade-in or fade-out, click the "Fade in" or "Fade out" box, then click Slow, Medium, or Fast to select the speed of the fade-in or fade-out.
- Speed - This allows you to speed up or slow down a video. Click the "Speed" drop-down box, then select a video speed. You can also type in a custom speed. 1x is normal speed. Anything below 1x will slow the video down. Anything above 1x will speed the video up.
- Trim - This allows you to select parts of a video you want to to use and cut out parts you don't want to use. Click Trim tool in the menu bar at the top. Then click and drag the slider bar on the left below the video preview to where you want the video to start. Then click and drag the slider bar on the right to where you want the video to end. Then click Save Trim.
- Split - This cuts a video clip into two separate clips. Drag the vertical line in the large Project window to where you want to split a clip. Then click Split in the menu bar at the top to split the clip.
- Stabilization - This allows you to correct for shaky or wobbly video. Click Video stabilization, then select Anti-shake, Anti-shake and wobble correction - low, or Anti-shake and wobble correction - high.
-
6Edit the music's properties. Double-click the green music bar below a video or photo in the Project widow. Then change any of the following options in the toolbar at the top to edit the music:
- Volume - Click Music volume, then click and drag the slider left or right to adjust the music volume.
- Fade In/Fade Out - A fade-in is when the audio gradually raises from silence at the beginning. A fade-out is when the audio gradually lowers to silence at the end. To add a fade-in or fade-out, click the "Fade in" or "Fade out" box, then click Slow, Medium, or Fast.
- Start Time - This adjust the time (in seconds) when the music starts playing relative to the length of your entire project. Type the time when you want the audio to start in your project. You can also adjust this by clicking and dragging the green audio bar in the Project window.
- Start Point - This adjusts the time (in seconds) for when the audio file starts playing relative to the music file. This trims time off the beginning of the audio file. Type the time for when the section of the audio you want to use starts.
- End Point - This adjusts the time (in seconds) for when the audio file ends. This trims time off the end of the audio file. Type the time for when the section of the audio you want to use stops.
Adding Titles and Text
-
1Click the Home tab. It's in the upper-left side of the window. This will take you back to the editing toolbar.
-
2Click Title. This option is in the "Add" section of the Home toolbar. This will add a new title at the beginning of the video. You can move the title around in your Project by clicking and dragging it.
-
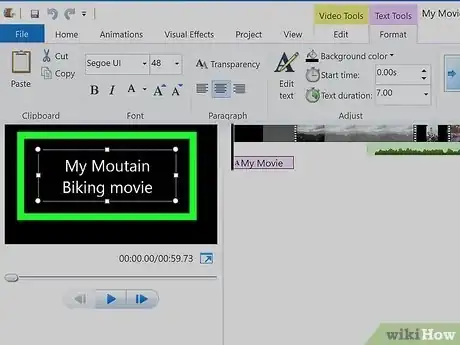
3Enter title text. In the text box that appears on the video preview window, type in the title that you want to assign to your video title.
- You can also edit the title slide's length in the "Adjust" section of the toolbar by clicking the text box next to "Duration" and enter the time (in seconds) you want the title to last.
- If you want to change the title size, font, or formatting, you can do so in the "Font" section of the toolbar.
- To change the background of the title, click Background color in the menu bar at the top, and click one of the colored swatches.
-
4Add captions to your video project. To add a caption to your video, click and drag the vertical black line in the Project window to where you want to add a caption. Then click Caption under the "Home" tab. Then type what you want the caption to say.
-
5Edit the caption. To edit a caption, double-click the pink caption box below your video clip in the Project window. Then use the following options to edit the caption:
- Font - Use the options in the box above "Font" to select the font you want to use, font size, and style (i.e, bold, italic, underline). Then use the options in the box above "Paragraph" to select the text alignment (i.e. right, center, left) and the text transparency.
- Edit Text - If you need to edit the text, click Edit text or double-click the text in the video preview. Then use the keyboard to edit the text.
- Start Time - This sets the time in your project that the caption starts displaying. Type the time (in seconds) for where you want the caption to start showing. You can also click and drag the pink caption box in the Project window to adjust when the caption starts.
- Text Duration - Use the box next to "Time duration" to to type the time (in seconds) you want the caption to remain on-screen.
- Effects - Use the options in the "Effects" section in the menu bar at the top to select a text animation for your caption. Mouse over one of the options to preview it. Click it to apply the effect.
-
6Add credits. To add credits, click Credits under the Home tab to add a new video clip for credits at the end of the clip. Then type your credits.
-
7Edit your credits. To edit your credits, double-click the credits video clip at the end of your movie. Then use one of the following options to edit your credits:
- Edit the text - To edit the text in your credits, double-click the pink bar below the credits clip. Then use the keyboard to edit the text.
- Background color - To change the background color of your credits, click Background color in the menu bar at the top. Then click one of the colored swatches to pick a background color.
- Duration - To edit the time duration of the credits, use the box next to "Duration" to enter how long (in seconds) you want the credits to last.
Adding Effects and Transitions
-
1Click the clip you want to add an effect or transition to. Click on any clip in the Project window to
-
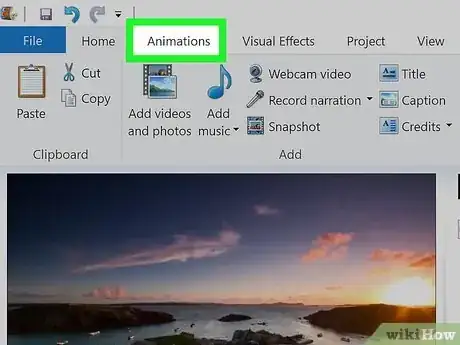
2Click the Animations tab. It's the third tab in the menu bar at the top.
-
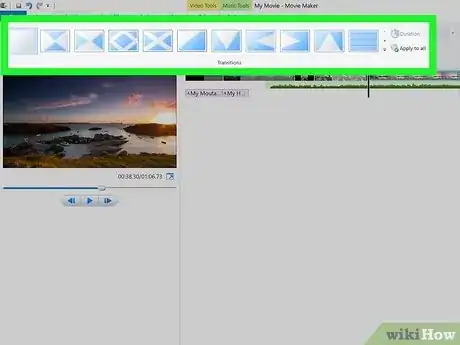
3Add a transition. Transitions are visual effects that happen at the beginning and/or end of a video clip. There are a variety of transitions in the "Transitions" section in the menu bar at the Use the arrow buttons on the side of the section to scroll through all the transitions. Mouse over a transition to preview it. Double-click it to apply it to the video clip.
- To adjust the time duration of the transition, enter the time (in seconds) next to "Duration" to the right of the Transitions box.
- You can also click Apply to all to the right of the "Transitions" section to apply the transition to all video clips in your project.
-
4Add a pan and zoom effect. Pan and zoom effects are useful on still images. The camera will either scroll over the image, or zoom in on it. To add a pan and zoom effect, click an image or video clip in your Project window. Mouse over one of the effects in the "Pan and zoom" section to preview the effect. Click on it to apply the effect.
- Click Apply to all to the right of the "Pan and zoom" section to apply the effect to all videos and images in your project.
-
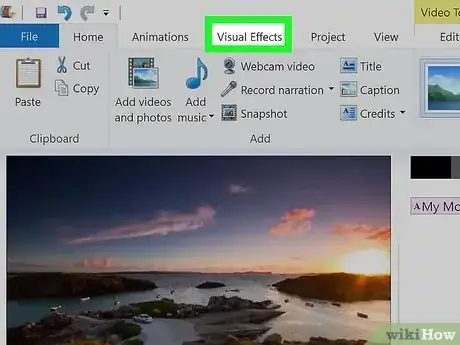
5Click the Visual Effects tab. It's the fourth tab at the top of the page.
-
6Click the video clip you want to apply a visual effect to. You can click any image or video clip in your Project window.
-
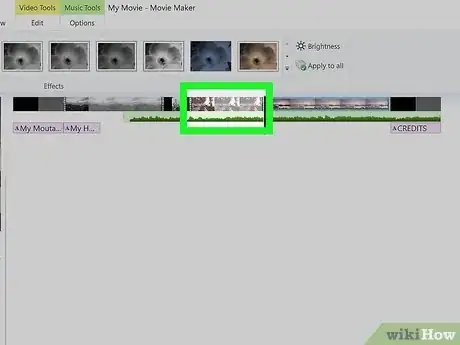
7Add a visual effect. Visual effects allow you to change the color and look of a clip. You can make it black and white, sepia, or apply other color and visual effects. Mouse over an effect in the "Effects" section to preview the effect. Use the arrow keys next to the section to scroll through all the effects. Click and effect to apply it.
- Click Apply to All to the right of the box to apply the effect to all clips and images in your project.
-
8Adjust the clip brightness. If you want to adjust the brightness of a clip, click Brightness next to "Effects" box. Then use the slider bar to adjust the brightness of the clip.
Saving the Movie
-
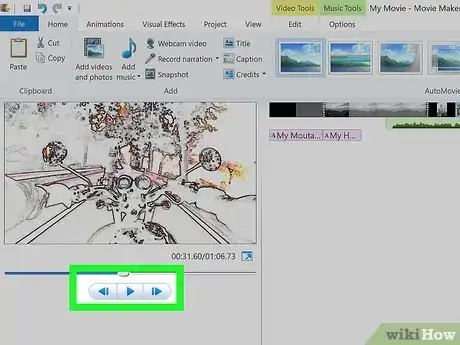
1Preview your movie. Click the "Play" button below the movie preview window on the left side of the window. If your movie looks the way you want it to, you're ready to save the movie.
- If the movie needs finessing, make any adjustments that are necessary before you continue.
- During the editing process, your music may end up off-beat or too short; if so, make sure that your music is properly edited to compensate before proceeding.
-
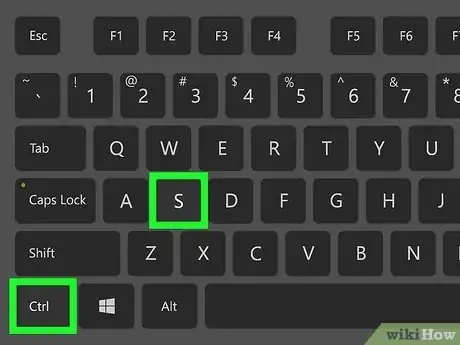
2Press Ctrl+S to save your project. Alternatively, you can click File followed by Save project to save your project.
-
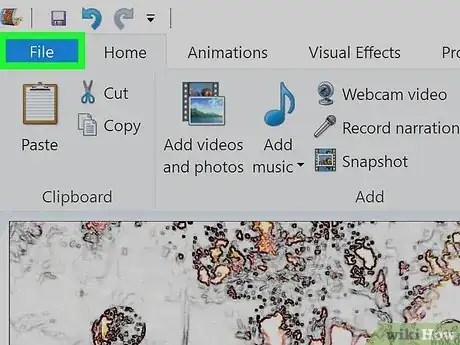
3Click File. It's in the menu bar at the top.
-
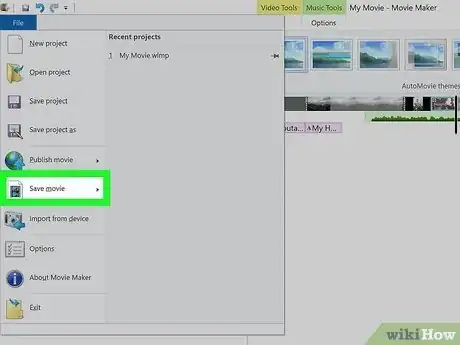
4Click Save movie. It's about halfway down the File menu. This displays a variety of formats you can save the movie in.
-
5Select a save type. If you don't know what format to use, click Recommended for this project at the top of the drop-down menu; otherwise, click the format that you want to use.
- You can select the best format for a variety of devices, including large, medium and small Android phones, iPhones, tablets, computers, email, and more.
- Alternatively, you can click Publish Movie and publish the movie directly to a social media application like YouTube, Facebook, or Twitter.
-
6Enter a name for your movie. Type in the name that you want to use for the movie file itself.
-
7Select a save folder. On the left side of the window, click a folder in which you want to save the movie file.
-
8Click Save. It's near the bottom-right corner of the window. This will save your movie file and begin exporting your project. Be patient—exporting can take a long time, especially for a detailed project.
-
9Click Play when prompted. Doing so will play your movie in your computer's default video player.
Community Q&A
-
QuestionWhat if my computer or device does not have enough memory to save the movie?
 Community AnswerTry emptying the recycle bin or getting rid of files you don't need. Using an external drive works for emptying files out of your computer while preserving them at the same time.
 -
QuestionHow long of a movie will Movie Maker make?
 Community AnswerThe Movie Maker can make a movie as long as you want it to be. Though beware, the longer and more complicated the film, the more likely the program is to crash or stop functioning. The longer you make your film, the more often you should back-up the project.
 -
QuestionHow long does it take to make a movie?
 Community AnswerMovie makers are slow. Fet all the videos, and put them together, and when you save it might take a few hours for it to complete and it will be larger size (for example a normal two hour movie might be 2GB, but a two hour movie maker movie might be 10GB).
Warnings
- As Windows 10 continues to update and evolve, you may find that Windows Movie Maker begins to freeze or become unresponsive. Make sure to save regularly.⧼thumbs_response⧽
- Windows Movie Maker is no longer supported by Microsoft, so security issues and bugs won't be fixed. You might want to consider using Video Editor instead.⧼thumbs_response⧽
About This Article
1. Download the archived setup file.
2. Run the setup file.
3. Click Install all of Windows Essentials (recommended).
4. Open Movie Maker in the Start menu.
5. If you see an installation error, close the message.
6. Accept the terms.
7. Create a new project.
8. Add photos and videos to your project.


