This article was co-authored by wikiHow Staff. Our trained team of editors and researchers validate articles for accuracy and comprehensiveness. wikiHow's Content Management Team carefully monitors the work from our editorial staff to ensure that each article is backed by trusted research and meets our high quality standards.
wikiHow marks an article as reader-approved once it receives enough positive feedback. In this case, 97% of readers who voted found the article helpful, earning it our reader-approved status.
This article has been viewed 43,753 times.
Learn more...
Meditation balls, or Baoding balls, are basically ancient Chinese stress balls. They’re often used for putting pressure on the chi points in your hand, but they’ll also provide you with a calming hand and wrist exercise. Once you have two balls that fit your hand size, use your fingers to circle them around your palm. It takes practice to get the balls to spin without clanging into one another, but once you do you’ll feel relaxed and ready to take on advanced exercises.
Steps
Mastering Basic Rotation
-
1Hold the balls away from you. Notice how heavy the balls feel in your hand. It wouldn’t feel very good to drop one of them on your foot. To prevent accidents, sit at a table or keep your hand away from your body. Don’t use the balls over glass or any other breakable objects you have, either.
-
2Place the balls in your hand. Hold your hand flat. Place one ball between your pinky and ring fingers. Follow up by setting the second ball between your middle and pointer fingers. Go ahead and curl your fingers over the tops of the balls. When you’re starting out, you’ll need to rely on your finger strength to get the balls moving.Advertisement
-
3Rotate the balls with your fingers. The goal is to have the balls swap places. Use your thumb to push the outermost ball towards your body. At the same time, use your smaller fingers to shift the other ball to your larger fingers. Continue swirling the balls in your hand as long as you can.
-
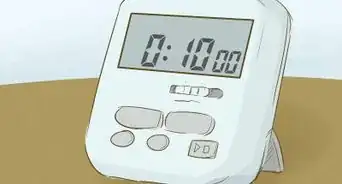
4Practice rotating the balls until you can do it smoothly. As you master the movement, the balls will collide with each other less and less. If yours have chimes, listen for them to ring smoothly and without interruption. Once this happens, you’ve successfully mastered the basics. Feel free to continue practicing so the balls don’t touch at all.


Getting Meditation Balls
-
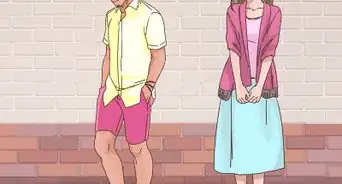
1Pick balls that fit your hands. As a beginner, look for balls around 40 millimetres (1.6 in) wide. This size, which is slightly less than a golf ball, is enough for the balls to hit all pressure points on an average hand. Balls smaller than this are better for children or adults under 5 feet 2 inches (1.57 m), while larger balls are better for experienced users and people over 6 feet 2 inches (1.88 m).
-
2Choose the type of ball material you prefer. Meditation balls are made of material ranging from wood to metal. Metal balls are heaviest, so they’ll stimulate your hands more, but are generally the cheapest option. Stone balls, such as ones made with jade or marble, are rarer and more expensive.
- Hardwood balls are the rarest type and are very light, so they’re not used as often as other varieties.
-
3Get balls with chimes for greater sound feedback. Balls that have chimes are hollowed out. A hollowed steel ball is far lighter than a whole one, but this allows the chime to make noise when the ball is moved. Some practitioners like the soothing sound that chimes provide. As a beginner, the chimes let you hear how smoothly you’re moving the balls in your hand.
- For example, a smooth and even chime sound informs you that your movements are fluid. In normal balls, you can hear this when the balls no longer clack together.


Performing Advanced Tricks
-
1Spin the balls with minimal finger contact. As you get accustomed to using the meditation balls, you’ll gain better control of your muscles. Instead of using your fingers, set the balls in your palm and try moving them. Raise one side of your palm and lower the other so the balls start rolling. It’s difficult, but the amount of strength and concentration you learn is a nice reward.
- Remember that you’re providing empty space for the ball to roll into rather than pushing it into that space.
-
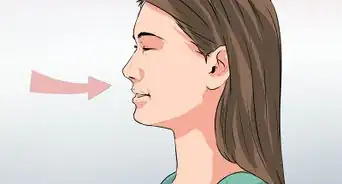
2Turn your palm downwards while rotating the balls. The angle you hold your hand can make using the balls a lot harder. Normally you’d have your hand flat, but try inclining it upwards. The more your hand faces the ground, the more you’ll have to work your muscles to control the balls. Keep going until you’re ready to try controlling the balls while your palm faces the floor.
- This exercise is for building more strength and quickness in your fingers.
-
3Move the balls in the opposite direction. Instead of sending the balls in the direction of your thumb, send them towards your smaller fingers. Rotate the balls in your hand as you would normally. It’s a basic trick, but it’ll feel strange and difficult the first time you try it. You’ll still get full hand stimulation by the balls while also increasing your ability to control them.
-
4Add more balls to the rotation. Start with a third ball, then, once you master that, add a fourth. You’ll spin them in your hand the same way you did with two. It’s similar to juggling in that the difficulty increases with more balls, but so does your skill level.
- Once you can handle three balls, you can even set a fourth ball on top of them and keep it spinning.
-
5Move onto bigger balls. Bigger meditation balls are tougher to handle. They’ll press on your hands more, which some practitioners might prefer. It can also be worthwhile when you’ve mastered the meditation balls you own and would like a new challenge.


-Step-7-Version-2.webp)

About This Article