This article was co-authored by wikiHow Staff. Our trained team of editors and researchers validate articles for accuracy and comprehensiveness. wikiHow's Content Management Team carefully monitors the work from our editorial staff to ensure that each article is backed by trusted research and meets our high quality standards.
There are 13 references cited in this article, which can be found at the bottom of the page.
This article has been viewed 64,438 times.
Learn more...
Pears are a sweet and versatile fruit that can be enjoyed alone or in a variety of dishes, including desserts and salads. It’s no wonder so many people consider them a favorite. If you want to enjoy pears well beyond when they are in season, or if you simply find yourself with more pears than you can eat right now, storing them properly can help ensure they’re fresh and flavorful when you’re ready to eat them in the short or long term.
Steps
Storing Pears for the Short Term
-
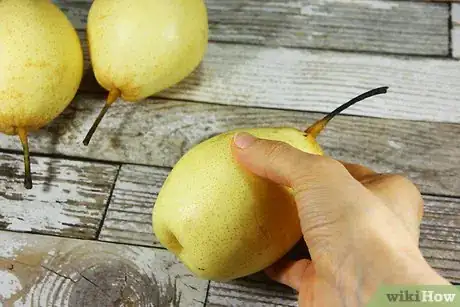
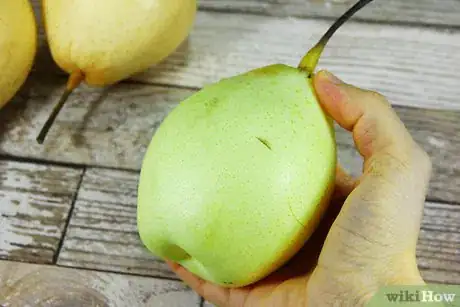
1Examine your pears for ripeness. Unlike most other fruit, pears are picked off the tree when they are mature, not ripe.[1] They begin to slowly ripen from the inside out after they’ve been picked.[2] You can check the ripeness of your pears yourself by applying gentle pressure at the top near the stem. The color of your pears alone is not a good indicator for how ripe or not ripe they are.
- If the flesh is hard when you press down, your pears are not ripe.[3] If you plan to eat them a few days from now, purchasing unripe pears is perfectly fine.
- If the flesh slightly gives when you press down, your pears are ripe and can be eaten right away. [4] Softness or bruising anywhere else on a pear could indicate it is overripe and will impact the taste and texture.
-
2Store unripe pears at room temperature. Room temperature storage will allow your pears to continue the ripening process. They should be stored whole and not cut. Room temperature is 70 °F (21 °C).[5] You’ll need to check your pears daily using the pressing technique to see if they are ripe and ready to eat. Most pears ripen between 3 and 4 days after purchase.[6]Advertisement
-
3Refrigerate ripe pears to keep them fresh. Ripe pears will not last very long on the kitchen counter or pantry. Placing them whole in the fridge can extend their shelf life up between 5 and 12 days.[7]
- The temperature of your refrigerator should be set at or below 40 °F (4 °C).[8]
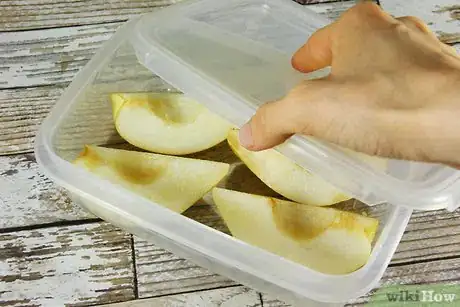
- If you’ve cut up your pears, wrap them tightly in a bag or container before refrigerating to limit air exposure.
-
4Don’t eat bad, rotten or spoiled pears. Browning, bruising and blemishing are all signs that your pears are no longer desirable or safe to eat.[9] It’s possible for a bad pear to look healthy on the outside, so you’ll have to cut it open to confirm whether or not you should eat it.
- If a pear is not rotten but just slightly overripe, it can still be used in a variety of recipes, including smoothies, jams and dressings.
-
5Speed up the ripening process of your unripe pears by placing them in a brown bag. If you want to enjoy your pears sooner rather than later, it’s possible to speed up the ripening process. Fruits like pears produce a natural hormone known as ethylene during the ripening process. Placing your pears in a brown paper bag traps the hormone, allowing them to ripen at a faster rate.[10]
- Placing your pears in a fruit bowl with other ethylene-producing fruits, like bananas, apples and avocados, will also speed up the ripening process.[11]
Freezing Pears for the Long Term
-
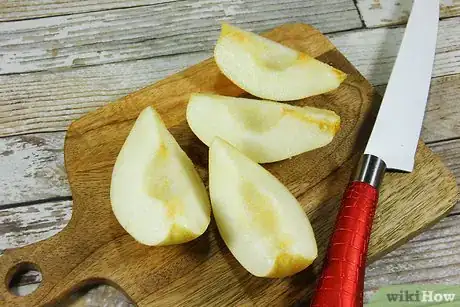
1Cut the pears before freezing for easier storage. Freezing pears will allow you to enjoy their sweet taste throughout the year, even when not in season. How you cut the pears is completely up to you––cut them in halves, quarters, or slices.
- Before cutting pears, peel and core them for best results. If you’re not comfortable completing these steps with just a knife, a variety of fruit peeling and cutting tools is available to help make this step easier.
-
2Soak the pears in a simple solution to prevent browning. In 1 quart of water, add either ½ tablespoon salt, ¾ teaspoon ascorbic acid, or 3 tablespoons lemon juice.[12] After creating the mixture, add the pears, then allow them to soak for 3 to 5 minutes.
- Pre-treating the pears before storing them can significantly reduce browning.[13]
-
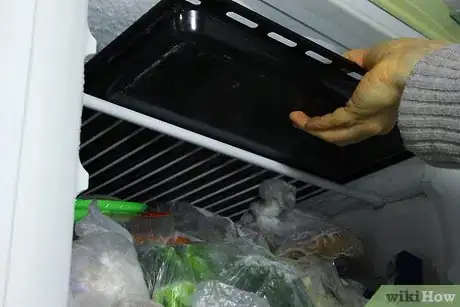
3Place the pre-treated pears on a baking sheet or tray and into the freezer. Spread them in a single layer so they all lay flat, then transfer them to the freezer on the baking sheet or tray. Allow the pears to freeze for 3 to 5 hours. Leaving them too long without being properly packaged could cause freezer burn, which could impact the taste and texture of your pears.[14]
- Freezing the pears before placing them in their long-term storage bag or container will allow the pieces to freeze individually instead of sticking together.
-
4Pack and seal the pears in freezer-friendly bags or containers. You can use plastic resealable bags, plastic containers with a lid, or even mason jars. Fill the bag or container with the pears, leaving enough room so they are not packed too tightly. Once you’ve packaged the pears, seal the bag or container.
- If you’re using a bag to store the pears, push out as much air as possible to limit browning and freezer burn.[15]
- Label the bag or container with the date and name of the fruit so you’ll be able to quickly identify what it is and how long its been in your freezer.
-
5
Community Q&A
-
QuestionWhat month is OK to remove pears from the tree?
 Community AnswerSeasonal harvest times. In mild climates, including U.S. Department of Agriculture plant hardiness zones 6 through 10, pear harvest usually occurs between early August and late September, depending on the pear variety and weather patterns. Aurora, Bartlett and Bennett are usually the first pears to mature.
 -
QuestionCan I use the pear-treating solution multiple times?
 MicheleTop AnswererYes. You can definitely reuse the solution for pre-treating more pears or apples or other fruits that tend to turn brown from oxygenation.
References
- ↑ http://usapears.org/pear-ripening-and-handling/
- ↑ https://fruitguys.com/almanac/2012/07/02/fresh-fruit-storage-and-ripening-tips
- ↑ https://spoonuniversity.com/how-to/pear-easy-way-to-tell-if-is-ripe-or-not
- ↑ https://spoonuniversity.com/how-to/pear-easy-way-to-tell-if-is-ripe-or-not
- ↑ https://www.thekitchn.com/what-room-temperature-means-kitchen-facts-216648
- ↑ https://www.eatbydate.com/fruits/fresh/pears/
- ↑ https://www.eatbydate.com/fruits/fresh/pears/
- ↑ https://www.fda.gov/ForConsumers/ConsumerUpdates/ucm093704.htm
- ↑ https://www.eatbydate.com/fruits/fresh/pears/
- ↑ https://www.huffingtonpost.com/food-52/how-to-ripen-fruit-faster_b_3949628.html
- ↑ https://www.huffingtonpost.com/food-52/how-to-ripen-fruit-faster_b_3949628.html
- ↑ http://www.seriouseats.com/2015/09/how-to-prevent-apple-pear-browning.html
- ↑ https://ohioline.osu.edu/factsheet/HYG-5349
- ↑ https://www.thekitchn.com/food-science-what-is-freezer-b-62927
- ↑ http://www.seriouseats.com/2016/09/the-best-fastest-way-to-freeze-defrost-food.html
- ↑ https://www.thekitchn.com/the-right-temperature-for-your-freezer-quick-kitchen-facts-216070
- ↑ http://www.stilltasty.com/fooditems/index/17934
About This Article
To store pears, keep them in the fridge so they last 1-2 weeks longer. If you've already cut up the pears, put the pieces in a sealable bag before refrigerating them. To store pears for several months, cut them into quarters, halves, or slices and soak them in water with a pinch of salt for 5 minutes. After you soak the pears, put them on a lined baking sheet and freeze them for a few hours. Finally, transfer the pears to freezer bags and store them in the freezer for 10-12 months. To learn how to check if your pears are ripe and ready to be stored, keep reading the article!
