This article was co-authored by wikiHow staff writer, Jessica Gibson. Jessica Gibson is a Writer and Editor who's been with wikiHow since 2014. After completing a year of art studies at the Emily Carr University in Vancouver, she graduated from Columbia College with a BA in History. Jessica also completed an MA in History from The University of Oregon in 2013.
There are 11 references cited in this article, which can be found at the bottom of the page.
The wikiHow Video Team also followed the article's instructions and verified that they work.
This article has been viewed 13,122 times.
Learn more...
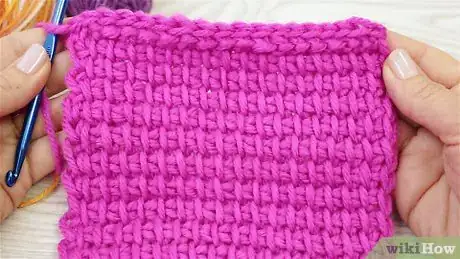
Tunisian crochet is a beautiful way to create waffle-like fabric that looks kind of like knitting. Since the stitches are worked on just one side, Tunisian crochet does have a tendency to curl. Fortunately, you can make a few minor adjustments when you're crocheting to minimize curling. Once you're done with your project, block it so it dries completely flat.
Steps
Preventing Curling as You Crochet
-
1Add a border at the beginning and end of your project so it lies flat. Instead of jumping right into simple Tunisian crochet stitch, which is most likely to curl, work a few rows of a different stitch that will balance the tension in your fabric. You can use any of these stitches to alternate with the simple stitch:[1] [2]
- Tunisian reverse stitch
- Tunisian purl stitch
- Tunisian double stitch
- Tunisian extended stitch
-
2Try a different yarn or switch to a natural-fiber yarn if you're using acrylic. 100% acrylic yarn tends to curl more than yarn made with natural fibers like cotton or wool. Read yarn labels and look for yarn that uses all-natural fibers or a blend.[3]
- If you're getting curling with 100% acrylic yarn, try a 60% acrylic and 40% wool blend, for instance.
Advertisement -
3Go up a hook size to reduce the tension in the yarn. Since you make all of the stitches on the front of your project, it creates a lot of tension between the front and back of the work.[4] To reduce this strain, use an afghan hook that's a size larger than the one your pattern calls for.[5]
- For example, if your yarn or pattern calls for a size G (4 mm) hook, work with a size H (5 mm) instead.
-
4Adjust your tension so you crochet looser. Do you tend to pull the yarn tight when you crochet? Tight stitches create tension, which causes your fabric to curl. Remind yourself to hold your yarn loosely and relax as you crochet. This makes looser stitches that don't bunch together and curl as much.[6]
- If you usually wrap your working yarn tightly around your finger, drape it loosely over your finger instead so you're not pulling as tightly on the yarn.
-
5Alternate rows of Tunisian simple stitch with reverse or purl stitches. If you're only using the Tunisian simple stitch to make your project, it will curl at least a little. The best way to prevent curling is to alternate your simple stitch rows with rows of Tunisian purl stitch or Tunisian reverse stitches.[7]
- Alternating the rows makes a ribbed look, but your fabric will lay flat.
-
6Sew the edges of your fabric together. If you're making an afghan using blocks or working on an infinity scarf, leave a long tail when you cast off. Thread the yarn through a tapestry needle and line up the edges of your project. For example, arrange squares of Tunisian knit if you're making a blanket, or line up the 2 ends of a scarf for an infinity scarf. Then, whipstitch the edges so they lie flat.[8]
- Can't sew the edges together on your project? Don't worry—you could attach tassels to the bottom edges. These weigh down the edge so it doesn't curl.
Blocking a Finished Project
-
1Soak your project in cool water for 10 minutes to relax the fibers. If you want to block a small project like a hat, fill a bowl with cool water and submerge it. To block something bigger like a scarf or shawl, fill your clean sink with cool water and push the fabric down into it. Then, set a timer for 10 minutes.[9]
- Want to block several items at once? Fill your tub about a third full of cool water and put all of your projects into the water.
-
2Remove the project and squeeze the water out of it. Lift the crocheted fabric out of the water and firmly squeeze it so most of the water drains into your sink or bowl. Don't wring the fabric or you'll twist the stitches and damage the fibers.[10]
- Squeezing most of the water out helps your item dry a lot faster.
-
3Roll your item in a towel and press down to get rid of more water. Spread out a fluffy towel and arrange your crocheted fabric on it. Roll the towel up to the opposite end so your crocheted project is layered in between. Then, press firmly on the towel so it absorbs water from the project.[11]
- You can also set the rolled-up towel on a clean floor and step on it to put extra pressure.
-
4
-
5Pin the edges of the fabric to the board with sewing pins. Take rust-proof sewing pins and push a pin through each corner. If your project doesn't have corners, just start pinning along 1 edge.[14] Keep pushing pins through the edge of your crocheted fabric so you get straight, even lines. Aim for 1 pin every 1 inch (2.5 cm) or so.[15]
- Want to save time when pinning a large project? Pick up knit blockers from your craft supply store. These long plastic pieces have several pins sticking out from 1 end, so you can insert 4 or 5 pins at a time.
- The number of pins you use totally depends on how large your project is. A big afghan might take a whole package, while 1 square or doily only takes a handful.
-
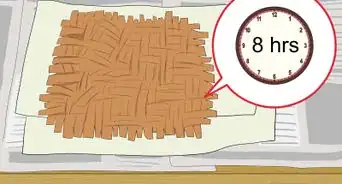
6Leave your project to dry completely before you remove the pins. Small crocheted projects may dry within a few hours, while large items can take a whole day. Wait to unpin the fabric until it's totally dry or it may curl again.[16]
- Keep in mind that if you wash and dry your item later, you'll have to block it again so it lies flat.
Things You'll Need
- Rust-proof pins
- Foam board or corkboard
- Towel, optional
References
- ↑ https://crochetkim.com/tunisian-crochet-stop-the-curling/
- ↑ https://crochetkim.com/tunisian-crochet-stop-the-curling/
- ↑ https://youtu.be/92HejSbxTc4?t=143
- ↑ https://crochetkim.com/tunisian-crochet-stop-the-curling/
- ↑ https://youtu.be/92HejSbxTc4?t=78
- ↑ https://www.bhookedcrochet.com/2016/09/21/five-ways-eliminate-prevent-tunisian-crochet-curling/
- ↑ https://youtu.be/an-mc3FYtm8?t=1760
- ↑ https://www.bhookedcrochet.com/2016/09/21/five-ways-eliminate-prevent-tunisian-crochet-curling/
- ↑ https://youtu.be/v0Hfu0byjxs?t=415
- ↑ https://youtu.be/BDv3CTQNXjM?t=192
- ↑ https://youtu.be/BDv3CTQNXjM?t=209
- ↑ https://www.bhookedcrochet.com/2016/09/21/five-ways-eliminate-prevent-tunisian-crochet-curling/
- ↑ https://youtu.be/BDv3CTQNXjM?t=257
- ↑ https://www.bhookedcrochet.com/2016/09/21/five-ways-eliminate-prevent-tunisian-crochet-curling/
- ↑ https://youtu.be/v0Hfu0byjxs?t=566
- ↑ https://youtu.be/BDv3CTQNXjM?t=320
