This article was co-authored by wikiHow Staff. Our trained team of editors and researchers validate articles for accuracy and comprehensiveness. wikiHow's Content Management Team carefully monitors the work from our editorial staff to ensure that each article is backed by trusted research and meets our high quality standards.
This article has been viewed 69,786 times.
Learn more...
Steam bending wood is a woodworking technique used to create curved wooden forms. You’ll need a steam box or plastic bag, steam generator, and some wooden forms or molds to bend the wood with. Steam the wood in the steam box or bag, then carefully bend it while it is still hot and secure it against a form or in a mold and let it dry overnight to create curved wooden pieces.
Steps
Steaming Wood in a Steam Box
-
1Soak the wood you want to bend in water for at least a day before steaming. This will make the wood much easier to bend after steaming. Place the lumber you want to bend in a container full of water, completely submerged, and soak it overnight before you steam it.
- It’s possible to steam bend wood without soaking it overnight if you aren’t able to do so. Keep in mind that air-dried lumber is easier to steam than kiln-dried lumber. Woods with more open grain, for example oak, are the most easy to steam bend.
-
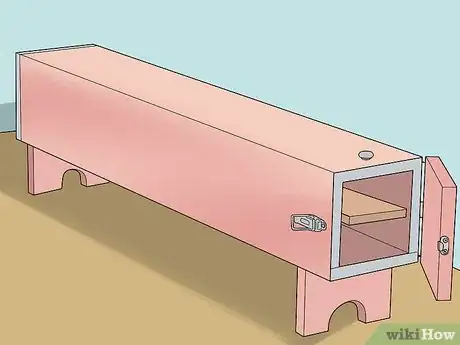
2Place the moist wood into a steam box. A steam box may be constructed from wood or PVC pipe. The steam box needs to be big enough to let the steam flow around the piece of wood and needs openings, like drilled holes, so that the steam gets airflow and does not become volatile.[1]
- You can buy a steam box from a home improvement center or construct your own steam box from lumber, like plywood, or from PVC piping. A steam box is essentially just an enclosure that opens at 1 end and has a hose running into it from a steam generator.
- If possible, work outside when you are steam bending wood. Steam gets very hot, so be incredibly careful around the steam box and generator. Wear heat-resistant gloves and safety goggles while you are steaming and bending the wood.
Advertisement -
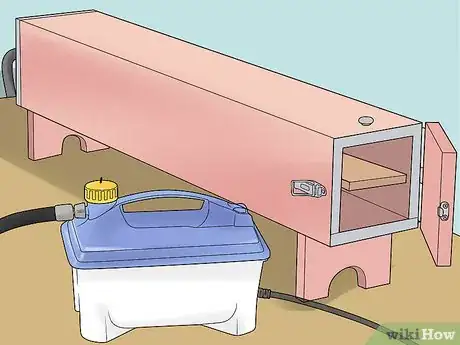
3Hook up a steam generator to the steam box with a hose. A steam generator may be store bought or you can use an appliance like a wallpaper steamer. Attach the steam generator to the steam box via a hose or tube.[2]
- Wallpaper steamers are the most recommended way of creating a homemade steam generator. They are available cheaply at most home decorating stores.
- If you made a homemade steam box, you can drill a hole to fit the hose or tube that connects to the steam generator.
-
4Steam the wood for 1 hour for every 1 in (2.5 cm) of thickness. Fill the steam generator’s tank with water and turn it on. The general rule for steam bending wood is 1 hour for every 1 in (2.5 cm) of thickness of the piece of wood that you are processing, but since all woods are different the time can vary.
- If you don’t steam the wood for long enough, then it will snap when you try to bend it. It’s a good idea to do a test on a scrap piece of the same wood you want to bend to get the correct amount of time down.
-
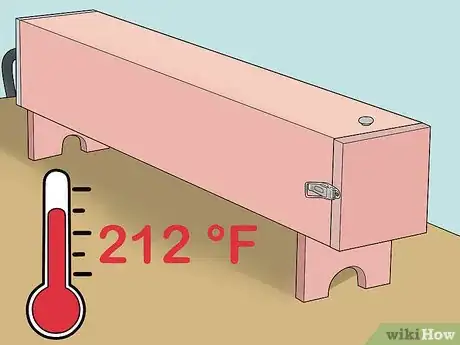
5Maintain the temperature at about 212 °F (100 °C). This is the temperature that water boils at, so as long as you have proper ventilation in your steam box the temperature should stay close to this number. Open the steam box door to reduce pressure and temperature if it gets more than 2 degrees higher than this.
- You can monitor the temperature in the steam box by inserting a thermometer, like standard kitchen thermometer, into an opening (like one of the ventilation holes). You can add more ventilation to your steam box by drilling holes if you have difficulty maintaining the temperature.
-
6Remove the steamed wood with heat-resistant gloves when the time is up. Turn off the steam generator and carefully open the steam box with heat-resistant gloves. Remove the steamed piece of wood and begin the bending process as fast as possible before it loses its pliability.
- Make sure you have everything ready for bending before you remove the wood from the steam box so you can get started right away.
Steaming Wood with a Plastic Bag Instead of a Box
-
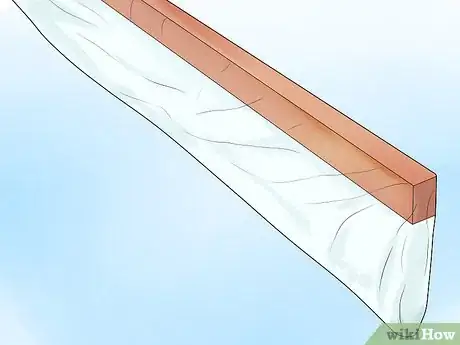
1Insert the piece of wood you want to steam completely inside a plastic bag. Use a plastic bag or plastic sheet tubing that is big enough to cover the whole piece of wood from end to end. Make your own out of PVC sheeting if you can’t find a bag big enough.[3]
- Make sure to leave the ends of the bag open for ventilation. If the bag only has 1 open end, then cut a hole in the other end so the steam can escape from both sides.
-
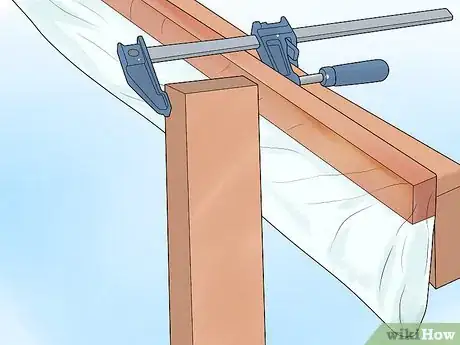
2Clamp the bag with the wood to the side of something or set it on saw horses. Use clamps to secure the wood to the side of a workbench or other support. Set it on saw horses if you don’t have anything to clamp it to.
- The idea is to suspend it in the air to allow the steam to flow around the wood in the bag as much as possible.
- Try to steam wood outside whenever possible. Steaming inside can get very hot, and the humidity can damage other tools in your shop.
-
3Cut a hole in the plastic bag and insert the hose of your steam generator. Make a small incision in the middle of the plastic bag just big enough to insert the hose from the steam generator. Put the tip of the hose in.[4]
- You can use tape to secure the hose in place if it doesn’t stay on its own.
-
4Steam at 212 °F (100 °C) for 1 hour for every 1 in (2.5 cm) of wood. This is the temperature that water boils and generates steam at, so as long as your bag has sufficient ventilation it will stay at that temperature. Multiply the thickness of the wood by 1 hour for every 1 in (2.5 cm) to determine how long to steam it.[5]
- Monitor the temperature with a meat thermometer. You can stick the thermometer in 1 end of the plastic bag or poke a small hole in the side to stick it in. Cut more ventilation holes in the plastic bag if the temperature rises more than 2 degrees above 212 °F (100 °C).
-
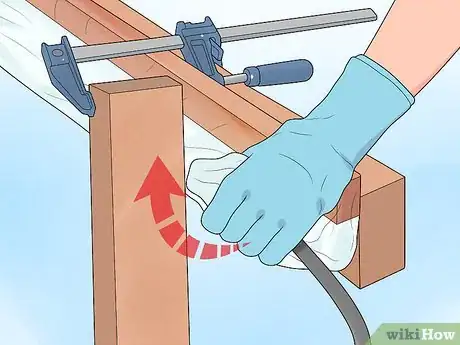
5Tilt the bag to one side wearing gloves to let the condensation drip out. Lift up the bag at an angle when you are done steaming and let all the hot droplets of condensation fall out to the other side. This will make it safer to remove the wood from the bag.[6]
- Try do do this as quickly as possible so you can move on to bending the wood before it cools down.
-
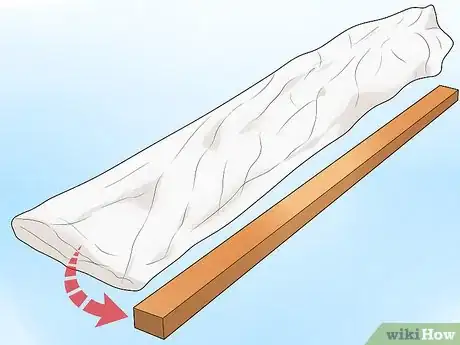
6Remove the wood from the bag and proceed with the bending process. Keep your heat-resistant gloves on and pull the wood out of the bag. The faster you start bending it, the more pliable it will be.[7]
- You can also bend the wood inside of the bag if you want to save time. This could work well for larger pieces of wood that you can just bend and clamp against a large form, such as a boat.
Bending Wood After Steaming
-
1Make a plywood form or bending board to shape the wood to. Cut plywood to create forms to shape the wood you want to bend. Attach several small curved pieces of plywood to a board to create a bending board, or cut large forms that you can clamp the steamed wood to.[8]
- For example, you can use a bandsaw to cut a single large curved form out of a piece of plywood. You will attach the steamed wood to this form with clamps.
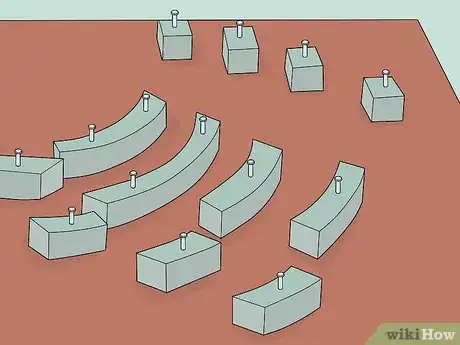
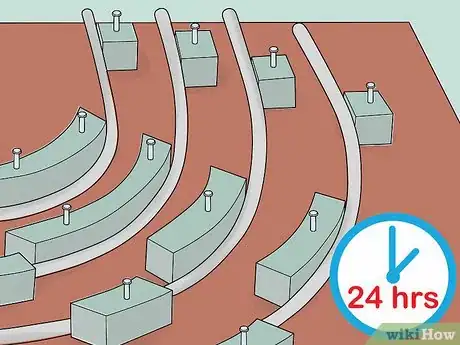
- Alternatively, cut up several smaller curved pieces from plywood or MDF, then screw or nail them to a backboard to create a mold for your steamed wood. You will need to make pieces for the inside and outside of the curves so that the steamed wood is held in place between them.
-
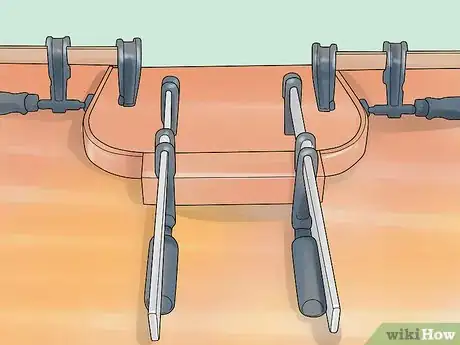
2Clamp the steamed wood to the forms if you cut large plywood forms. Place the wood you are bending against the form, then clamp it to the form. Start with the flattest area, secure it in place, then carefully bend the wood around the form.
- You can put scrap wood between the clamps and the wood to protect it and hold it in place better.
- Try to work as quickly as possible. The longer you take, the harder the wood will be to bend.
-
3Place the steamed wood in the mold if you made a bending board. Carefully bend the wood in between then curved pieces of plywood or MDF that you used to make a mold. Start at one end and work your way to the other.[9]
- Bending boards work well with smaller pieces of steamed wood to create more intricate curves.
-
4Let the wood sit against the form or in the mold for 24 hours. Leave the wood to cool, dry, and set for at least a full day. Unclamp the wood from the form or remove it from the bending board mold after a day has passed.
- Keep in mind that the wood will likely spring back a bit after you remove it from the form or mold.
Warnings
- Always wear heat-resistant gloves and safety goggles when steam bending wood.⧼thumbs_response⧽
Things You’ll Need
- Steam chamber
- Steam generator
- Hose
- Thermometer
- Plywood or MDF
- Clamps
- Heat-resistant gloves
- Safety goggles
- Plastic bag
References
- ↑ https://www.thomasnet.com/articles/process-equipment/how-to-steam-wood
- ↑ https://www.woodworkersinstitute.com/wood-carving/projects/figure-carving/sculpture/weekend-projects-steam-bending/
- ↑ https://www.core77.com/posts/35838/A-Better-Way-to-Steam-Wood-for-Bending-Use-a-Plastic-Bag
- ↑ https://www.core77.com/posts/35838/A-Better-Way-to-Steam-Wood-for-Bending-Use-a-Plastic-Bag
- ↑ https://www.core77.com/posts/35838/A-Better-Way-to-Steam-Wood-for-Bending-Use-a-Plastic-Bag
- ↑ https://www.core77.com/posts/35838/A-Better-Way-to-Steam-Wood-for-Bending-Use-a-Plastic-Bag
- ↑ https://www.core77.com/posts/35838/A-Better-Way-to-Steam-Wood-for-Bending-Use-a-Plastic-Bag
- ↑ https://www.woodworkersinstitute.com/wood-carving/projects/figure-carving/sculpture/weekend-projects-steam-bending/
- ↑ https://www.woodworkersinstitute.com/wood-carving/projects/figure-carving/sculpture/weekend-projects-steam-bending/

