This article was co-authored by wikiHow Staff. Our trained team of editors and researchers validate articles for accuracy and comprehensiveness. wikiHow's Content Management Team carefully monitors the work from our editorial staff to ensure that each article is backed by trusted research and meets our high quality standards.
There are 9 references cited in this article, which can be found at the bottom of the page.
This article has been viewed 108,697 times.
Learn more...
If you’ve ever been drawn to the beauty of the night sky, you may have thought about spending an evening just staring at the stars and trying to learn about them. While all you truly need to stargaze is a view of the night sky, you can get even more out of the experience by planning ahead. By carefully choosing a time and place, having the right equipment, and knowing what to look for, you can get the best views and appreciate stars in a new way.
Steps
Choosing a Time and Place
-
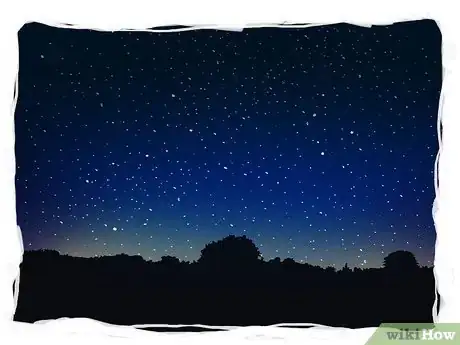
1Find somewhere away from bright lights. It is easiest to see stars if you’re away from large urban areas that produce a lot of artificial light at night. This reduces visibility of the night sky, making it harder to see stars. The further you get away from urban lights, the more stars you’ll be able to see, so try heading to rural areas or even parks or nature preserves.[1]
-
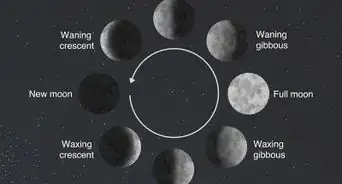
2Stargaze when there’s a new moon. The darker the sky is, the more stars become visible. At night, the size of the moon has a large effect on how bright or dark the sky. If you go stargazing when the moon is at its smallest, you will have a better view of the stars. [2]
- You can look up the phases of the moon online on various astronomical websites. Some weather forecasts will also include information about the moon.
Advertisement -
3Go to a place with high elevation. Just as with landscapes on Earth, views of the stars become better the higher up you go. Being at a high elevation not only makes you relatively closer to the sky but also puts you above trees and other things that can block your view.[3] Astronomers often place their observatories on mountains for these reasons.
- If you can’t make it out of a city, though, you can try stargazing from the top of a building.
- You can research state and national parks to find public spaces with high elevations. If you’re interested, you can often camp at the park you stargaze from.[4]
-
4Go stargazing in the winter for the best views. Views of the night sky are usually best in the winter for several reasons. There is less daylight in the winter, so the sky gets darker at night and stays that way for longer. Also the leaves have fallen off of most trees, so there tend to be more places to find an unobstructed view.[5]
- If you stargaze in the winter, though, you will want to make sure to bring heavy clothing and any other equipment you might need to keep yourself warm and safe.
-
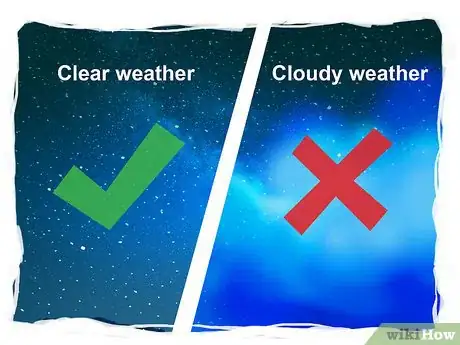
5Pay attention to weather forecasts. When planning a stargazing outing, you want to make sure you have good, clear weather. Cloudy skies will severely limit your ability to see stars. Additionally, stargazing requires spending long stretches of time outdoors, so you should avoid having to stand in the rain.
-
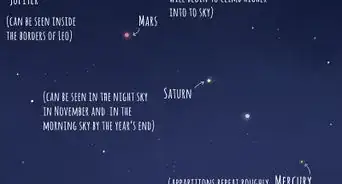
6Research upcoming astronomical events. The night sky always has interesting things to see, but there are sometimes occurrences that make stargazing particularly interesting. Comets or meteor showers, for instance, can be especially fun to watch. If you want to see something like that while stargazing, you can research upcoming astronomical events online. Astronomers often know what you will be able to see on a certain night well in advance.
- A good place to start looking for this information is the NASA website, which has a useful Sky Events Calendar. You can find that calendar here: https://eclipse.gsfc.nasa.gov/SKYCAL/SKYCAL.html
-
7Research campsites. To try finding place that has high elevation and relatively little light pollution, you can begin by searching campsites in state or national parks. Some parks have particularly great areas for stargazing, and many are free or inexpensive to enter. Many state and national parks have informative websites that let you know what kinds of activities you can do there.
- If a website says nothing about stargazing, however, you can always call and ask to speak with a park ranger, who should be able to answer your questions.. [6]
Packing the Right Equipment
-
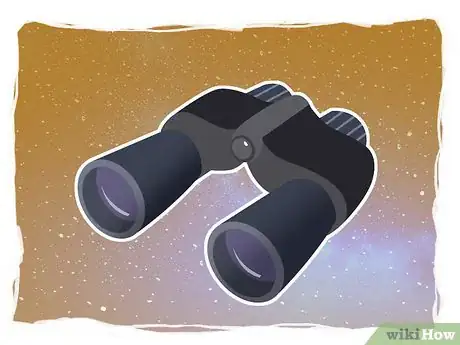
1Bring binoculars. While telescopes are more commonly associated with stargazing, binoculars can also be very useful for watching the night sky. Especially if you’re just looking to try stargazing, binoculars can be a simpler and more affordable option than getting a telescope.[7]
- There are many different brands and types of binoculars that you can research to choose the best ones for your needs.[8]
-
2Bring a telescope if you’re an advanced stargazer. If you do want to make sure you can see as much as possible, you will want to bring a telescope. Telescopes have been used by astronomers for centuries, and they offer better clearer views of stars than any other device. There are many different telescopes on the market, but you will probably only need highly advanced models if you’re especially serious about stargazing.[9]
- If you are looking to buy a telescope, keep in mind that some of the most important factors are magnification power, portability, type, and price.[10]
-
3Bring charging equipment for your devices. Depending on how long you plan on spending outdoors stargazing, you will want to bring external chargers for your phone and any other devices you have with you. You can find a variety of USB chargers online that should serve your needs.
- If you are bringing a lot of high-tech gear, you may want to bring a portable power source. [11]
-
4Take along a chair. If you plan on stargazing for several hours or a whole night, you should bring a portable folding chair so you don’t have to stand the whole time. Ideally, you should have a chair that enables you to use your telescope comfortably. You don’t want to put undue strain on your neck or back by hunching over your telescope.[12]
- If you’re going with several people, you can also spread a blanket on the ground so multiple people can sit at once.
-
5Dress for the weather. Keep an eye on the weather forecast and be prepared for the weather you’ll face when you go stargazing. No matter the season, it makes sense to bring several layers along. That way you will always be able to adjust how many warm clothes you’re wearing to make yourself as comfortable as possible.[13]
- If you’re going in the winter, you will especially want to make sure you have a proper coat, warm socks, and other warm layers, like sweaters, sweatshirts, and scarves.[14]
-
6Bring bottles of water. As you will probably be away from the indoors for at least several hours, you will want to make sure to bring plenty of water with you. You do not want to ruin your stargazing experience by becoming dehydrated.
- If you’re going in the winter, you may also want to bring a thermos so you can have warm liquids, like hot tea or soup, on hand.
-
7Wear gloves. In the winter, you will definitely need to bring gloves, though even in summer temperatures can get much chillier at night. You may want to bring gloves that have either retractable coverings over the fingers or no covering. This will help you to operate your telescope, binoculars, or other equipment.[15]
-
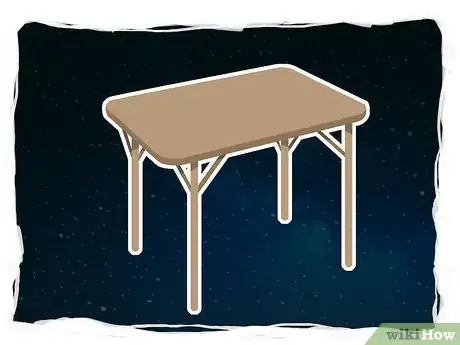
8Take a small table if you're bringing a lot of equipment. Depending on how much equipment you’re bringing with you, you may want to bring a small, portable table. This will give you something besides the ground to spread out your stuff on. A table can be especially useful for spreading out any stargazing guides you might bring.[16]
-
9Bring reference material. You will want to consult your star charts and star atlases while you stargaze. These will help you to figure out what to look for and how to find it. You can usually find star charts online, in bookstores, and in libraries.[17]
Looking at Stars
-
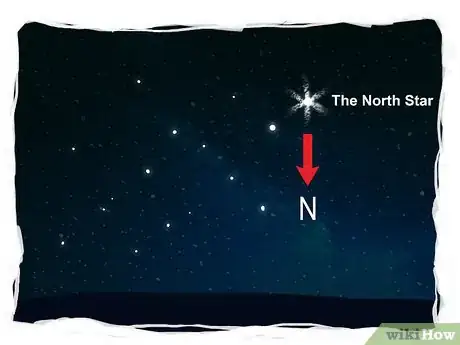
1Identify important stars for orientation. If you’re in the northern hemisphere, figure out how to find the North Star. If you’re in the southern hemisphere, learn how to identify the Southern Cross. Stargazers often use these markers to figure out what part of the sky they’re looking at. From these touchstones, you can often easily identify other stars and constellations. [18]
- This process of using one star to identify the others around it is sometimes called star-hopping and is often practiced by even veteran astronomers.
-
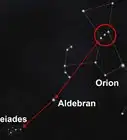
2Look for constellations. Constellations are groups of stars that sometimes form interesting shapes in the night sky. One of the most recognizable of these in the northern hemisphere is the Big Dipper, which looks like a spoon or a bowl with a handle. Constellations are not only beautiful to look at, they can also help you to identify individual stars and orient yourself. [19]
- You can help yourself find constellations by consulting star charts and star atlases, or by using a stargazing app.
-
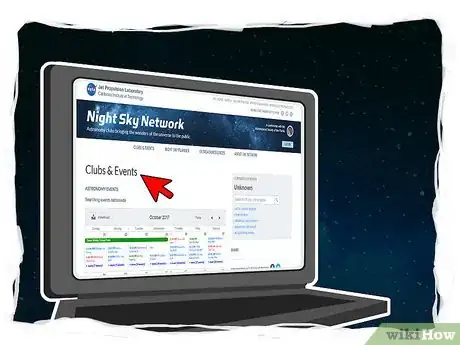
3Go with a local astronomy club. If you’re new to stargazing or simply want to go with a group, you can often find local astronomy clubs that organize stargazing outings. If you want help identifying stars in the sky, these clubs often have experienced members who can help teach you. This might be especially useful if you’re having trouble reading star charts.[20]
- Many local astronomy clubs are affiliated with NASA’s Night Sky Network. You can find a listing of these clubs on NASA’s website.[21]
-
4Download a stargazing app. There are several apps for phones and tablets that can help you identify stars and constellations. Usually, you simply put your device’s camera at the night sky and the app tells you what stars and constellations you’re looking at. These are great educational tools for beginners. They can also be an effective way to interest kids in stargazing.[22] .
- Some popular stargazing apps include SkySafari and Starmap.
-
5Learn the difference between stars and planets. You can tell the difference between stars and planets by paying attention to the light they give off. Sparkling lights in the night sky tend to be stars, while lights that don’t sparkle and seem to keep a fixed position are usually planets.[23]
-
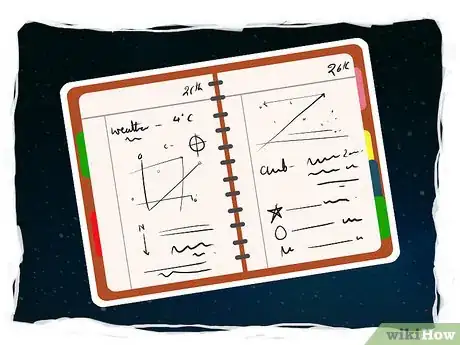
6Keep a stargazing diary. It might help you enjoy stargazing more if you if you keep track of what you see, especially if you plan on going more than once. In your diary, you can record any details that you find relevant, including your location, the weather, what equipment you used, and so on.[24]
-
7Relax. While there is a lot you can plan for when stargazing, remember to relax and enjoy yourself. Sometimes you will not be able to see as many stars as you’d hoped, and that’s okay. If you’re new to stargazing, you might have a harder time identifying stars than you’d expected. Even if that’s the case, try not to get frustrated. Instead, enjoy the time spent outdoors looking at the beauty of the stars.
Community Q&A
-
QuestionWhat if I'm afraid of looking stupid in front of my family?
 Community AnswerEveryone needs some time to themselves, and stargazing is an excellent way to do it. If your family makes fun of you, just shrug it off.
 -
QuestionCan I see stars with binoculars?
 Community AnswerYou can see many stars with a good pair of binoculars.
 -
QuestionHow do I find a shooting star?
 Community AnswerThe best time is during meteor showers; research astronomy news to find dates and times of upcoming showers.
References
- ↑ https://www.fatherly.com/play/a-guy-building-the-next-hubble-telescope-on-stargazing-with-your-kid/
- ↑ https://www.fatherly.com/play/a-guy-building-the-next-hubble-telescope-on-stargazing-with-your-kid/
- ↑ https://www.fatherly.com/play/a-guy-building-the-next-hubble-telescope-on-stargazing-with-your-kid/
- ↑ https://www.reserveamerica.com/outdoors/stargazing-where-and-how-to-view-the-night-sky.htm
- ↑ https://www.fatherly.com/play/a-guy-building-the-next-hubble-telescope-on-stargazing-with-your-kid/
- ↑ https://www.reserveamerica.com/outdoors/stargazing-where-and-how-to-view-the-night-sky.htm
- ↑ http://mentalfloss.com/article/66316/13-tips-stargazing-astronomers
- ↑ https://www.space.com/27404-binoculars-buying-guide.html
- ↑ https://www.space.com/27775-amateur-astronomy-guide.html
- ↑ https://skyandtelescope.org/astronomy-equipment/how-to-choose-a-telescope/
- ↑ https://www.space.com/27775-amateur-astronomy-guide.html
- ↑ https://www.space.com/27775-amateur-astronomy-guide.html
- ↑ https://www.space.com/27775-amateur-astronomy-guide.html
- ↑ https://www.space.com/27775-amateur-astronomy-guide.html
- ↑ https://www.space.com/27775-amateur-astronomy-guide.html
- ↑ https://www.space.com/27775-amateur-astronomy-guide.html
- ↑ https://www.space.com/27775-amateur-astronomy-guide.html
- ↑ https://www.reserveamerica.com/outdoors/stargazing-where-and-how-to-view-the-night-sky.htm
- ↑ https://www.youtube.com/watch?v=uHFbbwEc6GI
- ↑ https://www.youtube.com/watch?v=uHFbbwEc6GI
- ↑ https://nightsky.jpl.nasa.gov/club-map.cfm
- ↑ https://www.fatherly.com/play/a-guy-building-the-next-hubble-telescope-on-stargazing-with-your-kid/
- ↑ http://mentalfloss.com/article/66316/13-tips-stargazing-astronomers
- ↑ https://skyandtelescope.org/astronomy-equipment/how-to-start-right-in-astronomy/
About This Article
To stargaze, start by finding a place that’s away from bright lights, like a park or nature preserve, so that you can see the stars more easily. Then, wait for a clear night when there’s a new moon to give you a better view. If you want to find some constellations, bring along a telescope or binoculars, and star charts that you can find online. When you arrive at your spot, identify the North star so you can find other constellations based on its location. Alternatively, use an app like SkySafari, which will tell you what constellations you’re looking at. To learn how to tell the difference between stars and planets, read on!
