wikiHow is a “wiki,” similar to Wikipedia, which means that many of our articles are co-written by multiple authors. To create this article, volunteer authors worked to edit and improve it over time.
wikiHow marks an article as reader-approved once it receives enough positive feedback. In this case, 91% of readers who voted found the article helpful, earning it our reader-approved status.
This article has been viewed 109,081 times.
Learn more...
Sponge painting your windows can create a whimsical, festive picture for the holidays. The technique is fairly simple and requires very few materials. You should begin by selecting a paint that will be easy to remove to avoid a headache later on. Apply a light coating of your paint onto the sponges and dab it onto the glass instead of smearing it on.
Steps
Preparing the Paint
-
1Choose your color scheme. Choose colors that will work for the scene and ambiance you want to create with your holiday window paint.
- Use color schemes already associated with the holidays. Certain holidays already have specific colors assigned to them through tradition. For instance, Christmas is associated with red and green.
- Opt for white and blue to create generic winter scenes.
- Use festive metallic hues like silver and gold to create a sense of festivity commonly associated with the holidays.
-
2Consider using tempera paint. Tempera paint dries with a matte finish and the end result is usually translucent. Moreover, it is the easiest paint to remove.Advertisement
-
3Consider using acrylic paint. Acrylic craft paints are among the most commonly used paints for temporary window illustrations. They can be scraped off windows fairly easily but are a little more durable than tempera paints.
-
4Add dish soap to your paint before use. This step is especially important if using acrylic paints since dish soap reacts with the paint and makes it easier to wash off later. Add 1 teaspoon of dish soap to every 1/4 cup bowl of paint and mix thoroughly.
-
5Avoid permanent window paints. Permanent paints specifically meant for windows will be nearly impossible to clean off once the holidays pass.


Painting Basic Holiday Shapes
-
1Purchase several soft, non-scratch sponges. Avoid sponges that have a "scrubber" side and stick with a soft dish or paint sponges.
-
2Cut the sponges into holiday shapes. Trees and stars are fairly simple options, but you can go even simpler by cutting out basic geometric shapes, including circles and triangles, and using the shapes to create more elaborate pictures like ornaments and snowmen.
-
3Pour a little of your paint into a small bowl.
-
4Add dish soap, if needed, and stir.
-
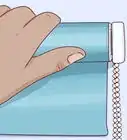
5Briefly dip one side of the sponge into the paint. Do not allow the sponge to sit in the paint for a prolonged period, since it may soak up too much and ruin the "sponge" texture of the final product.
-
6Hold the sponge above the bowl and allow excess paint to drip off. It is important to keep the paint on one side of the sponge to prevent dripping.
-
7Press the painted side of the sponge against the window. Apply gentle pressure to prevent the sponge from "squeezing out" the paint and causing it to drip down.
-
8Continue pressing the painted side of the sponge against the window as often as necessary to create the scene you want to create. When the sponge no longer leaves a painted image, dip it back into the paint and repeat the same process.


Painting with Stencils
-
1Purchase holiday stencils. You should be able to find stencils online and at craft stores, general stores, and toy stores.
-
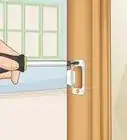
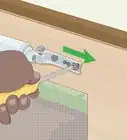
2Tape the stencil flat against the window using masking tape or painter's tape. The stencil should be held firmly in place.
- Avoid taping over any previously-painted areas, since the tape may peel away some of the dried paint.
-
3Pour a little of your paint into a small bowl.
-
4Add dish soap, if needed, and stir.
-
5Dip one side of a soft sponge into the paint. Use a soft dish or painting sponge, and avoid sponges with rough "scrubber" sides. Do not allow the sponge to soak in the paint.
-
6Hold the sponge above the bowl to allow excess paint to drip off.
-
7Gently press the painted side of the sponge against the stencil. Dab the sponge over the stencil until the entire design is filled in, but not solid. Do not use the sponge to rub the paint over the stencil, as doing so will ruin the texture of the finished image.
-
8Use smaller sponges when filling in pictures that require multiple colors. Carefully dab the paint over the portion of the stencil that requires that color, but do not allow the color to transfer into other portions of the stencil. Use a separate sponge for each paint color instead of trying to rinse the colors off in between uses.
-
9Allow the paint to dry before removing your tape and stencils. Otherwise, you may smear the paint.


Warnings
- Be mindful of temperature variations when cleaning off your windows. Extremely cold or extremely hot water may cause the glass to chip, especially if you are washing your windows on a cold day. For best results, clean your windows off with lukewarm water at a time when the temperature outside is fairly mild.⧼thumbs_response⧽
- Water-based tempera paint can smear or rub off during periods of heavy precipitation. As a result, it is best to use tempera paint if you have an overhang protecting your window. Otherwise, you may want to consider painting the design on the inside of your window to prevent wear and tear from the outside elements.⧼thumbs_response⧽
Things You'll Need
- Soft sponges
- Acrylic or tempera paint
- Dish soap
- Scissors
- Small bowl
- Stencils
- Masking tape