wikiHow is a “wiki,” similar to Wikipedia, which means that many of our articles are co-written by multiple authors. To create this article, volunteer authors worked to edit and improve it over time.
The wikiHow Tech Team also followed the article's instructions and verified that they work.
This article has been viewed 20,059 times.
Learn more...
Setting up a brand-new laptop could be exhilarating and intimidating at the same time. But it's pretty straight forward. Most laptops out in the market in recent years come with the latest version of Windows 10. The setup procedure can differ based on brand, but it's relatively the same, so this guide should work for all Windows 10 laptops. To setup your new Windows 10 laptop, follow the steps below.
Steps
Initial Setup
-
1Unbox your laptop and plug it in. First of all, unbox the package and connect the original power adapter and cables to power it up. Setting the PC up may take some time and you want to be sure you have enough power to keep it up and running.
- If you have a Lenovo ThinkPad, you may see an independent battery alongside other accessories such as cables and power brick in the package. In this case, you need to turn your ThinkPad upside down, and insert the battery with its terminal inward into the laptop.
- USB-C ports have been taking over rectangular Type-A ports on most of the latest laptops. In this case, you should simply for you to connect the charger to the Type-C port on your device. For some models, such as Lenovo ThinkPad X1 Carbon Gen 8 or all Huawei Matebooks, the manufactures marked one USB-C port as the charging port, so in this case you should plug into this port.
-
2Turn on your laptop. Press the power button. The power button may be labeled with the universal power symbol (). On some models, it may be in the top right corner or on the right side of the computer. But it may be located elsewhere. The quick start guide that came with your computer will tell you where the power button is.
- Once you start up, the Welcome screen will display, and Cortana, which is Microsoft's virtual assistant, will give you a voice walkthrough. She'll ask you questions, and you can respond with your voice on some laptop models (but keep in mind that this will not work on many laptops). If you'd like to mute her, then you can select the speaker icon at the bottom of the screen to change the volume.
Advertisement -
3Select your region. Select your country or region and then click or tap, Yes.
-
4Select your keyboard layout. Select the county that you are currently in, and then select Yes.
-
5Click or tap Skip on the "Want to add a second keyboard layout screen". Since you're using a laptop, you should only be using one keyboard layout.
-
6Connect to a Wi-Fi network. Select your Wi-Fi network, enter your network password, and then click or tap Next.
- If you don't have an internet connection right now, select "I don't have internet".
-
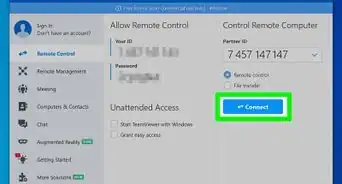
7Sign into your Microsoft account. Type your email address, phone number, or Skype username into the "Email, phone, or Skype" box. Then click or tap Next.
- If you do not have a Microsoft account, then select, "Create account".
-
8Enter your password. Type the password for your Microsoft account into the "Password" box. Then, click or tap Next.
- If you have two step verification enabled, then you will have to authenticate using that as well.
-
9Create a PIN. On Windows 10, a PIN is a unique password for your computer. If you don't set up a PIN, then you will use your Microsoft account password to sign in, which is not recommended. To create a PIN, select Create PIN.
- If your laptop supports biometric authentication, then you will be prompted to setup those.
-
10Type in your PIN. By default, only numbers are allowed, but if you want to use a password, then check the "Include letters and symbols" check box. Once you create your PIN, select OK.
-
11Choose your privacy settings. Microsoft enables all of the settings by default, but you may want to look through them to see if there is anything that you want to disable. To disable a setting, click or tap the blue slider switch () under the setting. Once you are done, click or tap Accept to continue.
-
12Customize your device. You can tailor your device to meet your needs depending on what you will be using it for. You can check multiple options if you are going to be doing different things. Once you select what you are doing with your device, click or tap Accept.
- If you do not want to tailor your device, then click or tap Skip. This is not recommended though.
- After this step, you may see some steps that don't apply to you. Some of the options that are displayed in this article may only apply if you selected a certain customization option. If you see a step that does not correspond to what you are seeing, then skip that step.
-
13Link your PC to your phone. You can connect your iPhone and/or Android device to your computer to access it from your PC. This can be very useful. For example, on Android devices, you can send text messages from your laptop. Select Remind me later to be prompted to link your phone when you are done.
- If you do not want to link your phone to your laptop, then Select on "Skip for now".
-
14Decide whether or not to back up your files to OneDrive. Backing up your files makes sure that they will be saved even if your hard drive breaks or if they get accidentally deleted.
- If you do not want to back up your files, then Select "Only save files to this PC". Although, keep in mind that your files may be permanently lost if you choose this option.
-
15Decide if you want to join Xbox Game Pass. Game Pass allows you to play a variety of games at no extra charge, so it may be something to think about. However, if you already have the games you want through another service, then feel free to decline the offer.
- This option will not display if you already have Xbox Game Pass.
-
16Consider enabling Cortana. Cortana is Microsoft's virtual assistant and is similar to Siri or Google Assistant, but on your computer. If you want to enable Cortana, then click or tap Accept. If you don't want to enable Cortana, then select Not Now.
-
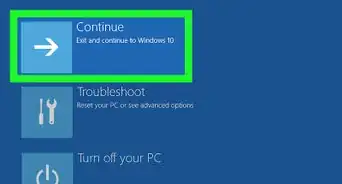
17Wait for the final setup. You don't have to do anything here. Just make sure that you don't accidentally turn off your computer. Otherwise you will have to reinstall Windows.


Installing Updates
-
1Update Windows. Windows will probably be out of date when you start your laptop for the first time, so it's a good idea to update it. To update Windows, open Start , then Settings . After that, select "Update & Security" , then Check for updates.
- During the update process, your screen may flicker. Don't worry, your laptop isn't broken, it's just the graphics drivers updating.
-
2Update the Microsoft Store apps. The Microsoft Store apps are things like the Mail app and the Photos app. It's a good idea to update these for the best experience. To update your Microsoft Store apps, open the Microsoft Store by clicking or tapping the shopping bag in the taskbar. Then, click or tap the three dots in the top-right corner, and select "Downloads and updates. Once there, select Get updates.


Remove Bloatware
Bloatware is software that comes with your laptop that you probably don't want.[1]


Make Other Customizations
Windows 10 comes with many features that you might not know about. It's a good idea to check these out to see if there's anything that you want to enable.
-
1Customize Windows 10. Windows 10 allows you to customize the look of it. There are many options such as changing your desktop background, adjusting the lock screen, and even setting your own custom sounds. Check out How to Customize Windows 10 for all of the ways that you can customize your laptop.
-
2Consider enabling night light. Night light can automatically lower the amount of blue light that your computer screen displays at night so that your computer use won't disrupt your sleep.
-
3Enable parental controls. Parental controls allow you to set restrictions on certain accounts on your computer to protect your children. If your kids will be using your laptop, then parental controls are a great idea.
-
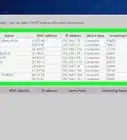
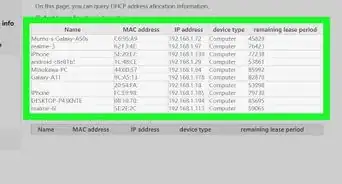
4Rename your laptop. Your laptop name is what other computers see on the network. You may want to personalize it to something that you want, or change it to something that hides it.
- Check out How to Rename Your PC in Windows 10 for instructions.


Warnings
- Do not disable automatic updates, User Account Control (UAC), or Microsoft Defender. Many people online say that these should be disabled because they say that it's annoying, but disabling these is very dangerous and could result with your computer being infected with viruses.[3] [4]⧼thumbs_response⧽


References
- ↑ https://www.computerworld.com/article/2966113/bloatware-what-it-is-and-how-to-get-rid-of-it.html
- ↑ https://www.av-test.org/en/antivirus/home-windows/windows-10/december-2020/microsoft-defender-4.18-204917/
- ↑ https://www.zdnet.com/article/here-are-the-bad-reasons-why-people-disable-automatic-updates/
- ↑ https://insights.sei.cmu.edu/blog/the-risks-of-disabling-the-windows-uac/#:~:text=Do%20not%20disable%20the%20UAC%2C%20as%20this%20action,decisions%20that%20are%20made%20based%20on%20those%20markings.