wikiHow is a “wiki,” similar to Wikipedia, which means that many of our articles are co-written by multiple authors. To create this article, 18 people, some anonymous, worked to edit and improve it over time.
This article has been viewed 325,100 times.
Learn more...
Fishing can be a complex sport depending or simple hobby depending on the individual. Regardless of how you like to fish, there are some key elements you must remember when setting up a fishing pole. No matter what type of fish you are hoping to catch, follow basic techniques to ensure your rod is sturdy and lure effective.
Steps
Assembling your Rod and Reel
-
1Identify the parts of your fishing pole. A fishing rod can be a complex piece of equipment so it is wise to learn the terminology before assembling your own. If your rod breaks into 2 parts or more, the joint where the sections fit together is called the ferrule. The male ferrule inserts into a female ferrule.
- The handle is also called a grip and is where you hold the rod.
- The butt it the thick part of your rod closest to the handle. The tip is the most flexible part of the rod and is located at the very top of the rod.
- Guides are the rings that go all along the rod that guide your fishing line.
-
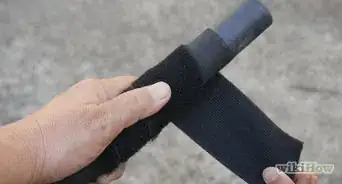
2Clean the rod beforehand. Wipe both pieces down with a cloth to remove any dirt or debris that could scratch it. Use necessary, use a cotton swab to clean the female ferrule.[1] By keeping the rod clean, you’ll extend the life of it. Dirt can scratch and destroy the pieces that hold the rod together.Advertisement
-
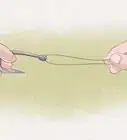
3Bring the pieces together. Align the female and male pieces on a flat service. Holding the female ferrule securely, anchor the male ferrule around it. Always ensure that if necessary, any guides to help secure the ferrules are properly aligned.[2]
- If your rod is not coming together, stop immediately. Look at the instructions. Is there a locking mechanism of any sort you’re missing? If you force the rod together, you risk damaging it permanently.
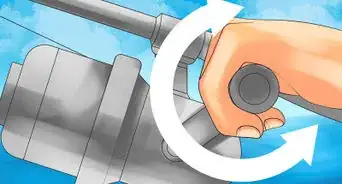
- On most rods you will need to rotate the pieces together. Do this by holding the female ferrule and rotating the male piece while they are adjoined.[3] This will lock in your rod.
-
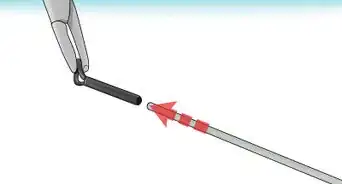
4Attach the reel. While looking at the bottom of your rod, you should see a female opening to insert your reel. This is called the reel seat. Insert your reel.[4] Now put the reel seat, which acts like a smooth handle, over the butt end of the reel. It will thread onto the reel. Rotate until the pieces all feel secure.
- Be cautious not to over tighten the reel. If you force the threading to turn past what it is built for, it can crack and ruin the rod.[5]
- Remember with threading that right is tight and left is loose. When looking at your rod from the back end, threading right will tighten it. In other words, rotating clockwise will tighten the thread, while rotating counter-clockwise will loosen it.

Threading your Fishing Pole
-
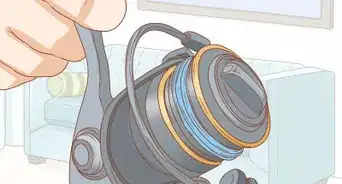
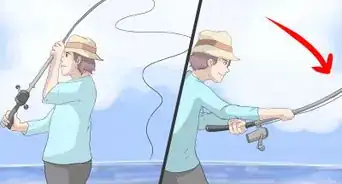
1Lift the bale arm and pull the thread. The bale arm is the silver overhead piece on the reel. When applying a small amount of pressure, you will be able to flip it up to the other side of the reel. After lifting the bale arm, you will be able to pull the edge of the thread and the reel will unravel it.[6]
- Use caution here. If the bale does not lift easily, you may be looking at the wrong piece. You should never have to strong-arm your bale up.
- Check that the spool of line unwinds the same direction as the reel turns. If they do not match, you’ll have unnecessary twists and knots. If they are not the same direction, simple flip the spool to have the directions match.[7]
-
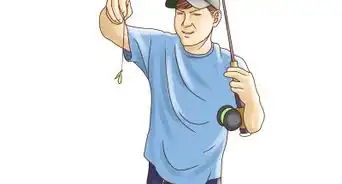
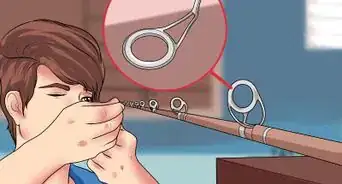
2Thread the line through the guides. Most rods have four to five guides, or eyelets, attached to the rod. Starting at the eyelet closest to the reel, thread it with the line starting at the bottom and coming out of the top. Work your way up to the top of the rod.
-
3Close the bale arm. To close the arm, simply flip it the opposite direction as you previously moved it.[8] To test that it is closed, gently pull the line. No more line should come out.
- Test the direction of the spool again by reeling in a small amount of line. If the reel does not rotate the same direction as the spool you’ll need to start over after fixing the direction of the spool.[9]
Choosing a Lure
-
1Pick the right color based off weather. Depending on the sun and cloud cover, you may want to pick a different lure. On sunny days, try using a silver lure. The silver will help reflect light and attracts attention.[10] Contrastingly, use a gold lure on a cloudy day. Gold has high reflective properties and will help give off light on an overcast or stormy day.[11]
-
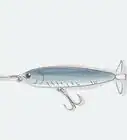
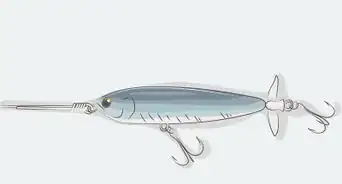
2Choose a lure type. Pick your lure style based off what kind of fish you are aiming to catch and where. If you’re fishing in freshwater, try a jig. A jig will work well in fresh water by using feathers and a metal head to attract fish.[12] A spoon lure will work well for fish that prey on small fish. The spoon will wave back and forth to mimic the movement of a fleeing fish, attracting the bigger predators.[13]
- If you’re looking for an all-purpose lure, try a spinner. A spinner is a metal piece that will spin in the water as it moves. This attracts a lot of attention and should be used in a particularly difficult-to-catch location.[14]
-
3Look at water clarity. If your water is muddy or dirty, you’ll need a lure that makes a lot of moment, such as a spinner or a spoon.[15] These lures create vibrations, so even if the fish cannot see the lure, they can feel it. Comparatively, if the water is clear, an overwhelming amount of vibration and movement may scare off a fish.[16]


Attaching a Lure
-
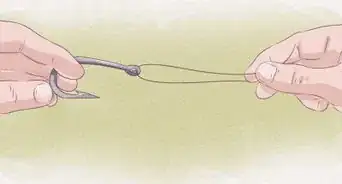
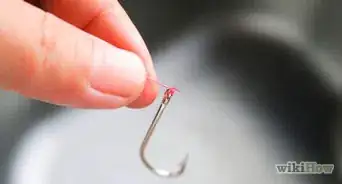
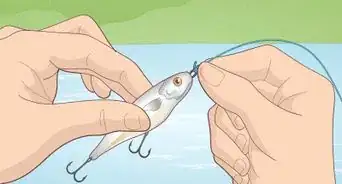
1Thread your line through your lure. Once you’ve threaded the lure onto your line, leave approximately ten inches, or twenty centimetres, of line on the other side of the lure.[17]
- Since fishing line is so difficult to see, it is often recommend that you practice knot tying with string or shoelaces.
-
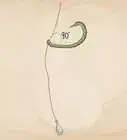
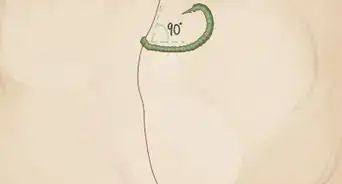
2Wind the line back around itself. While your line and lure and laying on the ground, pull the free end of the line back up towards the rest of the line. Loosely wrap the end of the line around the line on the other side of the lure, similar to how a candy cane would have two colors wrapped around another.[18] Stop once you have wound the lines together approximately five times.
-
3Tuck the free-end of the line back through. Taking the end of your line, pull it back towards the lure. Next, loop it through the first, big loop, that contains the line. After you loop it through, tuck it once more within itself, so it is coming underneath the line. [19]
-
4Fasten the knot. Hold the line, as well as the end of the line. Pull them slowly together. This should make the line coil tightly where it has been wrapped, and create a tight knot at the lure.[20] You may need to help the process along by using your fingernails to shuffle the twists down towards the lure. Once the knot is wrapped tightly, clip the excess off the end.
- To correctly wind the knot down, you may find you need to moisten the line. This can be done by moistening your fingertips with saliva and running the line over your finger.[21]
Community Q&A
-
QuestionMy lure doesn't have the plastic thingy, what do I do?
 Adam McMullinCommunity AnswerNot all lures do. These are called "shallow divers." You can get poppers and jig heads as well. Go out and find what works best for you.
 -
QuestionMy fishing rod is not collapsing all the way, what do I do?
 Community AnswerTelescoping fishing poles often build up dirt and grime from use; try cleaning and applying a lubricant. However, if the pole is new, check the warranty and either send it off to the manufacturer or get a refund/replacement from where you purchased the item.
 -
QuestionMy reel does not have the string on the reel?
 614 FishingCommunity AnswerBuy a line and add it to the reel. You can find videos online which demonstrate how to add the line.
Warnings
- When threading your pole, don’t miss an eyelet. If you accidentally skip an eyelet and instead of thread between the pole and the eyelet, you’re putting your rod at risk.[22]⧼thumbs_response⧽
- Take care when picking apart any messes on your rod. If you have a tangle, it may be wiser to simply snip the tangle and re-thread. Tread carefully when trying to untangle the line to ensure you don’t pull on your rod incorrectly.[23]⧼thumbs_response⧽

References
- ↑ http://fishingnoob.com/122/how-to-assemble-a-spinning-reel-and-rod/
- ↑ http://fishingnoob.com/122/how-to-assemble-a-spinning-reel-and-rod/
- ↑ http://fishingnoob.com/122/how-to-assemble-a-spinning-reel-and-rod/
- ↑ http://fishingnoob.com/122/how-to-assemble-a-spinning-reel-and-rod/
- ↑ http://fishingnoob.com/122/how-to-assemble-a-spinning-reel-and-rod/
- ↑ https://www.youtube.com/watch?v=1TUhpDtbOck
- ↑ http://survival-mastery.com/skills/scouting/how-to-string-a-fishing-pole.html
- ↑ https://www.youtube.com/watch?v=1TUhpDtbOck
- ↑ http://survival-mastery.com/skills/scouting/how-to-string-a-fishing-pole.html
- ↑ http://enlightenme.com/fishing-lure/
- ↑ http://enlightenme.com/fishing-lure/
- ↑ http://enlightenme.com/fishing-lure/
- ↑ http://enlightenme.com/fishing-lure/
- ↑ http://enlightenme.com/fishing-lure/
- ↑ https://www.boats.com/how-to/10-tips-for-picking-the-best-fishing-lure/
- ↑ https://www.boats.com/how-to/10-tips-for-picking-the-best-fishing-lure/
- ↑ http://fishingnoob.com/107/two-knots-you-absolutely-need-to-know/
- ↑ http://fishingnoob.com/107/two-knots-you-absolutely-need-to-know/
- ↑ http://fishingnoob.com/107/two-knots-you-absolutely-need-to-know/
- ↑ http://fishingnoob.com/107/two-knots-you-absolutely-need-to-know/
- ↑ http://fishingnoob.com/107/two-knots-you-absolutely-need-to-know/
- ↑ http://survival-mastery.com/skills/scouting/how-to-string-a-fishing-pole.html
- ↑ http://survival-mastery.com/skills/scouting/how-to-string-a-fishing-pole.html
About This Article
When you’re setting up a fishing pole, first attach all of the pieces of the rod together, then slide the reel into the notch near the bottom of the rod and rotate the reel seating to tighten it. Locate the silver overhead piece on the reel, called the bale arm, and flip it up, then pull on the edge of the fishing line to unravel it. As you pull the line, thread it through the eyelets on the rod, then flip the bale arm closed. Once the line is threaded, you can attach your lure or your hook and bait. To learn how to fasten a lure, keep reading!