This article was co-authored by wikiHow Staff. Our trained team of editors and researchers validate articles for accuracy and comprehensiveness. wikiHow's Content Management Team carefully monitors the work from our editorial staff to ensure that each article is backed by trusted research and meets our high quality standards.
The wikiHow Video Team also followed the article's instructions and verified that they work.
This article has been viewed 27,673 times.
Learn more...
You might think of acorns as the preferred snack of squirrels worldwide, but when prepared correctly, they are actually nutritious and tasty for humans as well. Once you’ve collected some acorns, it’s important to clean and shell them properly to get them ready for the leaching process, which involves boiling the acorns to remove their bitter flavors. Roast them and leave them whole for a crunchy snack, or even grind them up into flour to use them for baking!
Steps
Cleaning and Shelling the Acorns
-
1Place the acorns in a bowl of clean, cool water and remove any that float. Place the acorns in a bowl large enough to cover them with water. Fill the bowl with water and remove any floaters.[1]
- If any acorns float, it is a fair sign that they have gone bad. This float test will not work for old acorns that are already dry (from a past season).
-
2Rinse the acorns in a colander under the tap for 1-2 minutes. Drain the acorns in a colander once you have removed all of the bad ones. Hold the colander over the sink and run cool water from the tap over them to remove any remaining dirt or bugs.[2]
- Stir the acorns around with your hands to dislodge any stubborn dirt or hiding bugs.
Advertisement -
3Let the acorns air dry or dry them with a dish towel. Set the colander aside until the acorns dry on their own, or empty them out onto a dry towel and let them sit to air dry. Use a dry towel to pat and rub them dry if you want to speed up the process.[3]
- It will be much easier to remove the shells when the acorns are completely dry.
-
4Remove the caps from the acorns. The caps are the piece of the acorn that covers the flatter side where the acorn attaches to the tree. Pry the caps off with your hands, or use a knife or nutcracker to pry them off if they are stuck on tightly.[4]
- Sometimes it works to freeze the acorns first to make it easier to remove the caps and shells.
- If you use a knife, make sure to pry with the blade facing away from you so you don’t cut yourself by accident.
-
5Crack the acorns open with a nutcracker or hammer. Acorns have an elastic shell that is resistant to nutcrackers, so it is easier to crack them open with a hammer sometimes. Lay the acorns flat on a towel and give them a good whack with a hammer to crack the shells if you can’t get them open with a nutcracker.[5]
- If you use a hammer, make sure you work on a flat surface that you won’t damage. Place the acorns on a towel to give them some traction so they don’t go flying.
-
6Sort through the shelled acorns and remove any that look bad. Carefully look through all the acorns you cracked open one-by-one. Remove any that have signs of mold or look like they have been chewed on by bugs.[6]
- If they acorns are black, fuzzy, or have wormholes in them, then throw them away.
Leaching and Roasting the Acorns
-
1Bring 2 pots of water to a boil. Fill 2 pots with enough water to cover the acorns you shelled. Put them on a stove over high heat until the water boils.[7]
- You don’t necessarily need to use 2 pots, it just speeds up the process of leaching the acorns.
-
2Boil the acorns in 1 of the pots until the water turns brown. Put all of the shelled acorns into 1 of the pots of boiling water. Wait for the water to turn a dark brown color, like the color of strong black tea.[8]
- The water turns dark as it leaches out all of the tannins in the acorns.
- It’s possible to leach out the tannins by letting the acorns soak in cold water, but this process can take several days. It is much more efficient to boil the tannins out.
-
3Drain the acorns in a colander and put them in the other pot of boiling water. Carefully pour out the acorns into a colander and throw away the dark, tannin-filled water. Put the drained acorns into the other pot of clean boiling water and wait for it to turn dark.[9]
- The second pot of boiling water won’t get as dark as the first time around. The idea is to keep boiling the acorns until the water doesn’t change color, then you know the tannins have been removed.
-
4Repeat this process until the water stays clear to leach the tannins out. Fill up the first pot with more clean water and bring it to a boil while the acorns are boiling in the second pot. Drain the acorns when the water has turned brown again and transfer them to the clean boiling water.[10]
- Keep doing this until the water boils clear, then drain the acorns to get them ready for roasting. You will probably have to do it about 3-4 times total.
-
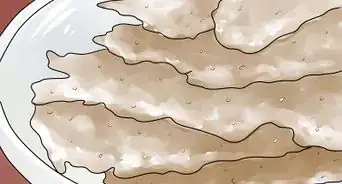
5Roast the acorns in an oven at 350 °F (177 °C) for 15 minutes. Preheat an oven to 350 °F (177 °C) and lay the acorns out on a baking sheet. Put the baking sheet in and check on the acorns after 15 minutes to see if they have changed color. They are ready when the color starts to darken.[11]
- You can sprinkle the acorns with salt or any other seasonings you want to try prior to roasting them.
- Keep roasting the acorns for 5 minutes at a time if they have not changed color after the first 15 minutes until they darken.
- You can eat roasted acorns as a healthy snack on their own, or add them into a trail mix.
-
6Grind the roasted acorns if you want to make them into a flour. Grind the acorns in an old fashioned hand-cranked meat grinder or electric blender to get a coarse grind. Put the coarse ground nuts through a flour mill or coffee grinder to make them into a finer flour.[12]
- To get the best results, mix acorn flour with regular wheat flour to use it for baking. Acorn flour does not hold well on its own.
- You can use acorn flour mixed with regular flour to make anything you would make with normal flour on its own, such as breads, cakes, or cookies.


Community Q&A
-
QuestionI accidentally ate a raw acorn without leaching it. What should I do now?
 Matthew YangCommunity AnswerYou are fine, as one raw acorn will not make you sick or kill you. However, if you eat raw ones in large numbers, they can kill you or at least make you very sick.
Things You’ll Need
- Large bowl
- Colander
- Nutcracker or hammer
- Towels
- Pots
- Baking sheet
- Meat grinder or blender
- Flour mill or coffee grinder (optional)


References
- ↑ https://www.almanac.com/content/how-prepare-and-cook-acorns
- ↑ https://www.almanac.com/content/how-prepare-and-cook-acorns
- ↑ https://honest-food.net/how-to-eat-acorns/
- ↑ https://www.woodlandtrust.org.uk/blog/2016/10/edible-acorns/
- ↑ https://honest-food.net/how-to-eat-acorns/
- ↑ https://insteading.com/blog/how-to-eat-acorns/
- ↑ https://www.almanac.com/content/how-prepare-and-cook-acorns
- ↑ https://www.almanac.com/content/how-prepare-and-cook-acorns
- ↑ https://www.almanac.com/content/how-prepare-and-cook-acorns
About This Article