This article was co-authored by Ryaan Tuttle. Ryaan Tuttle is a Home Improvement Specialist and the CEO of Best Handyman, Inc. in Boston, Massachusetts. With over 17 years of experience, he specializes in building home service businesses, focusing on creating scalable and efficient brands. With the help of his global team, the companies have achieved over 10+ million in sales and received recognition through magazine features, and enjoy partnerships with wikiHow and Jobber field service software. Boston Magazine and LocalBest.com have named Best Handyman Boston the Best Handyman in Boston. Ryaan holds Construction Supervisor and Home Improvement Contractor Licenses.
This article has been viewed 13,940 times.
When applied properly, stucco can last for 100 years or more. However, in some cases it can start to crack and peel off of a wall. This is often because water has seeped into the wall underneath the stucco and caused water damage. Luckily, you can patch and repair cracked or peeling stucco to restore the wall’s strength and appearance. The patching process does take some time, since you have to apply the stucco in three coats, but it isn’t too complicated. The good news is that when you’re all done, the damaged section of your stucco wall will be waterproofed and should last for years to come!
Steps
Removing the Loose Stucco
-
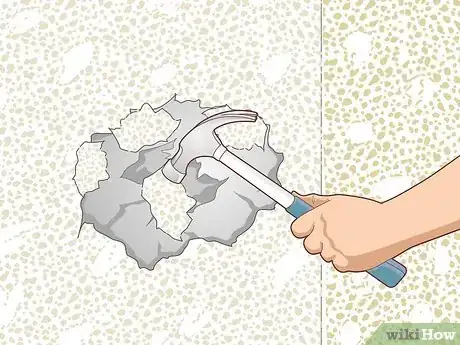
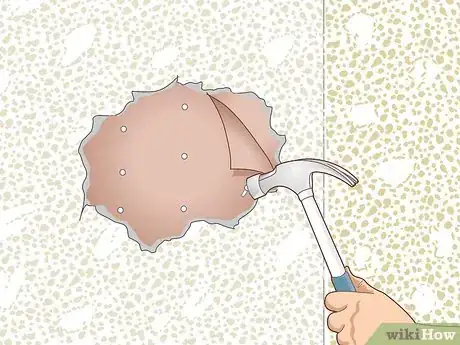
1Break away loose chunks of stucco with a hammer. Whack away at the loosest pieces of stucco using the head of the hammer until they fall to the ground. Use the claw end of the hammer to pry away any peeling and damaged pieces that you can’t knock off.[1]
- This applies to repairing stucco that is severely cracking, buckling, or blistering, causing it to loosen and peel away from the wall. If there are just minor cracks in the stucco, you can fill them with stucco repair caulk.
- Be careful not to damage any of the wood laths beneath the stucco, which are the wooden strips that hold the stucco in place.
Warning: Wear eye protection when you are removing the loose stucco so you don’t get any debris in your eyes.
-
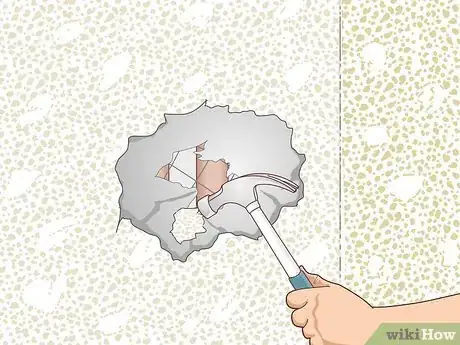
2Chip away all the loose stucco from the edges of the damaged area. Keep using your hammer to chip and pry loose stucco off the wall all the way around the edges of the peeling area.[2] Stop when you reach stucco that is firmly adhered to the wood laths underneath.[3]
- Removing all the loose and damaged stucco will leave you with a hole surrounded by stucco that is still good so you can create a solid patch and prevent further damage.
Advertisement -
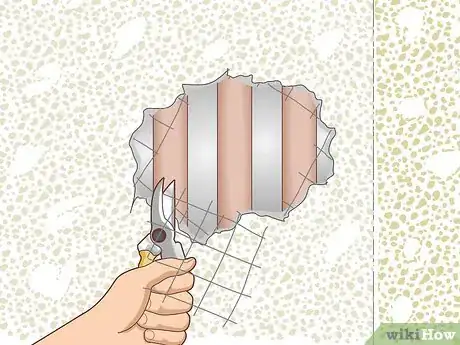
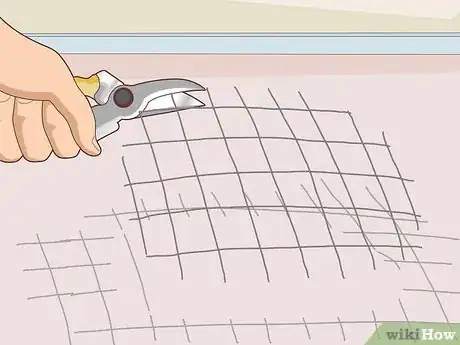
3Cut away any metal mesh from the hole using metal snips. Metal snips are a type of shears for cutting through various types of metal. Use a pair of these to clip the mesh around the edges of the hole until you can remove a whole piece of it. Take the mesh out of the hole to expose the wood laths underneath.[4]
- This will allow you to add waterproofing to the wood laths to prevent water damage, which is usually the reason stucco separates from a wall.
- If the construction is old, there might not be any mesh, in which case you can skip this step.
-
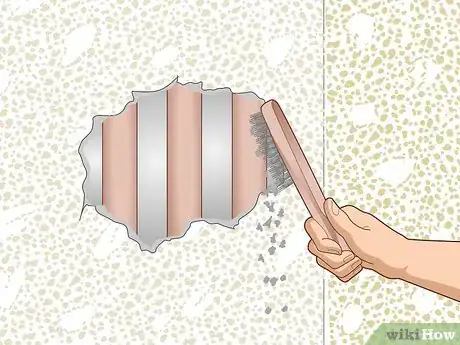
4Use a wire brush to clear loose debris out of the hole. Firmly brush the hole out using horizontal and vertical strokes in all directions. Stop when there are no more loose pieces of stucco inside the hole.[5]
- This will clean off the surface so you can properly waterproof it.
Adding Builder’s Paper and Mesh
-
1Trim a piece of grade-D builder’s paper to fit the hole using a utility knife. Hold a piece of builder's paper up to the hole in the stucco and trace the outline of the hole. Carefully cut the paper with a utility knife so it fits tightly inside the hole and the edges of the paper meet the edges of the old stucco that is still good.[6]
- Builder’s paper is Kraft paper that is saturated with waterproofing asphalt. It will create a waterproof layer between the wood laths and the stucco to prevent future peeling.
-
2Attach the builder’s paper to the wood laths with roofing nails. Hold the builder’s paper in the hole tightly against the wood laths. Hammer in as many roofing nails as you need to fasten it securely to the wood laths inside the hole.[7]
- Roofing nails are galvanized and highly rust-resistant, which makes them ideal for attaching the builder’s paper to the wood laths.
-
3Repeat the process to add another layer of builder’s paper in the hole. Use your utility knife to trim another sheet of grade-D builder’s paper to fit tightly in the hole. Fasten it in place using roofing nails.[8]
- This will ensure that the waterproofing is very tightly sealed and durable.
-
4Trim a piece of galvanized metal lath to fit in the hole using metal snips. Hold a sheet of galvanized metal lath over the hole. Snip the ribs in the metal lath around the edges of the hole to shape it so it will fit tightly in the hole on top of the carpenter’s paper.[9]
- Galvanized metal lath is a type of rust-resistant metal mesh used for stuccoing. It helps hold the stucco securely in place.
-
5Fasten the metal lath on top of the carpenter’s paper with roofing nails. Place the mesh into the hole on top of the carpenter’s paper. Use your hammer to drive roofing nails through the mesh and the paper below it into the wood laths to secure it in place.[10]
- Position the nails so that the head of each nail partially covers some of the ribs in the mesh to fasten it securely.
Patching the Hole with Base Coats
-
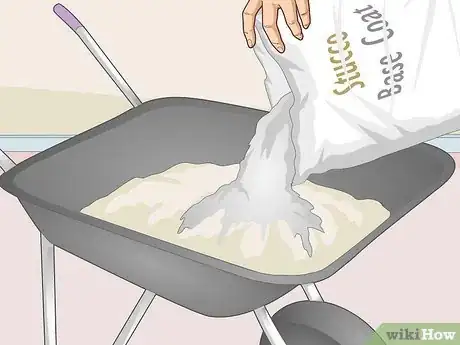
1Mix a batch of base coat stucco in a wheelbarrow. Combine 1 part plastic cement with 3 parts masonry sand in a wheelbarrow. Blend the dry ingredients together thoroughly with a mason’s hoe, then stir in water a little at a time until it is the consistency of pudding.[11]
- There are many different stucco recipes. Feel free to use a different one if you already have your own recipe you like.
- You can also purchase a pre-mixed stucco base coat and just add the water to it.
-
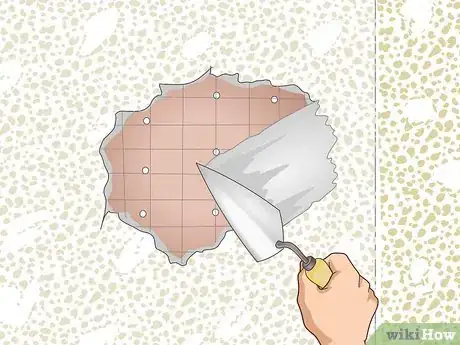
2Slap stucco onto the wire mesh using a brick trowel.[12] Scoop up approximately fist-sized scoops of the stucco on a brick trowel. Sling them onto the galvanized metal lath until it is completely covered with a nice patch.[13]
- A brick trowel is the kind of trowel that has a pointy, spade-shaped blade.
-
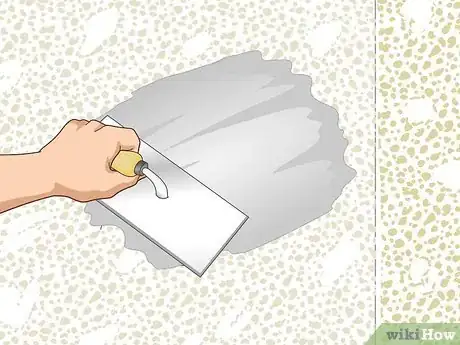
3Smooth the base layer stucco out using a finishing trowel. Pack the stucco down with a finishing trowel. Drag the trowel out towards the edges to smooth out the stucco and pack it down until the base layer is about 1⁄2 in (1.3 cm) lower than the surrounding old stucco.[14]
- A finishing trowel is a large, flat, rectangular trowel with a handle on the back.
- You can alternate between using the brick trowel and finishing trowel as you smooth the stucco out. Do whatever is easiest and most comfortable for you.
-
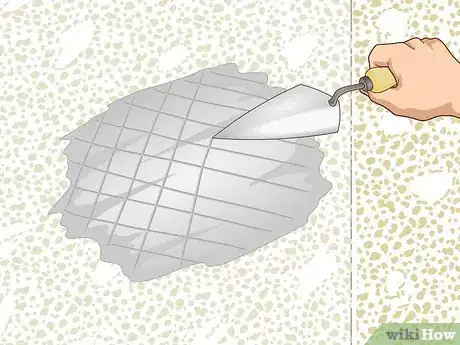
4Scratch the surface of the stucco using a trowel when it isn’t shiny anymore. Wait until the smooth stucco starts to lose it’s wet-looking sheen, which can take from 30-90 minutes. Use the edge of a trowel to score the surface all over with long lines or X-shaped marks.[15]
- This will help the next layer bond to the base layer better.
-
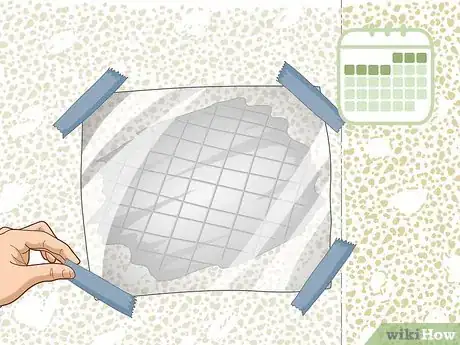
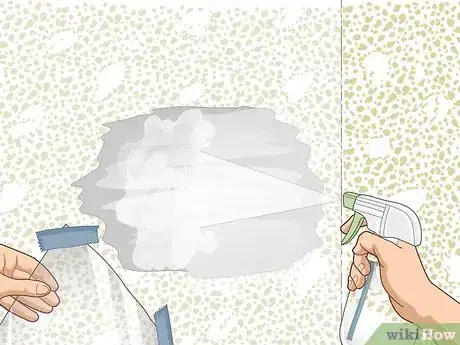
5Cover the base layer with plastic for 7 days. Tape a sheet of plastic over the patched area and let it cure for 7 days. Remove the plastic after a week, mist it with water, and proceed.[16]
- The plastic keeps the moisture in the base layer from evaporating too fast, which can weaken the stucco.
-
6Repeat the process to add another layer of base layer stucco. Mix up another batch of base coat stucco using the exact same recipe you did for the first. Apply it using your brick trowel, then pack it down and smooth it out until it is just barely lower than the edges of the surrounding stucco using your finishing trowel. Score the surface of the second coat when it loses its wet sheen, then tape plastic over it again, but leave it for just 3 days.[17]
- Adding stucco in 3 layers will ensure that it cures properly so it’s strong and long-lasting.
Applying the Finish Coat
-
1Remove the plastic sheet after 3 days and mist the second coat. Let the second coat of stucco cure for just 3 days this time. Take off the plastic sheet after 3 days, mist it with water to moisten it, and proceed.[18]
-
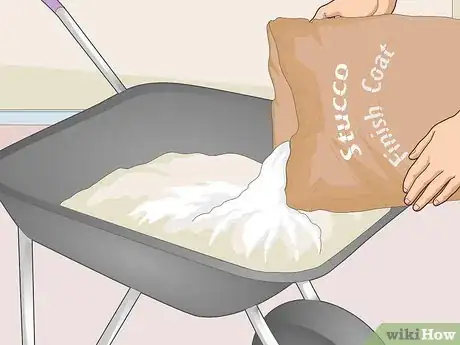
2Mix a batch of finish coat stucco in your wheelbarrow. Pour 1 part plastic cement and 4 parts masonry sand into a wheelbarrow and blend everything together with a mason’s hoe. Add water a little at a time, stirring as you go, until it is a pudding-like consistency.[19]
- You can use a pre-mixed stucco finish coat if you want and just add water. The finish coat just has more sand than the base coat.
-
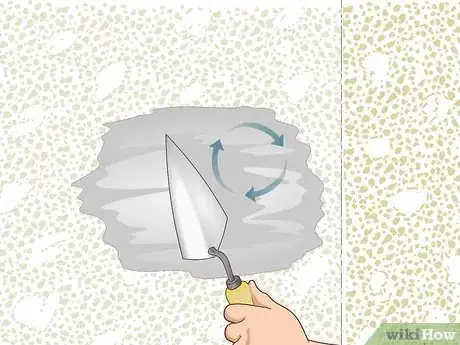
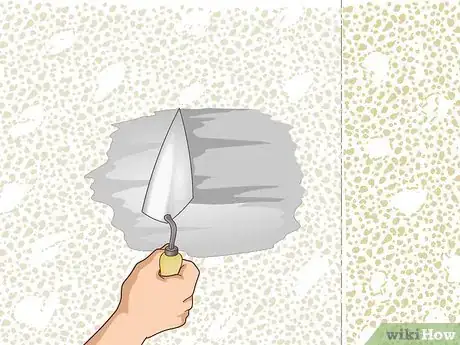
3Apply the finish coat using your brick trowel. Fill the patch in with the finish coat stucco up to the level of the surrounding old stucco.[20] Smooth it out and blend it in around the edges by dragging your trowel out across the surrounding stucco.[21]
- Stucco can have many different textures, so you can experiment to give the finish coat the look that you want. For example, if the old stucco has prominent blobs of texture, try scooping up tiny bits of stucco on the tip of your trowel and flicking them against the patch to give it more texture.
-
4Wait 60-90 days before painting the patched stucco. The average drying time for stucco is 90 days, but it may dry faster if the conditions are warm and dry. Wait at least 60 days if you are in a hot, dry climate, and about 90 days if you are in a humid or cold and moist climate.[22]
- Even if the stucco feels dry and hard to the touch, it can still be in the process of curing. The drying process goes very slowly, which is what makes stucco durable, so don’t rush into painting it.
Expert Q&A
-
QuestionHow do I clean the repaired area if it gets dirty?
 Dario RagnoloDario Ragnolo is the Owner and Founder of Tidy Town Cleaning, a home cleaning service in Los Angeles, California. His business specializes in residential & commercial cleaning. He is a second generation home cleaning expert, who grew up around his parents cleaning business in Italy.
House Cleaning Professional I'd use a mild detergent and a cloth to wipe the area clean. If that doesn't work, use a garden hose to spray it down.
 -
QuestionCan I use a pressure washer to clean stucco?
 Dario RagnoloDario Ragnolo is the Owner and Founder of Tidy Town Cleaning, a home cleaning service in Los Angeles, California. His business specializes in residential & commercial cleaning. He is a second generation home cleaning expert, who grew up around his parents cleaning business in Italy.
House Cleaning Professional I personally wouldn't recommend it. Too much pressure can damage stucco and cause it to crack, so you're probably better off just using a regular hose.
 -
QuestionIs cracked stucco really a big deal?
 Dario RagnoloDario Ragnolo is the Owner and Founder of Tidy Town Cleaning, a home cleaning service in Los Angeles, California. His business specializes in residential & commercial cleaning. He is a second generation home cleaning expert, who grew up around his parents cleaning business in Italy.
House Cleaning Professional Yes, unfortunately it's one of those things you should absolutely address. If stucco gets too cracked, it will start to fall off in chunks. You really should contact a professional to restore the wall if it's too big of a job for you to handle on your own.
Warnings
- Put on safety glasses or goggles before you start to remove the loose stucco.⧼thumbs_response⧽
Things You’ll Need
Preparing the Area
- Hammer
- Metal snips
- Wire brush
- Protective eyewear
Waterproofing and Meshing
- Utility knife
- Grade-D builder’s paper
- Galvanized metal lath
- Roofing nails
- Hammer
Stuccoing
- Wheelbarrow
- Mason’s hoe
- Brick trowel
- Finishing trowel
- Plastic cement
- Masonry sand
- Water
- Plastic sheet
- Tape
References
- ↑ https://www.bobvila.com/articles/how-to-repair-stucco/
- ↑ Ryaan Tuttle. Home Improvement Specialist. Expert Interview. 24 September 2021.
- ↑ https://www.thisoldhouse.com/siding/21016528/how-to-repair-stucco
- ↑ https://www.thisoldhouse.com/siding/21016528/how-to-repair-stucco
- ↑ https://www.bobvila.com/articles/how-to-repair-stucco/
- ↑ https://www.thisoldhouse.com/siding/21016528/how-to-repair-stucco
- ↑ https://www.thisoldhouse.com/siding/21016528/how-to-repair-stucco
- ↑ https://www.thisoldhouse.com/siding/21016528/how-to-repair-stucco
- ↑ https://www.thisoldhouse.com/siding/21016528/how-to-repair-stucco
- ↑ https://www.thisoldhouse.com/siding/21016528/how-to-repair-stucco
- ↑ https://thestuccoguy.com/mix-stucco-base-coat/
- ↑ Ryaan Tuttle. Home Improvement Specialist. Expert Interview. 24 September 2021.
- ↑ https://www.thisoldhouse.com/siding/21016528/how-to-repair-stucco
- ↑ https://www.thisoldhouse.com/siding/21016528/how-to-repair-stucco
- ↑ https://www.thisoldhouse.com/siding/21016528/how-to-repair-stucco
- ↑ https://homesteady.com/way-5692288-long-stucco-color-coat-dry-.html
- ↑ https://www.thisoldhouse.com/siding/21016528/how-to-repair-stucco
- ↑ https://www.thisoldhouse.com/siding/21016528/how-to-repair-stucco
- ↑ https://thestuccoguy.com/mix-stucco-base-coat/
- ↑ Ryaan Tuttle. Home Improvement Specialist. Expert Interview. 24 September 2021.
- ↑ https://www.thisoldhouse.com/siding/21016528/how-to-repair-stucco
- ↑ https://homesteady.com/way-5692288-long-stucco-color-coat-dry-.html
