This article was co-authored by wikiHow staff writer, Darlene Antonelli, MA. Darlene Antonelli is a Technology Writer and Editor for wikiHow. Darlene has experience teaching college courses, writing technology-related articles, and working hands-on in the technology field. She earned an MA in Writing from Rowan University in 2012 and wrote her thesis on online communities and the personalities curated in such communities.
Learn more...
Do you see an error that "AmpleApp is controlling this setting" whenever you try to change your search engine? AmpleApp is malware that will change your browser search engines (this includes Safari, Chrome, and Firefox) and home page to something random, like search.available.mac. Not only can AmpleApp redirect your browser to unsafe search results that put you and your data at risk, but it can also constantly crash your browser. This wikiHow article walks you through the process of getting rid of AmpleApp from your Mac so it's not a daunting task.
Things You Should Know
- Getting malware can be scary, but this guide aims to make removing AmpleApp from your Mac a clear process.
- If you opt to get rid of the malware manually, make sure to remove suspicious login items, extensions, files, and apps, then reset your original browser settings.
- Use software like Malwarebytes to easily remove all the malware from your Mac or after you've removed AmpleApp manually, just to make sure you got rid of everything.
Steps
Uninstalling AmpleApp from Applications
-
1Open Finder. You can press Cmd + N to open a new Finder window if you're not in another program, or you can click the Finder icon in the Dock.
- Automate this process by using an anti-malware program like Malwarebytes to get rid of the malware. If you use something like Malwarebytes, you'll only need to make the changes in your web browser instead of deleting everything else from your computer since the software does that part for you.
-
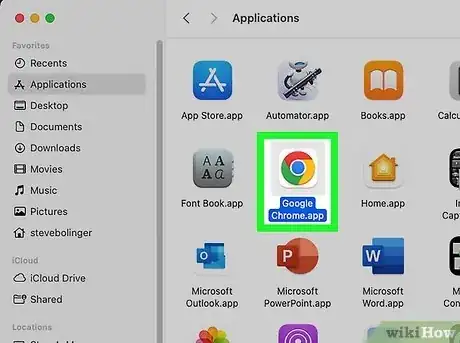
2Navigate to Applications. When you open Finder, you can click Applications in the panel on the left or you can click Go in the menu at the top of your screen and select Applications.Advertisement
-
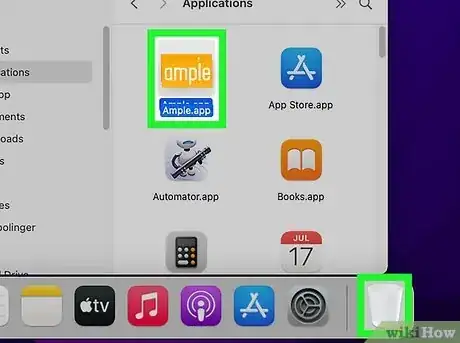
3Delete the AmpleApp application. To do this, drag it from the "Applications" window to the trash can icon.
- Repeat this for any app that you don't remember installing. AmpleApp may have installed other software.
-
4Empty the trash. To finalize your uninstall, right-click the Trash and select Empty Trash.
Deleting Suspicious Extensions
-
1Open your web browser. You'll open whichever one you discovered the malware on, be it Chrome, Safari, or Firefox.
-
2Navigate to your extensions. The steps vary for each web browser:
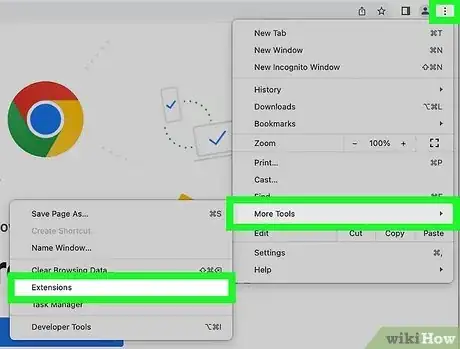
- For Chrome, click ⋮ > More tools > Extensions.
- For Safari, click Safari in the Apple menu, then choose Extensions.
- For Firefox, press Shift + Ctrl + A or click ☰ > Add-ons.
-
3Find the AmpleApp extension and click Remove. There may be more extensions, like "Ask App for Free Games" that are there that you don't remember installing. Remove those as well as AmpleApp.
Deleting Suspicious Files
-
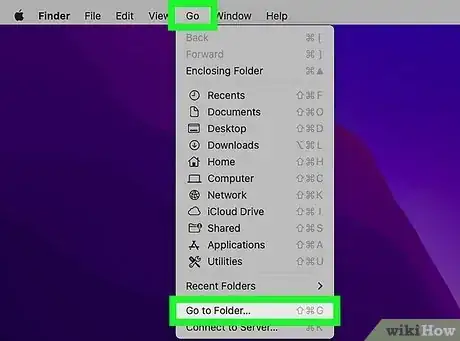
1Click Go and select Go to Folder. The Go menu is in the menu bar at the top of your screen as long as you don't have any other apps open.
- If you have Finder open, you can use the keyboard shortcut Cmd + Shift + G to open a new folder.
-
2Enter "/Library/LaunchAgents" and click Go. This will bring you to the LaunchAgents folder.
-
3Delete any unfamiliar and suspicious files. Make sure that the files you trash are malicious since deleting important files could make your Mac run slower or not work. Common malware file names include:
- com.AmpleApp
- unknown.download.plist
- unknown.ltvbit.plist
- unknown.update.plist
- While many "unknown" file names may reflect something different, you might see something like "AmpleApp Daemon."
-
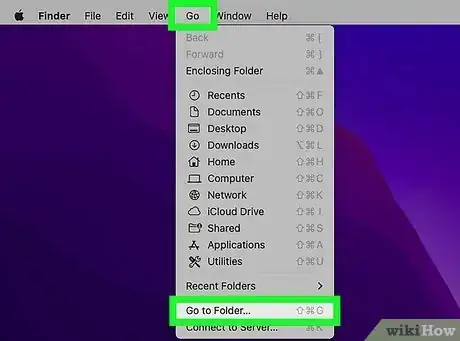
4Click Go and select Go to Folder. The Go menu is in the menu bar at the top of your screen as long as you don't have any other apps open.
- If you have Finder open, you can use the keyboard shortcut Cmd + Shift + G instead.
-
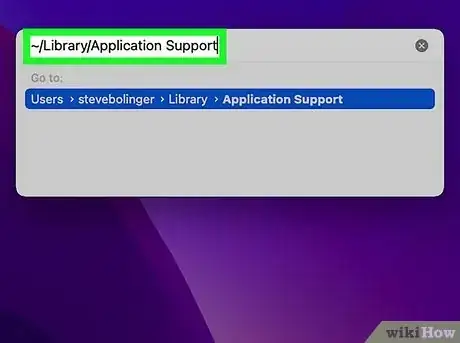
5Enter "~/Library/Application Support" and click Go. You'll be directed to the "Application Support" folder.
-
6Delete any unfamiliar or suspicious folders. The best tip for this is to look for folders that were created more recently (press Cmd + Opt + 4 to list the folders and files by date) and have names that aren't related to Apple products that you've installed, like SystemSpecial, ProgressSite, or IdeaShared. They can also be similar to the files you deleted before.
- Drag and drop any malicious folders into the Trash to delete them.
-
7Click Go and select Go to Folder. The Go menu is in the menu bar at the top of your screen as long as you don't have any other apps open.
- If you have Finder open, you can use the keyboard shortcut Cmd + Shift + G instead.
-
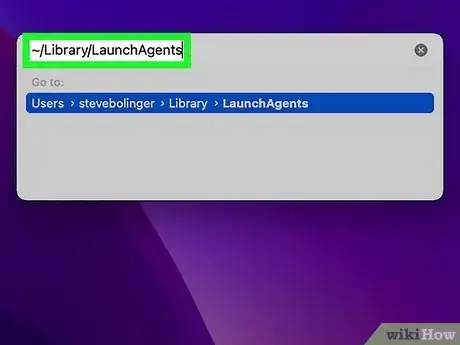
8Enter "~/Library/LaunchAgents" and click Go. You'll be directed to the "LaunchAgents" folder in your local directory.
-
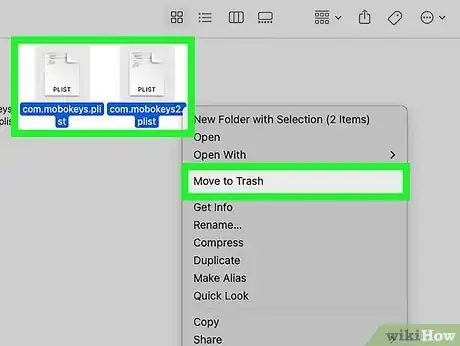
9Delete unfamiliar or suspicious files. Again, these are files that will somehow relate to the Skilled Marketing malware and don't seem relevant to any Apple products that you've installed on your Mac.
- Drag and drop any malicious files into the Trash to delete them. Make sure that the files you put here are malicious (a quick Google search will let you know if the folder is bad) since deleting important files could make your Mac run slower or not work at all.
-
10Click Go and select Go to Folder. The Go menu is in the menu bar at the top of your screen as long as you don't have any other apps open.
- If you have Finder open, you can use the keyboard shortcut Cmd + Shift + G instead.
-
11Enter "/Library/LaunchDaemons" and click Go. You'll be directed to the "LaunchDaemons" folder in your library.
-
12Delete any unfamiliar or suspicious files you find here. These are files that will somehow relate to the redirect virus and don't seem relevant to any Apple products that you've installed on your Mac. They can have names like, "com.pplauncher.plist," "com.startup.plist," and "com.ExpertModuleSearchDaemon.plist."
- Drag and drop any malicious files into the Trash to delete them.
- Some apps may require you to enter your Mac admin password to move it to the Trash.
- If you get a "You do not have permission to do that" error, then you probably need to use Activity Monitor to stop its process first before you can delete its files.
- Make sure to empty the Trash to permanently delete those files. To do this, click and hold the Trash icon and select Empty Trash.
Resetting Your Browsers Homepage and Search Engine
-
1Open your web browser. Now that you've deleted all the files associated with the malicious app, you can reset your browser's settings without the fear of them reverting to the hijacked settings.
-
2Reset your default search engine and home page. These steps are a little different for each web browser:
- For Chrome, click ⋮ > Settings > Search engine and click the drop-down next to "Search engine" to set your preferred search engine. Then, click On startup and set your preferred Homepage. You'll see this in the panel on the left side of the page. You can opt to start Chrome on a new tab, where you left off, or on a specific page or set of pages.
- For Safari, go to Preferences > Default Search Engine and select your preferred search engine, like Google. Under "Homepage," make sure you change your preferences and remove AmpleApp settings.
- For Firefox, go to Preferences and change the "Show your home page" settings under "Startup." Replace the AmpleApp URL, then click Search in the panel on the left. Under "Default Search Engine," choose a search engine and click Remove next to any that you don't want.
- If you're getting an error that your profile doesn't have administrative privileges to do this, then you need to delete any profiles that AmpleApp may have created. In that case, quit any running applications and open "System Preferences" (click the Apple icon in the menu bar or tap the icon in the Dock). Click Profiles, then look for any suspicious profiles that you didn't create (they can be called AmpleApp or AdminPrefs). Click that profile to select it, then click the - button at the bottom of the panel. With that profile deleted, you'll be able to make any browser changes that you were unable to complete.
-
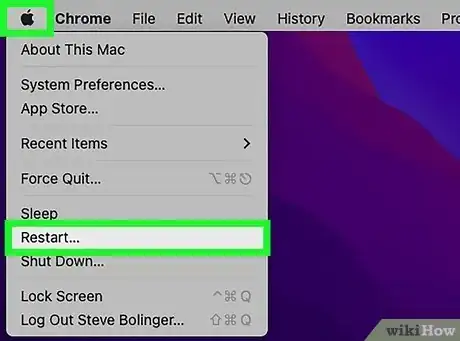
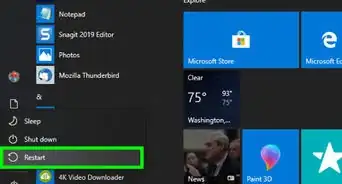
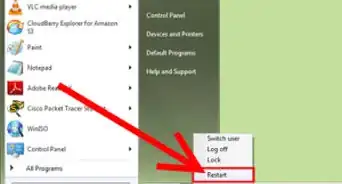
3Restart your computer. After you've finished uninstalling everything, you need to restart.
- Be completely sure you've gotten rid of the malware by running a scan with anti-malware software.


