This article was co-authored by wikiHow Staff. Our trained team of editors and researchers validate articles for accuracy and comprehensiveness. wikiHow's Content Management Team carefully monitors the work from our editorial staff to ensure that each article is backed by trusted research and meets our high quality standards.
This article has been viewed 13,059 times.
Learn more...
Crochet charts, also known as diagrams, can be helpful additions to a crochet pattern, especially if the pattern is a complex one. However, if you have never read a crochet chart before, then you may be wondering what all of the symbols on it mean. Crochet charts feature many symbols that represent different stitches. Some of these symbols also indicate where to place your stitches. As long as you have some basic to intermediate crochet skills, learning how to read and use a crochet chart will be easy.
Steps
Identifying Common Crochet Chart Symbols
-
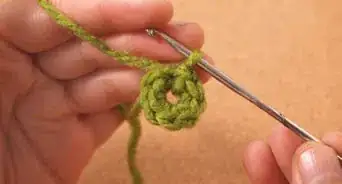
1Look for an oval shape for a chain stitch. The chain stitch is represented by a shape that looks similar to an oval or wide “O” shape. When you see this symbol, make a chain.[1]
- Each oval shape represents 1 chain stitch, so you may need to make multiple chains depending on the number of oval shapes you see in the diagram.
-
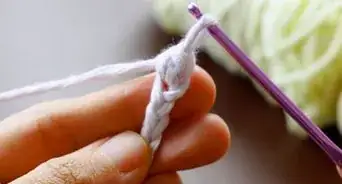
2Watch for a dot for a slipstitch. A slipstitch is represented by a thick dot. Whenever you see a thick dot, make a slipstitch.[2]
- More than one dot would indicate more than one slipstitch. Make the indicated number of slip stitches.
Advertisement -
3Interpret a plus sign or an X as a single crochet stitch. Diagrams may show single crochet stitches as either a plus sign or an X, so watch for both of these symbols. Each time you see a plus sign or an X, make a single crochet stitch.[3]
-
4Look for T symbol variations for different double crochet stitches. There are several variations of the double crochet stitch and they are all represented with a T shape with or without slashes. The slashes represent the number of yarn overs that you need to do at the beginning of the stitch, and the number of yarn overs changes the type of stitch you are completing.[4] The variations of this symbol include:[5]
- T with no slashes indicates a half double crochet stitch.
- T with a slash through the vertical line is a double crochet stitch.
- T with two slashes through the vertical line indicates a treble crochet stitch.
- T with three slashes through the vertical line is a double treble crochet stitch.
-
5Watch for combined symbols to know when to crochet stiches together. Crocheting stitches together, also known as decreasing, is a common technique in crochet. These types of stitches are often represented as triangular symbols in crochet diagrams. The triangular symbols are made up of the symbols that represent the stitches you need to combine. Some examples include:[6]
- 2 plus signs joined at the top to form a triangular shape indicates that you need to single crochet 2 stitches together.
- 3 plus signs joined at the top to form a triangular shape indicates that you need to single crochet 3 together.
- 2 lines with slashes through them connected in a triangular shape with a horizontal line across the top indicates that you need to double crochet 2 together.
- 3 lines with slashes through them connected in a triangular shape with a horizontal line across the top indicates that you need to double crochet 3 together.
-
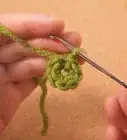
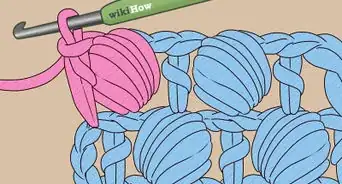
6Note any clusters, bobbles, or popcorn stitches. Clusters, bobbles, and popcorn stitches are all similar in that you work multiple stitches into one stitch space to create a puffy effect. These types of stitches will be represented as curved lines extending from a single point. Look at the curved lines to determine what type of stitches you need to create.[7]
- If the curved lines do not have slashes through them, then the stitches you will be working into one stitch space will be half double crochet stitches.
- If the lines have 1 slash through them, then the stitches you will be working into one stitch space will be double crochet stitches.
- If the lines have 2 slashes through them, then the stitches you will be working into one stitch space will be treble crochet stitches.
- If the lines have 3 slashes through them, then the stitches you will be working into one stitch space will be double treble crochet stitches.
-
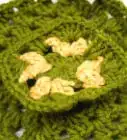
7Identify shell stitches. Shell stitches are represented as shell shapes with the number of stitches you need to create each one extending from the base of the shell. The types of stitches you need to use to create each shell will be represented as well.[8]
- For example, you might come across a shell stitch that is represented by 5 T shapes with slashes through them. This means that you will need to use 5 double crochet stitches to create the shell.


Determining Where to Place Stitches
-
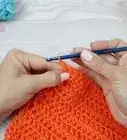
1Work the stitch through both loops if there is no indicator. For some crochet charts, you will not see an indicator. This usually means that you will be working the stitch through both loops instead of the front or the back loop only. However, it is a good idea to check your pattern’s written instructions if you are unsure.[9]
-
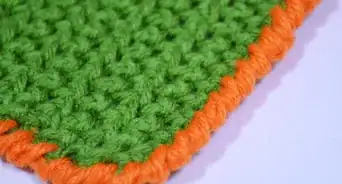
2Look for a rainbow symbol for back loop stitches. Working into the back loop is a common practice in crochet. This is the loop that is furthest away from you when you are holding your crochet project. If you need to work a stitch into the back loop only, then you will see a symbol that looks like rainbow or an upside down U shape.[10]
-
3Note a U shaped symbol for front loop stitches. If you spot a U shape, then you need to work the stitch into the front loop of your project. This is the loop that is closest to you when you are holding your crocheted piece.[11]


Getting the Best Results
-
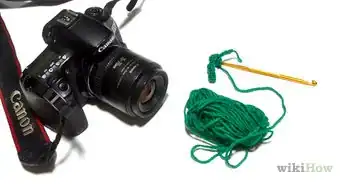
1Develop your crocheting skills before using crochet charts. Crochet charts are not ideal for first time crocheters. Charts are usually included with complex crochet patterns as a way to clarify the design. They may be highly confusing for someone who is new to crochet for this reason. Before you dive into using crochet charts, develop your knowledge of crochet stitches and techniques as much as possible.
-
2Refer to written instructions in conjunction with a chart. Crochet charts are not meant to completely replace written instructions. The chart is a complement to the written instructions.[12] Make sure that you read the instructions for your pattern as well as the chart to determine how to complete your project.
-
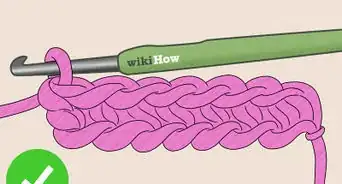
3Read the chart starting from the bottom. Crochet charts are meant to be read from the bottom to the top. Work the rows in the same fashion as you would crochet them: start at one end, work across the row, then go up to the next row and work across that row in the opposite direction as the first row. In other words, you will be working from the bottom to the top of the chart in a zigzag fashion.[13]
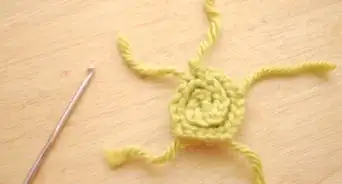
- The only exception to this rule is patterns that need to be worked in the round. For a pattern that is worked in the round, start at the center of the chart and work around in a counterclockwise fashion or as indicated by the chart.[14]
- Some charts also include numbers and arrows to help you know where to begin crocheting and how to progress. You may see these numbers and/or arrows on the ends of the chart or within the spirals for a pattern that you work in the round.


Community Q&A
-
QuestionWhat does a triangle mean on a crochet chart?Step 5 of the article has the nearest symbols to the triangle. It is usually detailed on the glossary of the stitches as to which stitch is being used. You can match the stitch with the photo of the completed item if it is available. Without seeing the chart, it is difficult to determine the meaning of the triangle. Ask at your local yarn store for help if they offer crochet classes.
References
- ↑ https://www.craftyarncouncil.com/chart_crochet.html
- ↑ https://www.craftyarncouncil.com/chart_crochet.html
- ↑ https://www.craftyarncouncil.com/chart_crochet.html
- ↑ http://www.redheart.com/how-to/articles/how-read-crochet-symbol-charts
- ↑ https://www.craftyarncouncil.com/chart_crochet.html
- ↑ https://www.craftyarncouncil.com/chart_crochet.html
- ↑ https://www.craftyarncouncil.com/chart_crochet.html
- ↑ https://www.craftyarncouncil.com/chart_crochet.html
- ↑ https://www.craftyarncouncil.com/chart_crochet.html
- ↑ https://www.craftyarncouncil.com/chart_crochet.html
- ↑ https://www.craftyarncouncil.com/chart_crochet.html
- ↑ https://www.craftsy.com/blog/2014/11/making-sense-of-crochet-diagrams/
- ↑ http://www.craftyminx.com/2011/11/crochet-school-lesson-21-reading-crochet-charts.html
- ↑ https://www.craftsy.com/blog/2014/11/making-sense-of-crochet-diagrams/
About This Article

If you want to learn how to read a crochet chart, start by familiarizing yourself with the most common symbols, like an oval for a chain stitch and a dot for a slip stitch. When you're working on a row, insert different types of stitches in the right place by doing a single crochet stitch when you see a plus or X and a double crochet stitch when you spot a T symbol. If you're struggling to understand something, try referring to written instructions for your design. For tips on how to identify other types of stitches, such as shell stitches and popcorn stitches, read on!