This article was co-authored by wikiHow Staff. Our trained team of editors and researchers validate articles for accuracy and comprehensiveness. wikiHow's Content Management Team carefully monitors the work from our editorial staff to ensure that each article is backed by trusted research and meets our high quality standards.
This article has been viewed 89,124 times.
Learn more...
Once you learn how to crochet, you will need to learn how to read crochet patterns, or guides to crocheting all sorts of items. Some crochet patterns are designed for those beginning to crochet, while other patterns are designed for those who crochet at a more advanced level. Following certain steps will help you learn to read a crochet pattern. Then you can decide if a pattern is one you'd like to attempt crocheting.
Steps
Reviewing Basic Pattern Information
-
1Read the title of the crochet pattern. While it may seem too obvious, the title is the first step in determining if this is a crochet pattern you want to try. The title will let you know if the pattern is for a scarf, a blanket or some other item. Sometimes, the title may also offer you clues to the difficulty of the pattern.
-
2Check the pattern's difficulty. Examine the pattern to determine if it is designed for beginner, intermediate or advanced-level crocheters. The difficulty is usually listed under the title. There is no reason to read through a pattern that is advanced if you are just beginning to learn to crochet.Advertisement
-
3Determine the size of the finished project. Look to see what the finished measurements of the project will be. If it is a pattern for some type of wearable garment, the sizes that are available from this pattern will be listed.
-
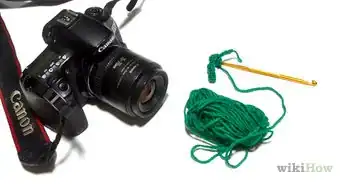
4Review the list of materials. Your pattern will tell you what type of yarn can be used and what the weight of the yarn should be. It will also tell you how much yarn you will need to complete the project. The crochet pattern will even tell you what size crochet hook to buy and if there are any other materials you will need to complete the project.


Reading Pattern Details
-
1Check your gauge. Gauge refers to amount of crocheted fabric that a specific hook size and yarn type will create. While the gauge is less important if you have an unending supply of yarn and aren't worried about the size of your completed project, most of the time you need to be aware of the size of your crochet stitches.
- To check your gauge, crochet a swatch approximately 4 inches (10.2 cm) by 4 inches in the stitch pattern listed in the crochet instructions. If your gauge is larger than the gauge indicated in the pattern, try a smaller hook. If your gauge is smaller, try a larger hook.
-
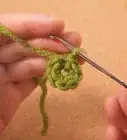
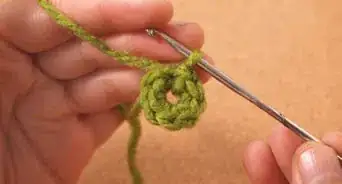
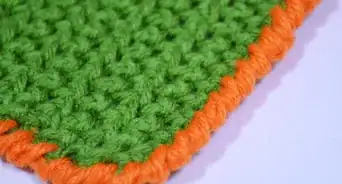
2Identify any special terms or stitches that are used by this pattern. These are usually listed before the actual pattern begins. You can look for tutorials on the Internet for any stitches you may be unfamiliar with. The basic stitch types include:[1]
- chain
- slip stich
- single crochet
- half double crochet
- double crochet
- triple crochet
-
3
-
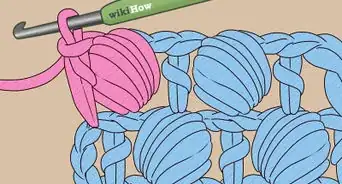
4Repeat steps when you encounter an asterisk. It is common to encounter asterisks (*) in crochet patterns, so you need to know what they mean. Asterisks indicate that the steps provided need to be repeated in order until you reach the end of the row.[5]
- For example, if you encounter instructions for a row that read: “Hdc in next 6 sts; *dc 2, sl st, dc in next st; rep from * to end,” then you will know that the instructions that follow the asterisk need to be repeated in order until you get to the end of the row.


Following the Pattern
-
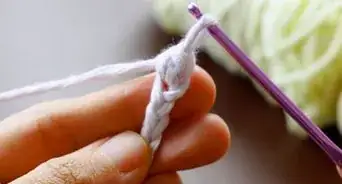
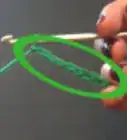
1Begin by tying a slip knot. Regardless what pattern you are crocheting, the first step is to make a slip knot on your hook. The pattern likely doesn't tell you to start with a slip knot, it's assumed you already know where to begin.[6]
- Make a loop with the end of the yarn, and slip the loop onto the crochet hook.
- Wrap the yarn back over the crochet hook, and once again pull the yarn through the loop.[7]
- Pull your crochet hook up with one hand while holding the other two ends of yarn to tie the slipknot tight.
-
2Follow the steps of the pattern. The steps will begin by telling you how many chains to make. Then, the steps will be listed in order by number of rows or rounds. You will crochet Row 1 followed by Row 2, Row 3 and so on. Keep crocheting rows or rounds until you complete the project.
- All crochet patterns begin with a foundation chain. The foundation chain could be long, as for an afghan, or short, as for a motif that begins as a circle.[8]
- A pattern may be worked in rows back and forth to form a flat piece such as an afghan, or in rounds worked around to form a tube with no seams, such as in a hat.[9]
- If the pattern directs you to turn the piece, flip it over so you are working from the opposite end. For example, you might keep the top side in the same position and switch the left end with the right end, flipping the top over.[10]
-
3Notice the number of stitches given at the end of the rows or rounds. This number lets you know how many stitches you should be crocheting. You may need to add or drop a stitch to get back on track with the pattern.
- It is a good idea to count your stitches once every 10 rows or so, just to make sure that you are on track with the pattern.
-
4Keep track of your rows. To stay on track with a pattern, it is important to keep track of the row that you are on by using a row counter, an app, or writing down your current row on a piece of paper.
- Row counters fit right on the end of your hook and you will just need to click it forward each time you complete a row.
- Apps are available to help you keep track of your rows as well. To keep track of your rows using an app, you will need to tap the screen every time you finish a row.
- Pen and paper also work well for keeping track of your rows. You can simply write down your row number on the paper after you finish each row.
-
5Refer to the finishing steps at the end of the pattern. As you get ready to complete your project, check the finishing steps provided in your pattern to determine if the project needs to be sewn together or blocked. The finishing steps will often advise you about how to add accessories as well, such as buttons or ribbon.


Community Q&A
-
QuestionHow do I read the brackets in crochet patterns?
 Community AnswerBrackets are usually different sizes. For instance, you might be crocheting a small size needing chain 8. In the brackets, it might show (14, 22, 30), which would indicate chain 14 for medium, or chain 22 for large, or chain 30 for extra-large. It usually states this in the instructions, so ALWAYS read that part first.
 -
QuestionWhat does skip first Trc mean?
 Lisa RobsonCommunity AnswerIt means skip the first Trc or treble crochet.
 -
QuestionWhat does it mean when it says to repeat rows three and four 4 times?
 Community AnswerIt means literally what it says. Repeat them in the next four rows. So, for example,... 3,4,3,4. Unless it says to repeat row three four times, THEN repeat row four four times. In that case it would look like 3,3,3,3, 4,4,4,4.
References
- ↑ http://www.craftyarncouncil.com/tip_crochet.html
- ↑ http://www.craftyarncouncil.com/tip_crochet.html
- ↑ http://www.crochetspot.com/how-to-read-crochet-patterns/
- ↑ http://www.craftyarncouncil.com/tip_crochet.html
- ↑ http://www.craftyarncouncil.com/tip_crochet.html
- ↑ http://www.craftyarncouncil.com/tip_crochet.html
- ↑ http://www.craftyarncouncil.com/tip_crochet.html
- ↑ http://www.crochetnmore.com/123readapattern.htm
- ↑ http://www.craftyarncouncil.com/tip_crochet.html
About This Article

To read a crochet pattern, keep a list of the common crocheting abbreviations and their meanings nearby since you'll need them. For example, if you come across "hdc" in the pattern, it means you should half double crochet, whereas "sl st" means you should do a slip stitch. If you encounter an asterisk in the pattern, repeat the previous steps until you get to the end of the row that you're working on. For more tips, like how to check the gauge on a crochet pattern, scroll down!


-Step-16-Version-3.webp)