This article was co-authored by Luigi Oppido and by wikiHow staff writer, Nicole Levine, MFA. Luigi Oppido is the Owner and Operator of Pleasure Point Computers in Santa Cruz, California. Luigi has over 25 years of experience in general computer repair, data recovery, virus removal, and upgrades. He is also the host of the Computer Man Show! broadcasted on KSQD covering central California for over two years.
There are 7 references cited in this article, which can be found at the bottom of the page.
The wikiHow Tech Team also followed the article's instructions and verified that they work.
This article has been viewed 81,795 times.
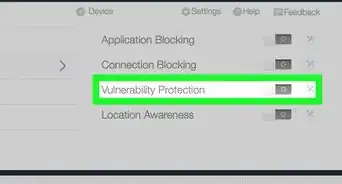
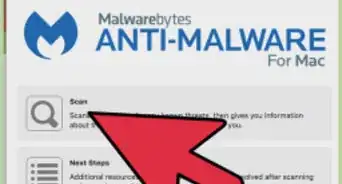
This wikiHow teaches you how to set up antivirus protection on your Windows PC or Mac. Having a robust antivirus program prevents your computer from being harmed by malicious software. Windows comes with a great antivirus software suite called Windows Security. While Macs do have built-in antivirus protection, it isn't customizable—if you want more control over your protection, install a third-party solution like Malwarebytes.
Steps
Windows Security
-
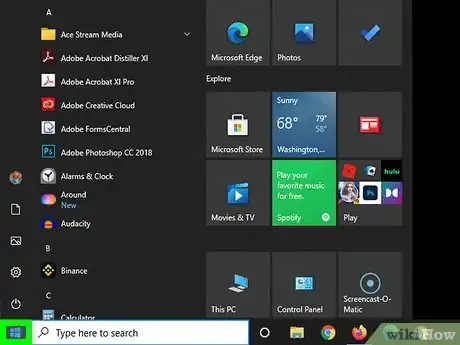
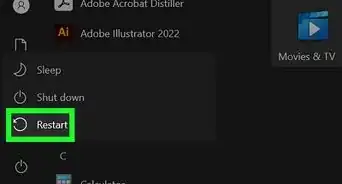
1Open the Windows Start menu . Click the Windows logo in the bottom-left corner of the screen.
- Windows Security is a fully-featured antivirus, antimalware, and firewall program that does a great job at protecting your PC. If you prefer using a different antivirus software suite, such as Malwarebytes, you can do so, but you really don't have to as long as Windows Security is running.
- If you do use a different antivirus suite, Windows Security will deactivate.[1] If you disable your third-party antivirus software, Windows Security will automatically reactivate to keep you protected.
-
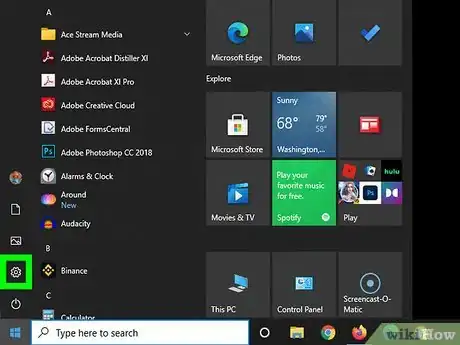
2Advertisement
-
3Click Update & security. This icon has a circle made of two arrows.
-
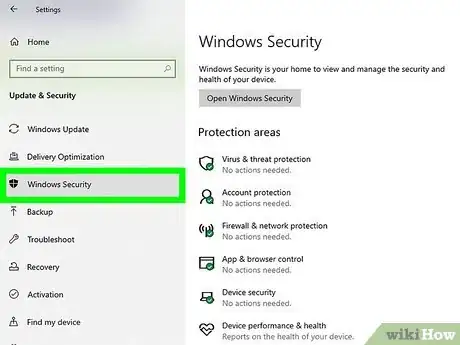
4Click Windows Security. It's a tab in the left panel. Your security settings will expand on the right side of the window.
-
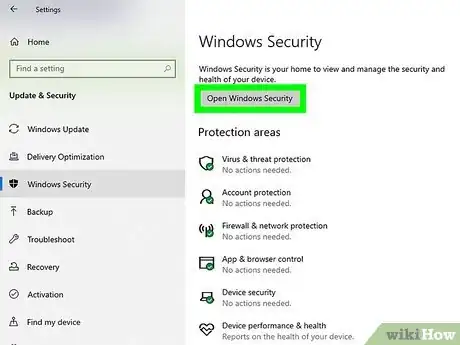
5Click Open Windows Security. It's the button at the top of the right panel. This opens the Windows built-in antivirus software in its own window.
-
6Click Virus & threat protection. This option is in the left panel. If you don't see it, click the three horizontal lines at the top-left corner of the window first.
-
7Click Manage settings. It's in the right panel under the "Virus & threat protection" settings.
-
8
-
9Enable Cloud-delivered Protection . As long as this switch is on, Windows will stay up to date on the latest viruses and threats as long as you are connected to the internet.[2]
- The next switch on the page, "Automatic sample submission," controls whether you want to anonymously submit sample files from your PC to Microsoft to keep cloud-delivered protection up to date. This is optional—you can turn the switch off if you don't want to participate, but it won't harm you either way.
-
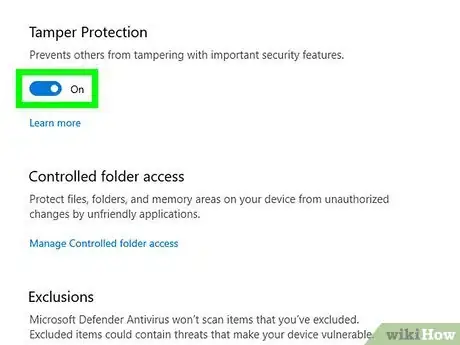
10Enable Tamper Protection . The last switch in the right panel is Tamper Protection. As long as this feature is turned on, software you install will not be able to change your Windows Security settings.[3]
-
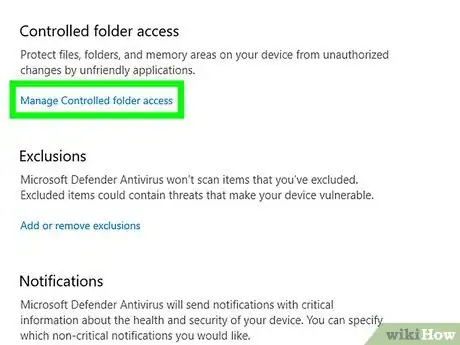
11Enable Controlled Folder Access. Click Manage Controlled folder access under "Controlled folder access" to open your settings. If the feature is disabled, tap the switch to enable it. This prevents the apps you install from making changes to folders on your computer without your permission. This is especially helpful in the case of ransomware, which is a type of malware that takes control of your personal files and demands payment before giving you access again.
-
12Click the back button twice. This takes you back to the Virus & Threat Protection screen.
-
13Run a manual virus scan (optional). Windows will always be checking your PC for viruses and malware in the background, but you can also run a quick or full virus scan at any time manually. To do so:
- Click Scan options in the "Current threats" section of the right panel.
- Select an option:
- To check common system folders where viruses may hide, select Quick Scan.
- If you'd rather scan the entire computer, select Full scan (this can take a while).
- Another option is to choose Custom scan, which allows you to scan only folders and drives you select.
- The most comprehensive way to scan for viruses is to choose the Microsoft Defender Offline Scan option, which will reboot your computer and scan for viruses offline.
- Click Scan now at the bottom to start the scan.
-
14Review the results. Windows Security will alert you if it comes across any problematic files or settings, at which point you can delete the file(s) in question or change the settings directly from within the Windows Security window.
- If Windows finds a corrupted or malicious file, it will alert you. You can then click Remove or a similar option to remove the file.
Malwarebytes for macOS
-
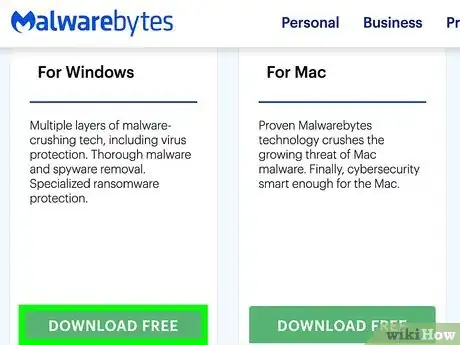
1Download Malwarebytes from https://www.malwarebytes.com/mac-download. Going to this address in your browser will automatically prompt the Malwarebytes antivirus setup file to download onto your Mac.
- If the download doesn't start automatically, click the click here link on the page to force the file to download.
- Your Mac has antivirus features built in to the operating system—Apple maintains that you can stay protected from viruses simply by keeping your system software up to date.[4] However, Malwarebytes (and AVG, Avast, Sophos, etc.) is available if you'd like to give your Mac some extra protection. Malwarebytes may catch viruses and malware that your Mac won't on its own.
-
2Double-click the Malwarebytes PKG file. You'll most likely find it in the Downloads folder that's on the left side of the Finder window.
- If you see an error that says you can't open the file due to it being from an unidentified developer, right-click the file and select Open.[5]
-
3Click Continue on the setup wizard. This starts the setup process.
-
4Agree to the licensing terms. Review the software agreement, select Continue, and then click Agree to do so.
-
5Click Install. If prompted, you will also need to enter your username and password to allow the rest of the software to download from the internet.
-
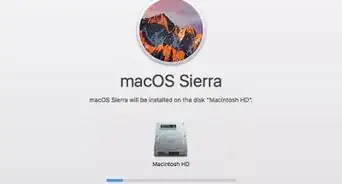
6Enter your Mac login details and click Install Software. After the files download, this action will install Malwarebytes on your Mac. When the installation is complete, click Close to close the installer. Malwarebytes will then open automatically.
-
7Click Get Started on the welcome screen. Now you'll be asked some information about your Mac.[6]
-
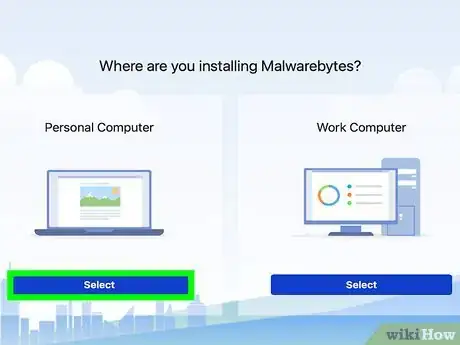
8Select your computer type and click Continue. If you are installing Malwarebytes on your own Mac, select Personal Computer. If it's a work computer, select Work Computer.
-
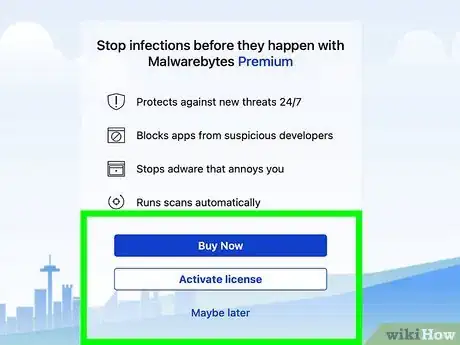
9Choose how to use Malwarebytes. Malwarebytes has free and paid options. Select the option you want, and then follow the on-screen instructions to activate.
- Use Malwarebytes Free: The free option lets you run scans when you want, but won't allow you to schedule them or use real-time protection (which is recommended).
- Purchase Premium: The premium version of Malwarebytes ensures that your Mac stays fully protected from threats at all times. You can also schedule scans to run whenever you'd like. If you choose this option, you'll need to provide payment info.
- Claim 14-day trial: This option gives you access to all premium features for 14 days. If you choose this option, you'll have to enter an email address to confirm, and then click Start Trial.
- Activate license: If you already purchased the premium version and have a license number, select this option to activate that license now.
-
10Give full disk access to Malwarebytes. Once you're ready to start using Malwarebytes, you'll need to give it permission to run on your Mac:
- Click Open preferences when prompted by Malwarebytes. This opens your System Preferences to the Security & Privacy panel.
- Click the Privacy tab if it isn't already selected.
- Scroll down the left panel and select Full Disk Access.
- Click the lock icon at the bottom.
- Enter your password and click Unlock.
- Check the box next to "Malwarebytes Protection" in the main panel.
- Click the padlock icon again to lock your settings and then close the window to return to Malwarebytes.
-
11Finish the setup process. Once you've given the app permissions, click Next, and then Next, followed by Done to close the installer. This will display the Malwarebytes Dashboard.
- If you're using the trial or the premium version, real-time protection is now turned on and actively protecting your Mac.
-
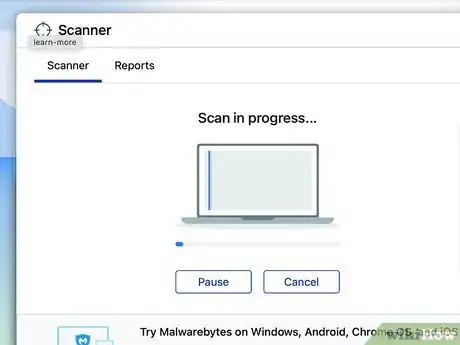
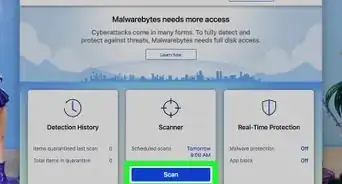
12Click the blue Scan button to scan for viruses. It's at the center of the window.[7] This scans your Mac for malware.
- Although your computer is actively protected, you can still run scans manually whenever you'd like.
- If you're using the free version of Malwarebytes and you don't have the trial, run the scan periodically to check for viruses.
-
13Quarantine your threats (if any). If the scan finds threats, a list will appear. You can get rid of these threads by checking the boxes next to each one and selecting Quarantine.
- If Malwarebytes misidentifies a legitimate app as a threat, don't check the box—just click Close.
-
14View the report or click Done. Once the scan is complete (and threats, if any, were quarantined), you can view a report of the scan by clicking the View report button. To close the window, click Done.
- Malwarebytes will remain running in the background as long as you have a trial or the premium version. You can re-open from the Launchpad or the Applications folder. Additionally, you can click the blue M icon in the menu bar (near the clock) to open the app quickly.
Expert Q&A
Did you know you can get expert answers for this article?
Unlock expert answers by supporting wikiHow
-
QuestionDo laptops need antivirus?
 Luigi OppidoLuigi Oppido is the Owner and Operator of Pleasure Point Computers in Santa Cruz, California. Luigi has over 25 years of experience in general computer repair, data recovery, virus removal, and upgrades. He is also the host of the Computer Man Show! broadcasted on KSQD covering central California for over two years.
Computer & Tech Specialist
-
QuestionHow can I clean my laptop from viruses?
 Luigi OppidoLuigi Oppido is the Owner and Operator of Pleasure Point Computers in Santa Cruz, California. Luigi has over 25 years of experience in general computer repair, data recovery, virus removal, and upgrades. He is also the host of the Computer Man Show! broadcasted on KSQD covering central California for over two years.
Computer & Tech Specialist Install antivirus software. Use a live-time scanner for constant monitoring. A live-time scanner is installed on your computer like a gatekeeper. It does an initial scan to know what's inside the machine, then it watches every single file as it comes in or out. Alternatively, try a real-time scanner for an instant read. A real-time scanner scans right now. If you're browsing the internet with no protection and you notice something wrong, you can download a program, update it, scan the computer, fix the problem, and uninstall the program.
 -
QuestionHow do I use an antivirus program?
 ayesha farhadCommunity AnswerJust download the anti-malware software and put it in schedule-scanning mode. Once it is set in schedule-scanning mode, it will automatically scan your system on a regular basis. It will scan all your programs, detect any viruses, and eliminate them.
References
- ↑ https://support.microsoft.com/en-us/windows/stay-protected-with-windows-security-2ae0363d-0ada-c064-8b56-6a39afb6a963
- ↑ https://docs.microsoft.com/en-us/windows/security/threat-protection/microsoft-defender-antivirus/utilize-microsoft-cloud-protection-microsoft-defender-antivirus
- ↑ https://support.microsoft.com/en-us/windows/prevent-changes-to-security-settings-with-tamper-protection-31d51aaa-645d-408e-6ce7-8d7f8e593f87
- ↑ https://www.apple.com/macos/security/
- ↑ https://www.malwarebytes.com/mac-download
- ↑ https://support.malwarebytes.com/hc/en-us/articles/360038479294
- ↑ https://support.malwarebytes.com/hc/en-us/articles/360038479334-Scan-your-device-with-Malwarebytes-for-Mac
About This Article
1. Open your Windows Settings.
2. Click Update & security.
3. Click Windows Security.
4. Click Open Windows Security.
5. Click Virus & threat protection.
6. Click Manage settings.
7. Enable all protection options.
